WordPress – Quick Guide
WordPress is an originate source State Administration Plot (CMS), which enables the users to kind dynamic internet sites and blogs. WordPress is the most authorized blogging gadget on the web and enables updating, customizing and managing the internet attach from its lend a hand-close CMS and design.
What is State Administration Plot (CMS)?
The State Administration Plot (CMS) is a map which stores the total files much like text, photos, music, paperwork, and so on. and is made readily available to your internet attach. It helps in editing, publishing and editing the command of the internet attach.
WordPress used to be in the muse launched on 27th Might perhaps well, 2003 by Matt Mullenweg and Mike Miniature. WordPress used to be announced as originate source in October 2009.
Aspects
- User Administration − It enables managing the person files much like altering the role of the users to (subscriber, contributor, author, editor or administrator), make or delete the person, alternate the password and person files. The main role of the person manager is Authentication.
- Media Administration − It is a long way the map for managing the media recordsdata and folder, in which that that it is doubtless you’ll per chance without grunt upload, region up and arrange the media recordsdata to your internet attach.
- Theme Plot − It enables editing the attach watch and performance. It involves photos, stylesheet, template recordsdata and customized pages.
- Prolong with Plugins − Several plugins are readily available which offers customized options and options primarily based entirely on the users need.
- Search Engine Optimization − It affords loads of SEO (SEO) instruments which makes on-attach SEO easy.
- Multilingual − It enables translating the total command into the language preferred by the person.
- Importers − It enables importing files in the create of posts. It imports customized recordsdata, feedback, post pages and tags.
Advantages
- It is a long way an originate source platform and readily available free of payment.
- CSS recordsdata could be modified primarily based entirely on the attach as per users need.
- There are a wide selection of plugins and templates readily available free of payment. Users can customize the many plugins as per their need.
- It is a long way terribly easy to edit the command as it uses WYSIWYG editor (What You Concept Is What You Secure is a person interface that enables the person to straight manipulate the structure of doc without having a structure expose).
- Media recordsdata could be uploaded without grunt and hasty.
- It affords loads of SEO instruments which makes on-attach SEO easy.
- Customization is easy primarily based entirely on the person’s needs.
- It enables setting up diversified roles for users for internet attach much like admin, author, editor and contributor.
Disadvantages
- Utilizing loads of plugins can kind the internet attach heavy to load and lumber.
- PHP files is required to kind modifications or modifications in the WordPress internet attach.
- Generally map will relish to be up to this level to protect the WordPress up-to-date with the latest browsers and cell devices. Updating WordPress version ends in loss of files, so a backup copy of the internet attach is required.
- Modifying and formatting the graphic photos and tables is tricky.
Plot Necessities for WordPress
- Database − MySQL 5.0 +
- Web Server −
- WAMP (Windows)
- LAMP (Linux)
- XAMP (Multi-platform)
- MAMP (Macintosh)
- Working Plot − Sinful-platform
- Browser Pork up − IE (Web Explorer 8+), Firefox, Google chrome, Safari, Opera
- PHP Compatibility − PHP 5.2+
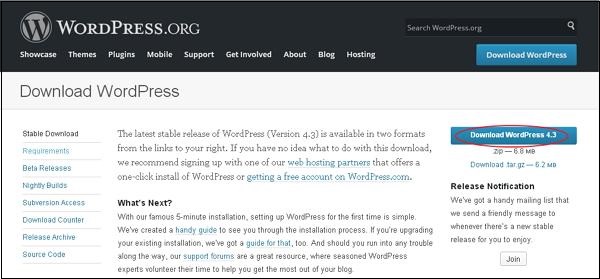
Receive WordPress
While you originate the hyperlink https://wordpress.org/get/, that it is doubtless you’ll secure to appreciate a conceal because the next snapshot −
Kind Store Database
- WordPress requires MySQL database. So make a recent empty database with person/password (as an illustration, person as “root” and password as “root” or else that that it is doubtless you’ll per chance region as per your comfort).
- Then, that that it is doubtless you’ll per chance proceed with the installation job as talked about additional.
Jam Up Wizard
It is entirely easy to region up WordPress into your gadget. The following steps checklist the most intriguing technique to region up WordPress regionally to your gadget.
Step (1) − Extract the downloaded WordPress folder and upload it into your internet server or localhost.
Step (2) − Originate your browser and navigate to your WordPress file course, then you definately can secure the key conceal of the WordPress installer as confirmed in the next conceal. In our case, the path is localhost/< Your_wordpress_folder >.
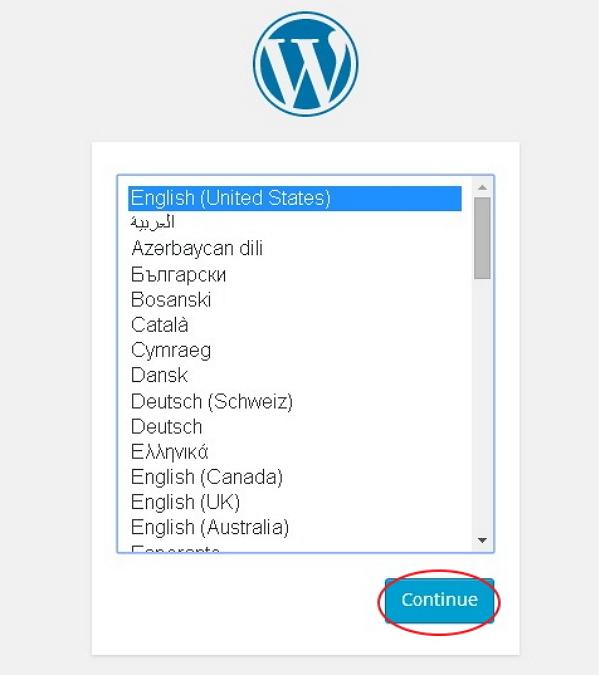
Eradicate your language for the WordPress and click on on Proceed.
Step (3) − In this step, that that it is doubtless you’ll per chance watch the whisk in the park wanted for the database before proceeding with WordPress installation.
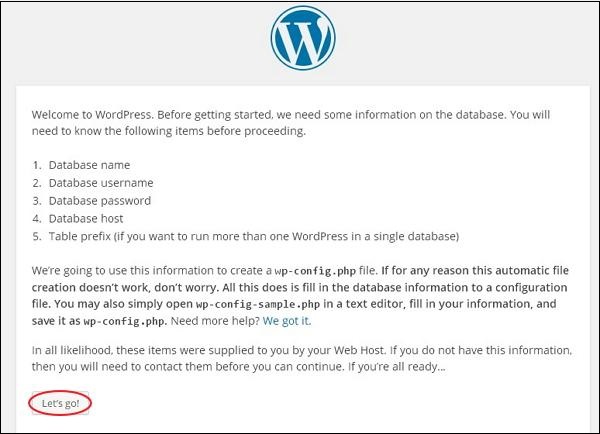
Click on on Let’s whisk!
Step (4) − Right here, you’ve to enter the whisk in the park about the MySQL database as described in the next conceal.
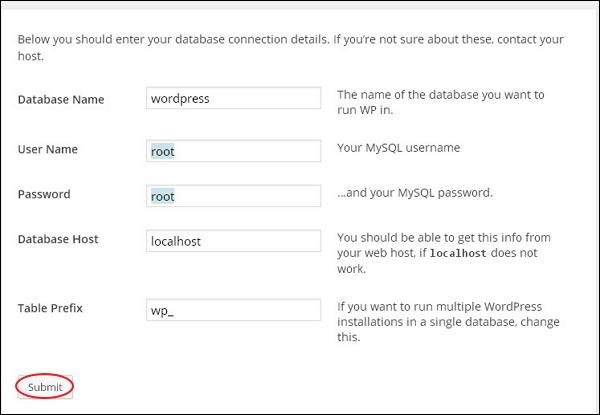
- Database Name − Enter the database title which you’ve created in MySQL database for WordPress.
- Username − Enter the person title of your MySQL database.
- Password − Enter the password which you had region for MySQL database.
- Database Host − Write the host title, by default it’d be localhost.
- Desk Prefix − It is a long way outdated to be able to add prefix in the database tables which helps to lumber multiple internet sites on the same database. It takes the default cost.
After filling all files, click on on Post button.
Step (5) − WordPress tests the database setting and affords you the confirmation conceal as confirmed in the next snapshot.
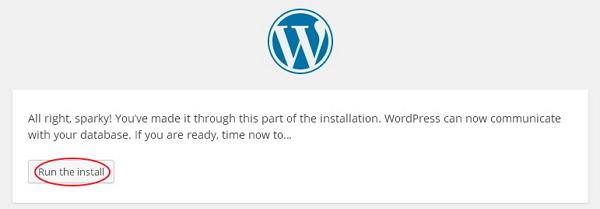
Click on on Speed the set up
Step (6) − Enter administrative files.
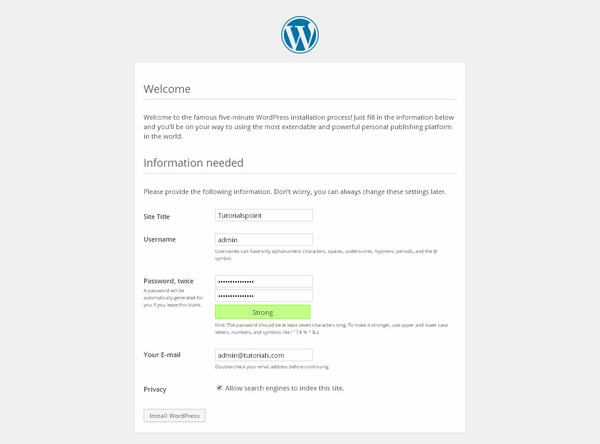
It incorporates the next fields −
- Build of residing Title − Enter the title of the attach which you will be going to make in WordPress.
- Username − Enter the username as per your preference whereas logging in the WordPress.
- Password twice − Enter password two events to supply protection to your attach.
- Your Electronic mail − Enter your email address which helps to secure better the password or any change.
- Privateness − It enables the quest engine to index this attach after checking the checkbox.
After filling the total files, click on on the Set up WordPress button.
Step (7) − After installation being winning, that it is doubtless you’ll secure a conceal of the declaring success as viewed in the next conceal.
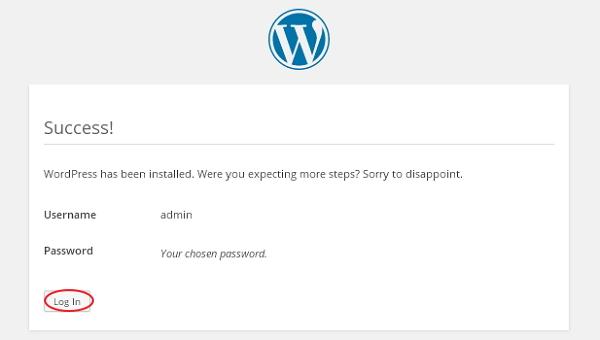
You’re going to be in a region to examine your username and password ingredient added in WordPress.
Click on on Log In button.
Step (8) − After clicking on login, that it is doubtless you’ll secure a WordPress Admin Panel as depicted in the next conceal.
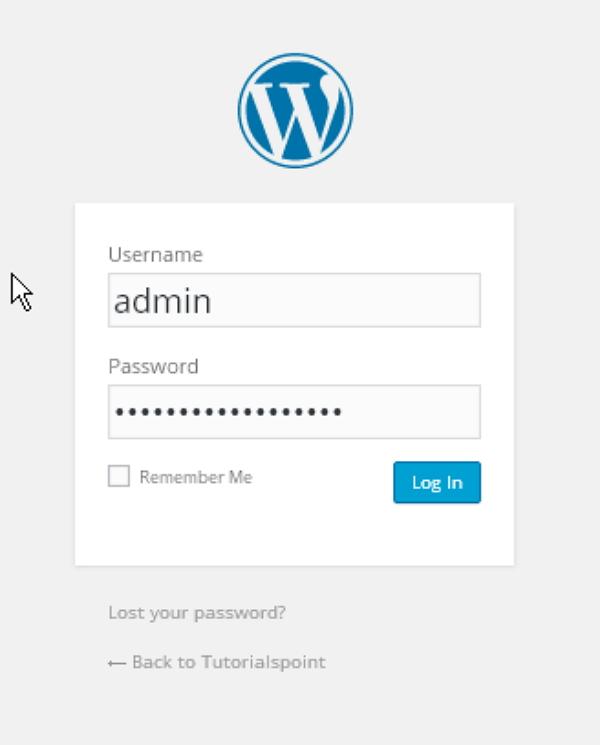
Enter the username and password which you had talked about all over installation as confirmed in step 6 and click on on the Log In button.
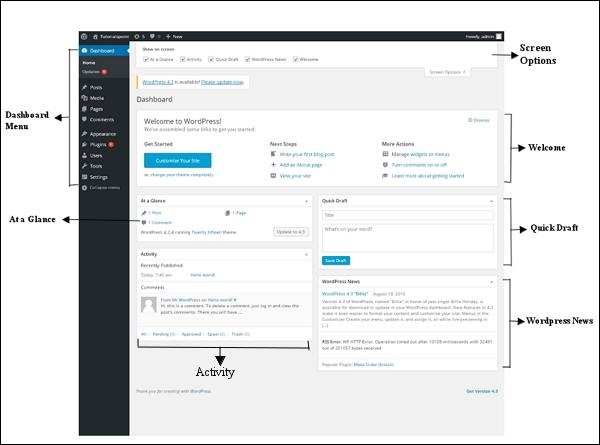
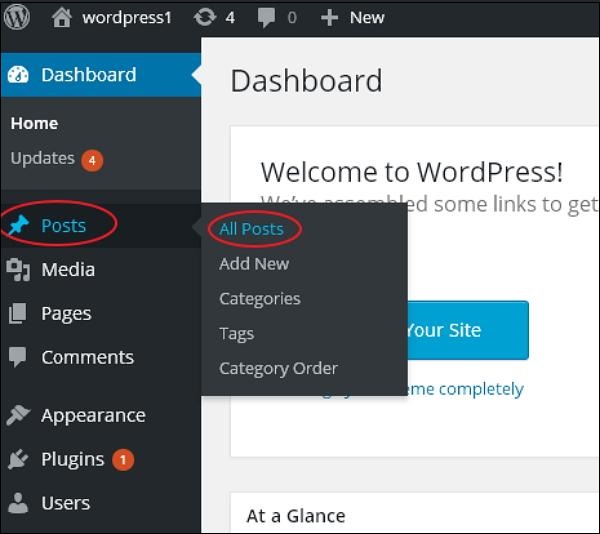
The WordPress Dashboard is a prime conceal which is able to be viewed whenever you log into the administration attach of your weblog which is able to demonstrate the overview of the internet attach. It is a long way a group of objects that supply files and supply an overview of what is occurring along with your weblog. You’re going to be in a region to customize your needs by the usage of some like a flash hyperlinks much like writing like a flash draft, replying to latest comment, and so on.
Dashboard could be labeled as confirmed in the next snapshot. Each and every of those categories are talked about in the next sections −
Dashboard Menu
The WordPress Dashboard affords navigation menu that comes with some menu alternate options much like posts, media library, pages, feedback, look alternate options, plugins, users, instruments and settings on the left facet.
Display conceal Solutions
The dashboard incorporates diversified forms of widgets that will be confirmed or hidden on some displays. It incorporates take a look at bins to dispute or hide conceal alternate options and also enables us to customize sections on the admin conceal.
Welcome
It involves the Customise Your Build of residing button which enables customizing your WordPress theme. The center column affords one of the priceless hyperlinks much like setting up a weblog post, setting up a internet page and watch the front close of your internet attach. Last column incorporates hyperlinks to widgets, menus, settings connected to feedback and also a hyperlink to the First Steps With WordPress internet page in the WordPress codex.
Rapid Draft
The Rapid Draft is a mini post editor which enables writing, saving and publishing a post from admin dashboard. It involves the title for the draft, some notes about the draft and set it as a Draft.
WordPress News
The WordPress News widget displays the latest files much like latest map version, updates, signals, files relating to the map and so on. from the legit WordPress weblog.
Negate
The Negate widget involves latest feedback to your weblog, recent posts and now not too long previously printed posts. It enables you to approve, detest, acknowledge, edit, or delete a comment. It also enables you to inch a comment to spam.
At a Look
This piece affords an overview of your weblog’s posts, type of printed posts and pages, and type of feedback. While you click on on these hyperlinks, you would possibly be taken to the respective conceal. It displays the latest version of running WordPress along with the currently running theme on the attach.
In this chapter, we are able to survey about Classic Settings in WordPress. WordPress general setting is outdated to region the elementary configuration settings on your attach. In the setting administration conceal, it is a default setting conceal.
Following are the steps to secure admission to the overall settings −
Step 1 − Click on on Settings → Classic option in WordPress.
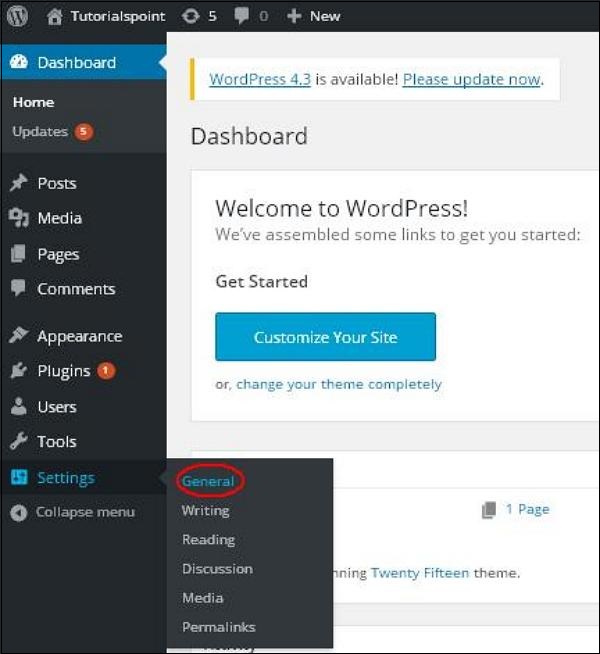
Step 2 − The Classic Surroundings internet page is displayed as confirmed in the next snapshot.
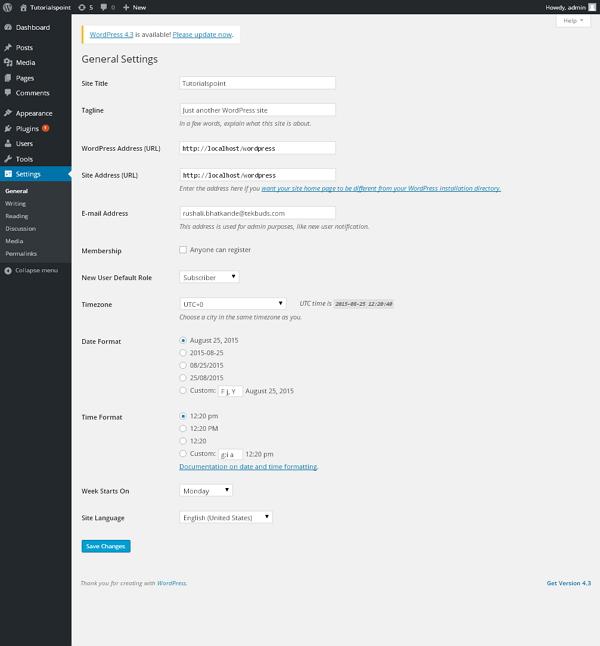
Following are the vital components of the fields on general settings internet page.
- Build of residing Title − It displays the title of the attach in the template header.
- Tagline − Shows a short sentence about your attach.
- WordPress Take care of (URL) − It is a long way the URL of WordPress listing where your all core application recordsdata are latest.
- Build of residing Take care of(URL) − Enter the attach URL which you should your attach to demonstrate on the browser.
- Electronic mail Take care of − Enter your email address which helps to secure better your password or any change.
- Membership − Anyone can register an memoir to your attach after you take a look at this checkbox.
- Sleek User Default Position − The default role is determined for the newly registered person or members.
- Timezone − Sets the time zone in step with the explicit metropolis.
- Date Structure − Sets the date format as you want to demonstrate on the attach.
- Time Structure − Sets the time format as you want to demonstrate on the attach.
- Week Starts On − Eradicate the week day which you rob to originate for WordPress calendar. By default it is determined as Monday.
- Build of residing Language − Sets the language for the WordPress dashboard.
Step3 − After filling the total files about general settings, click on on Put Changes button. It saves all your general setting files.
The writing settings controls the writing ride and affords alternate options for customizing WordPress attach. These settings rob an eye on the options in the collectively with and editing posts, Pages, and Post Forms, as successfully because the non-mandatory options admire Remote Publishing, Post by email, and Change Services and products.
Following are the steps to secure admission to the writing settings −
Step (1) − To alternate writing settings, whisk to Settings → Writing option.
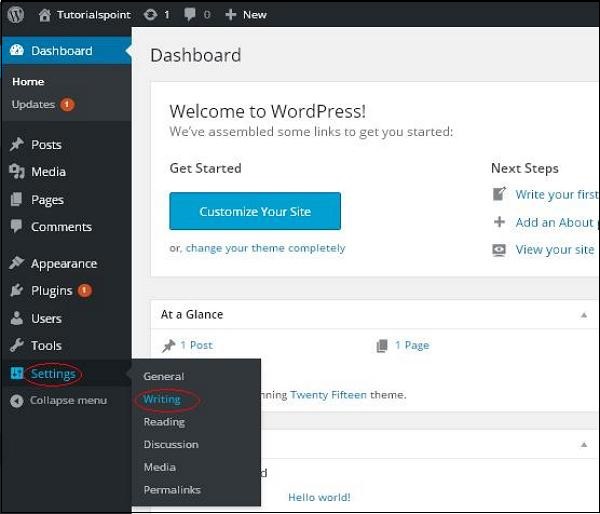
Step (2) − The Writing Surroundings internet page is displayed as confirmed in the next conceal.
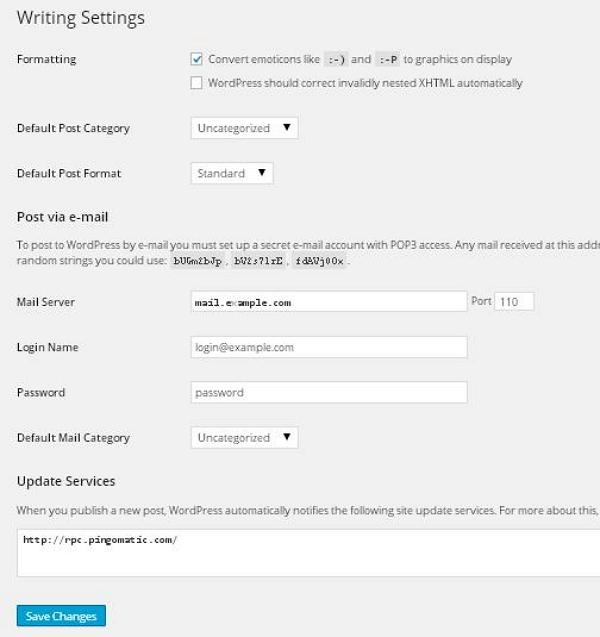
Following are the vital components of the fields on the get page.
- Formatting − This self-discipline defines two sub alternate options for better person ride.
- The first option Convert emoticons admire 🙂 and 😛 to graphics on demonstrate will turn text-primarily based entirely emoticons into graphic-primarily based entirely emoticons.
- The 2d option WordPress should always very most intriguing invalidly nested XHTML robotically corrects the invalid XHTML positioned throughout the posts or pages.
- Default Post Class − It is a long way a class to be utilized to a post and that that it is doubtless you’ll per chance leave it as Uncategorized.
- Default Post Structure − It is a long way outdated by issues to make a preference post format to be utilized to a post or make diversified kinds for diversified forms of posts.
- Post by email − This selection uses email address to make posts and publishes posts to your weblog thru email. To make spend of this, you will be wanting to region up a secret email memoir with a POP3 secure admission to, and any mail acquired at this address will be posted.
- Mail Server − It enables reading the e-mails that you simply ship to WordPress and stores them for retrieval. For this, you want to relish POP3 successfully matched mail server and it would relish URI address much like mail.instance.com, which it is top to enter right here.
- Login Name − To make posts, WordPress will need its hang email memoir. The Login Name will spend this email address and should always be saved as a secret as spammers will post hyperlinks redirecting to their very hang internet sites.
- Password − Jam password for the above email address.
- Default Mail Class − It enables selecting customized class for the total posts which could be printed by Post by email characteristic.
- Change Services and products − While you put up a recent post, WordPress will robotically bellow the attach change services and products in the box. Concept the Change Services and products on the codex for the long listing of doable services and products.
Step (3) − After filling the total above files, click on on Put Changes button to set your files.
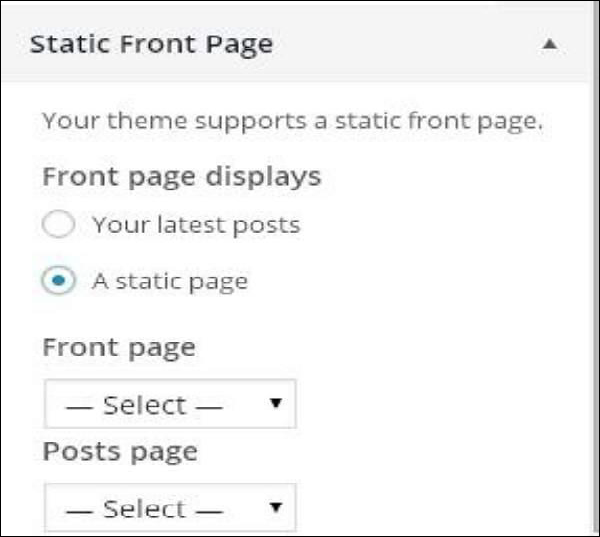
In this chapter, we are able to survey about Studying Settings in WordPress. Studying Surroundings is outdated to region the command connected to the front internet page. You’re going to be in a region to region the sort of post to be displayed on the key internet page.
Following are the steps to secure admission to the reading settings −
Step (1) − Click on on Settings → Studying option in WordPress.
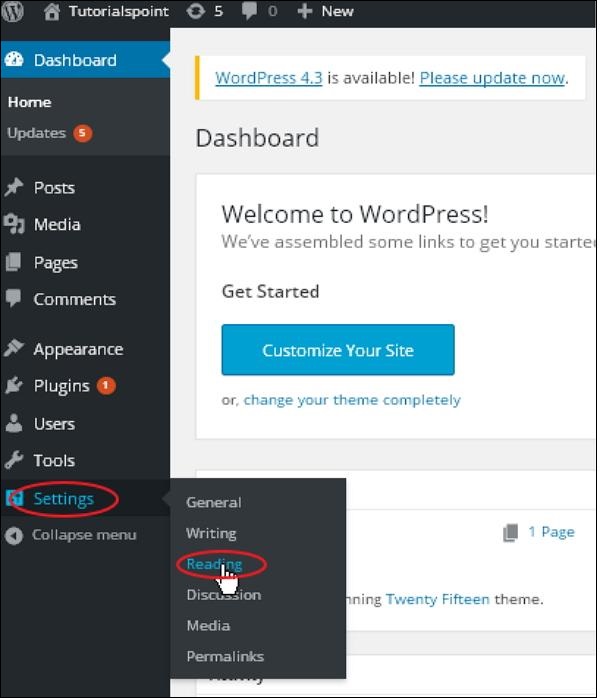
Step(2) − The Studying Settings internet page is displayed as confirmed in the next conceal.
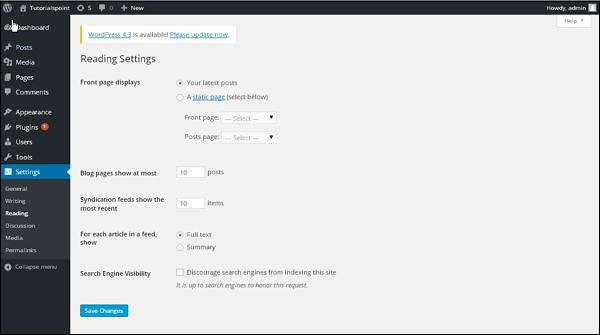
Following are the vital components of the fields on reading settings.
- Entrance internet page displays − This piece is outdated to demonstrate the front internet page in any of the next format −
- Blog pages present at most − The sort of posts to be displayed per internet page or attach. By default, it is determined as 10.
- Syndication feeds present the most modern − The person can watch the sort of posts when they get one in all the attach feeds. By default, it is determined as 10.
- For every article in a feed, present − This piece is outdated to demonstrate the post by selecting any of the next codecs −
- Search Engine Visibility − After clicking on the checkbox, Discourage engines like google from indexing this attach, your attach will be overlooked by the quest engine.
Step(3) − After filling the total files, click on on Put Changes button to set your Studying Surroundings files.
In this chapter, we are able to survey about Discussion settings in WordPress. WordPress discussion setting could be outlined because the interaction between the blogger and the guests. These settings are done by the admin to relish a rob an eye on over the posts/pages that come in thru users.
Following are the steps to secure admission to the Discussion setting −
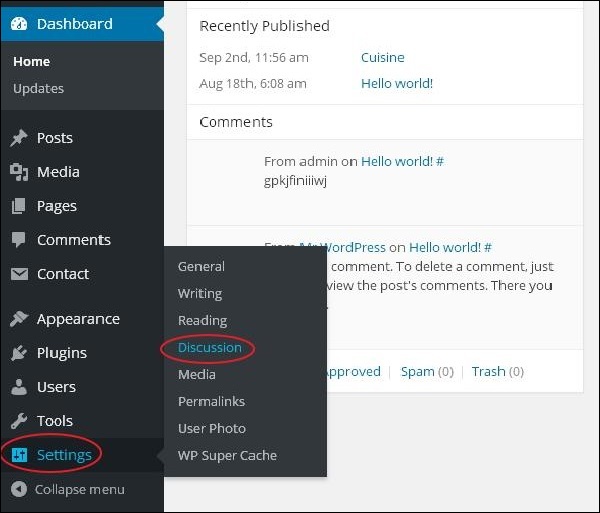
Step (1) − Click on on Settings → Discussion option in WordPress.
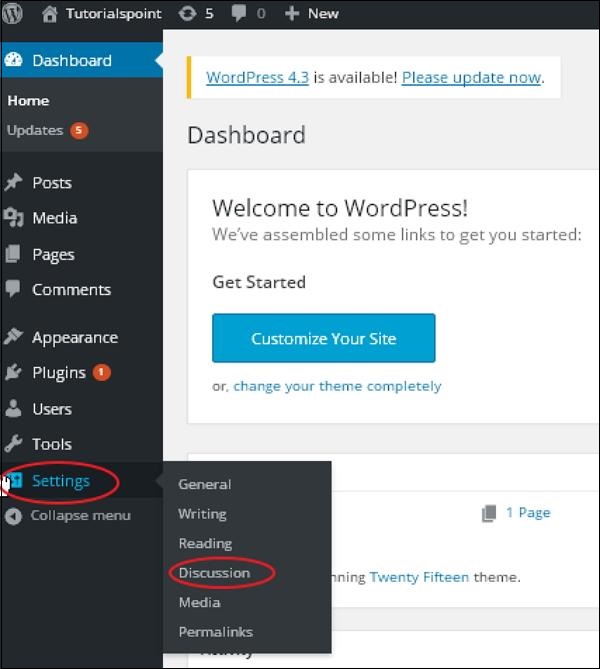
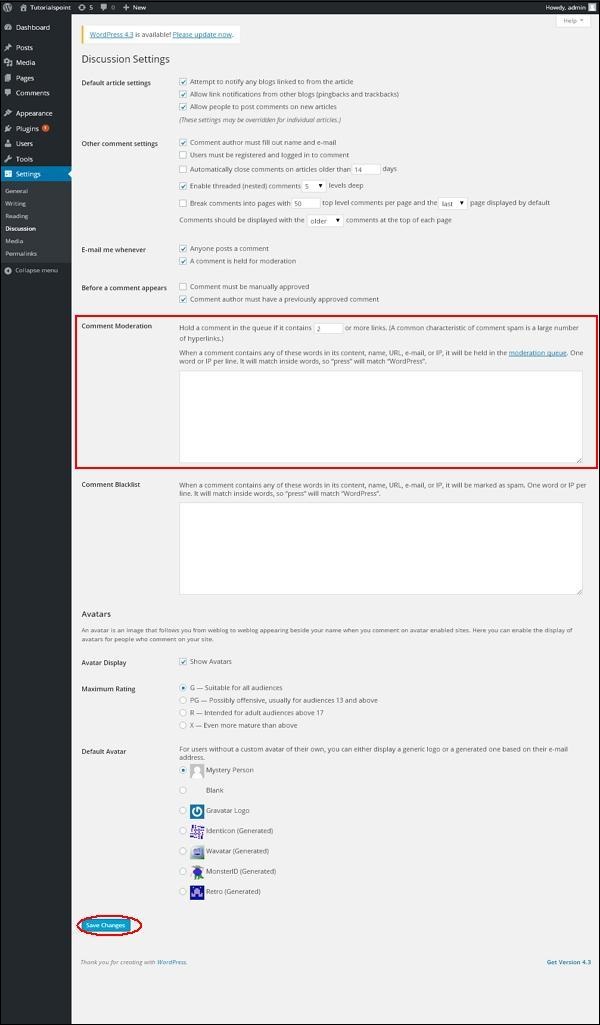
Step (2) − The Discussion Settings internet page is displayed as confirmed in the next snapshot.
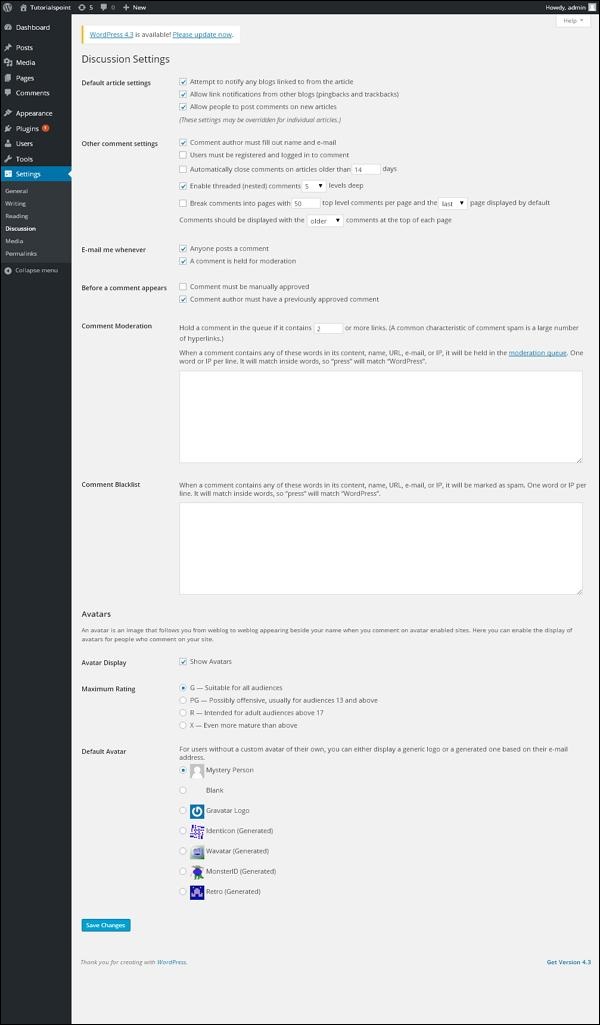
Following fields are viewed in Discussion settings.
-
- Default article settings − These settings are default to the recent pages you make or recent posts. This incorporates three extra settings. They are −
- Strive and bellow any blogs linked to from the article − While you put up articles then it sends a notification (sends pings and trackback) to other blogs.
- Allow hyperlink notifications from other blogs (pingbacks and trackbacks) − Accepts pings from other blogs.
- Allow folks to post feedback on recent articles − You’re going to be in a region to permit or disallow other folks to comment to your article the usage of this setting.
- Default article settings − These settings are default to the recent pages you make or recent posts. This incorporates three extra settings. They are −
You’re going to be in a region to alternate the settings as per your will for particular person articles.
- Other Reveal Settings − This setting has the next alternate options −
- Reveal author have to beget out title and email − While you take a look at this box, it is critical for guests to beget their title and email address.
- Users should always be registered and logged in to comment − While you happen to take a look at this box, simplest those registered guests can leave feedback, if now not checked any person can leave any type of feedback.
- Routinely conclude feedback on articles older than days − This selection enables you to fair rep feedback simplest for a explicit timeframe as per your desire.
- Allow threaded (nested) feedback − While you take a look at this selection, guests can acknowledge or relish a discussion and secure responses.
- Destroy feedback into pages with prime stage feedback per internet page and the get page displayed by default − If your pages are getting a wide selection of feedback then you definately per chance can spoil up them into diversified pages by checking this box.
- Feedback should always be displayed with the feedback on the head of every internet page − You’re going to be in a region to region up the feedback in the create of ascending or descending bellow.
- Electronic mail me each time − This setting incorporates two alternate options, specifically −
- Anyone posts a comment − While you take a look at into this box, the author will get an email for every single comment that’s posted.
- A comment is held for moderation − This is outdated in the event you attain now not desire your comment to be up to this level before it is moderated by the admin.
- Sooner than a comment appears to be like − This setting enables how your posts are managed. There are two extra settings as followed −
- Reveal should always be manually authorized − While you happen to take a look at this box then simplest the authorized feedback by the admin could be displayed on the posts or pages.
- Reveal author have to relish a beforehand authorized comment − This will be checked whenever you want to approve a comment of an author whose has commented and his email address fits the email address of the earlier posted comment. Otherwise the comment is held for moderation.
- Reveal Moderation − Possess simplest a particular type of hyperlinks which could be allowed correct into a comment.
- Reveal Blacklist − You’re going to be in a region to enter your hang spam phrases which you attain now not desire your guests to enter into the feedback, URL, email and so on.; later it would filter the feedback.
- Avatars − Avatar is a minute image that displays on the head-correct-hand corner of the dashboard conceal beside your title. It is a long way admire your profile image. Right here you’ve about a extra alternate options where that that it is doubtless you’ll per chance region your avatar for WordPress attach.
- Avatar Insist − It displays your avatar moreover your title when it is checked.
- Most ranking − You relish a four other alternate options of avatars that that it is doubtless you’ll per chance spend. They are G, PG, R and X. This is the age piece where you steal out primarily based entirely on which variety of target audience you want to demonstrate your posts.
- Default Avatar − In this selection, there are few extra forms of avatars with photos; that that it is doubtless you’ll per chance rob these avatars primarily based entirely to your guests email address.
Step (3) − Click on on Put Changes button to set the modifications.
In this chapter, we are able to survey about Media Settings in WordPress. It is a long way outdated to region the peak and width of the photos which you will be going to make spend of to your internet attach.
Step (1) − Click on on Settings → Media option in WordPress.
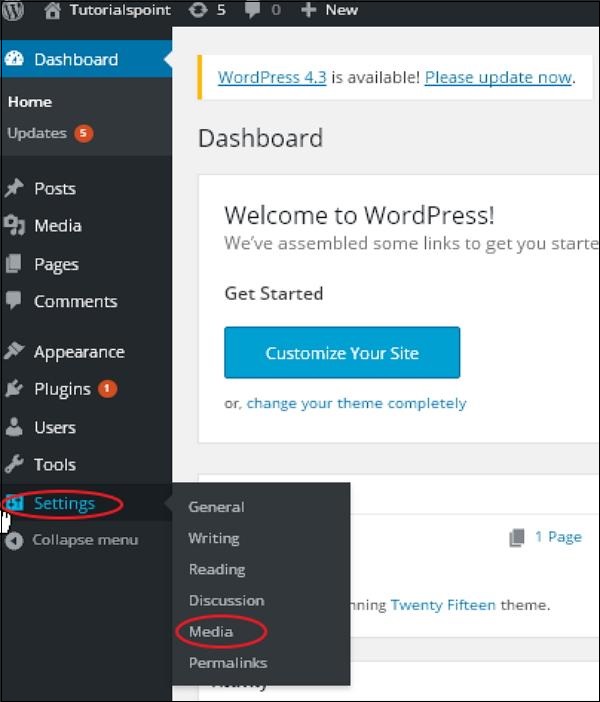
Step (2) − The Media Settings internet page is displayed as viewed in the next screenshot.
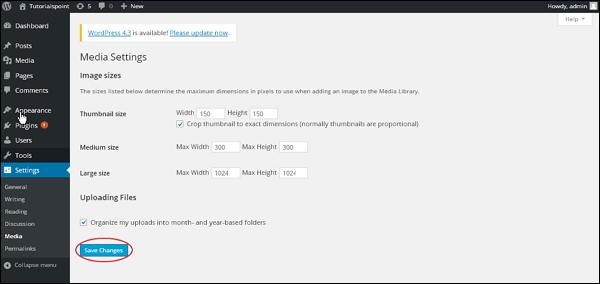
Following are the vital components of the fields on Media settings −
- Thumbnail size − Jam the dimensions of the thumbnail.
- Medium size − Jam the peak and width of medium size photos.
- Huge size − Jam width and height of larger photos.
- Importing recordsdata − After checking this checkbox, the uploaded image will be arranged into 300 and sixty five days and month primarily based entirely folder.
Step (3) − After setting the dimension in pixels, click on on Put Changes button. It saves your media setting files.
In this chapter, we are able to study Permalink settings in WordPress. Permalink is a eternal hyperlink to a explicit weblog post or class. It enables setting the default permalink construction. These settings are outdated to be able to add permalinks to your posts in WordPress. Following are the steps to secure admission to permalink settings.
Step (1) − Click on on Settings → Permalinks option from the left navigation menu.
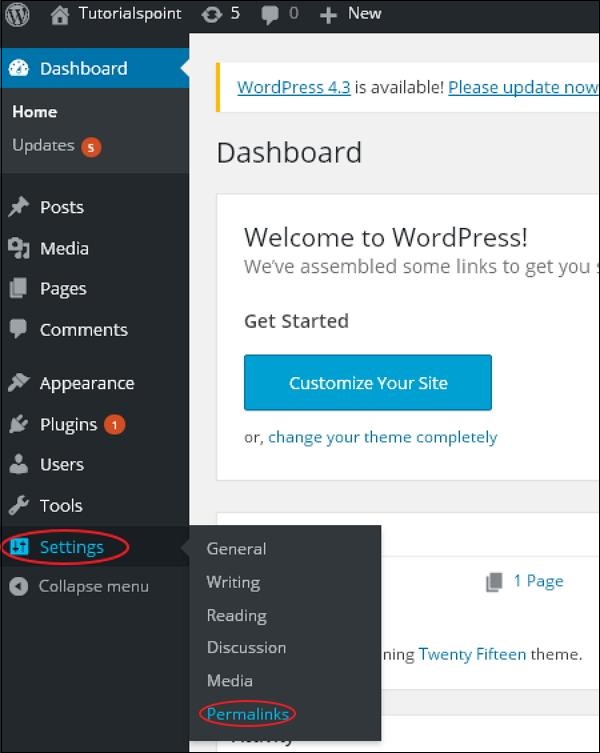
Step (2) − While you click on on Permalinks, the next internet page appears to be like on the conceal.
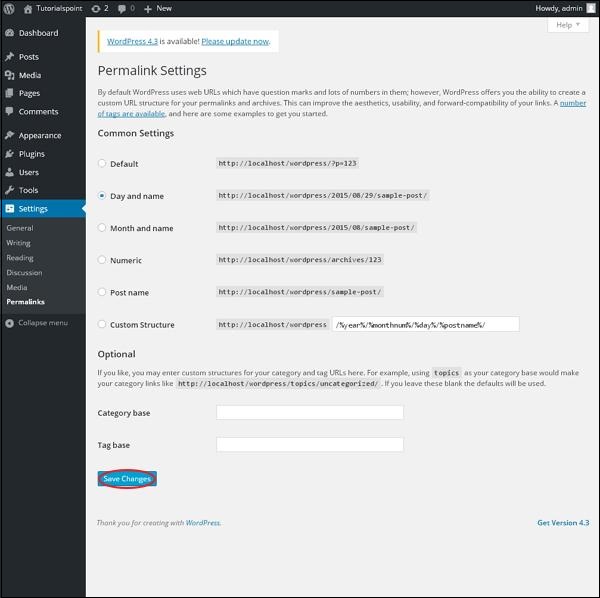
Listed right here are about a settings that that it is doubtless you’ll per chance kind −
- Classic settings −Verify any of the radio buttons to capture your permalink construction on your blogs
- Default − It sets the default URL construction in WordPress.
- Day and title − It sets URL construction primarily based entirely on the date and title to your posts.
- Month and title − It sets the URL construction primarily based entirely on the month and title to your post.
- Numeric − It sets numbers in the URL construction to your post.
- Post title − It sets post title in the URL construction to your post.
- Personalized Development − It sets the URL construction of your preference by writing the desired title in the given text box.
- Optionally availableThese are non-mandatory. You’re going to be in a region to be able to add customized construction for main class or impress URL. If your text box is empty then default settings is outdated. Right here you’ve two alternate options.
Step (3) − While you would be done with modifications, click on on Put Changes button to set the permalink settings.
In this chapter, we are able to survey the most intriguing technique to make spend of plugins to your WordPress attach. Plugin enables to without grunt adjust, customize or pork up WordPress weblog or post. The WordPress Plugin is a map that would possibly be uploaded to lengthen the performance of the attach. They add services and products or options to WordPress weblog. Plugins are outdated to kind your work less complicated. Following are the easy steps to be able to add plugins.
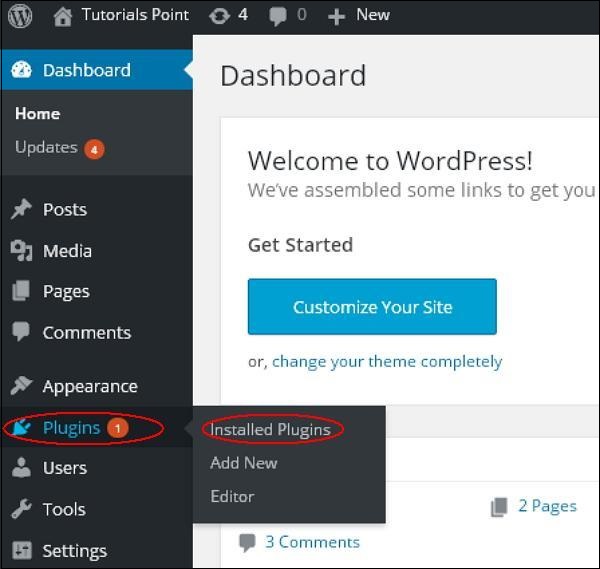
Step (1) − On the left facet bar, Click on on Plugins → Build in Plugins as confirmed in the conceal.
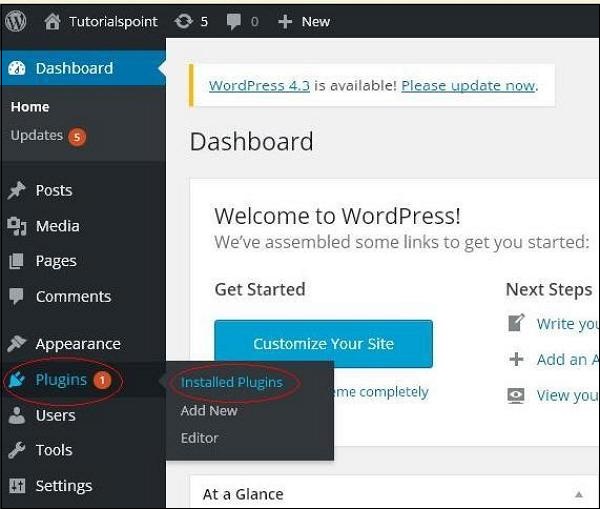
Step (2) − The following internet page appears to be like.
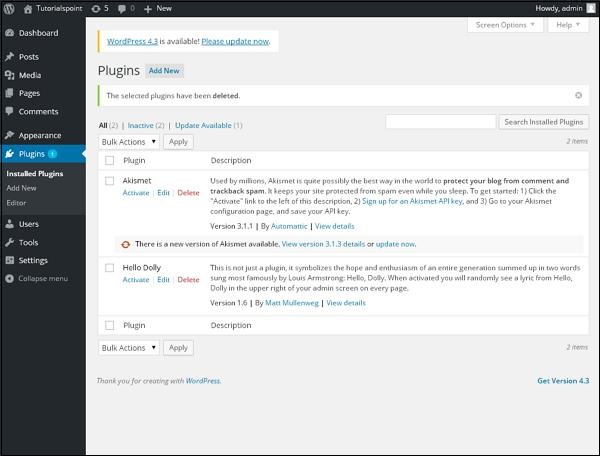
In this piece, that that it is doubtless you’ll per chance watch the already installed plugins.
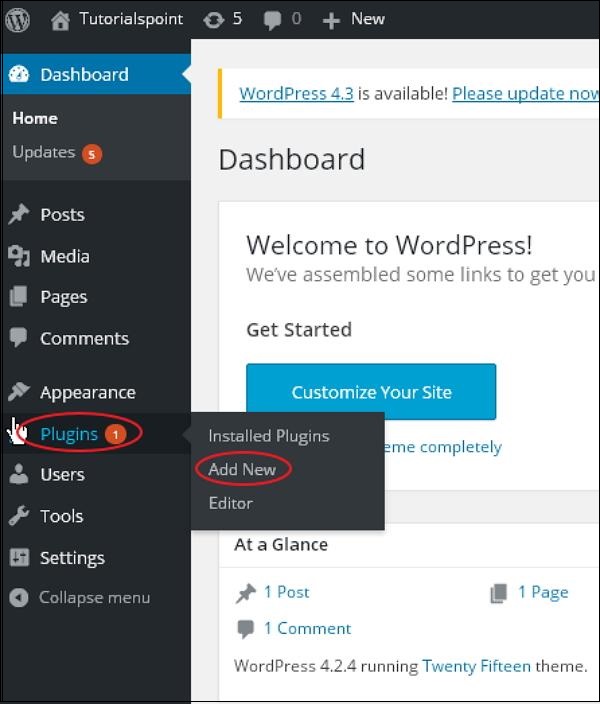
Step (3) − Click on on → Plugins → Add Sleek menu as confirmed in the next conceal.
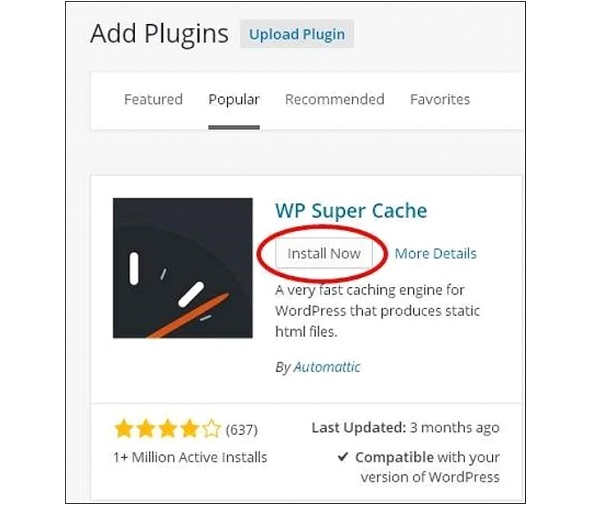
Step (4) − A listing of plugins appears to be like which could be outdated in WordPress. Right here that that it is doubtless you’ll per chance straight set up plugins from the readily available listing otherwise that that it is doubtless you’ll per chance upload it by clicking on Add Plugin.
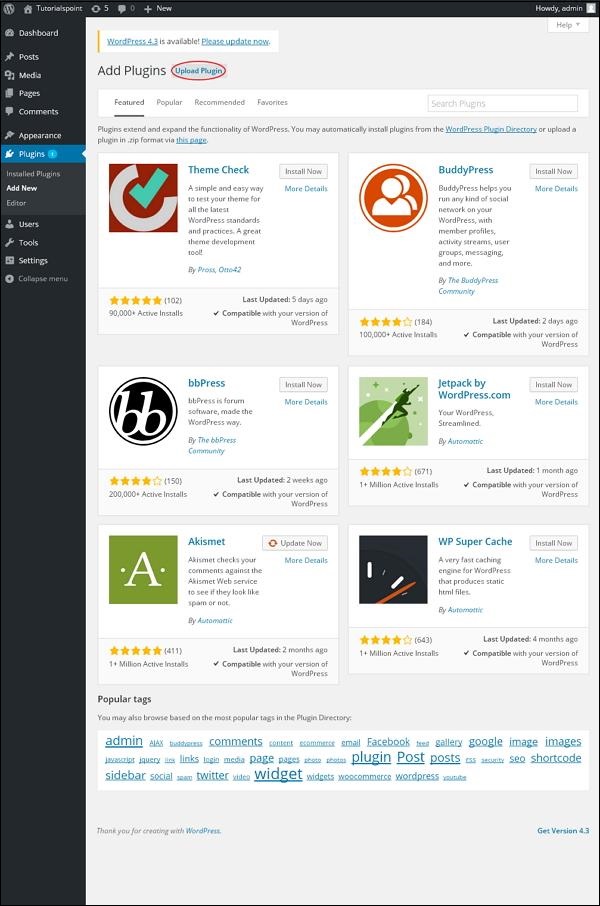
While you click on on Add Plugin you are going to secure the next internet page.
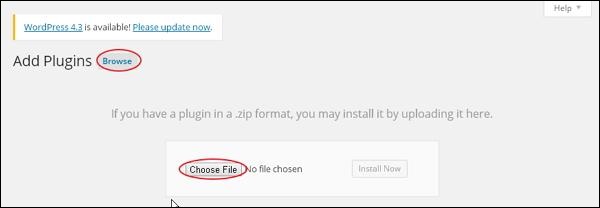
Click on on Browse, it goes lend a hand to the get page where that that it is doubtless you’ll per chance steal out plugins from WordPress attach. And whenever you click on on Snatch File, that that it is doubtless you’ll per chance add recordsdata out of your gadget. Otherwise, that that it is doubtless you’ll per chance straight capture the plugin that you simply should and click on on Set up now as viewed in the next screenshot.
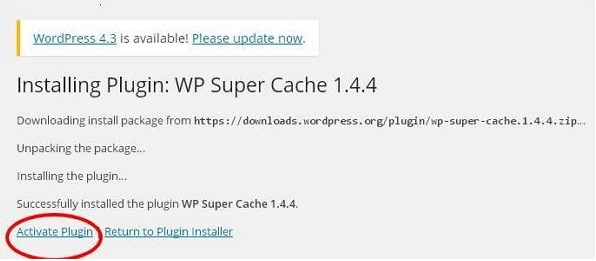
While you click on on Set up Now, the bundle begins to get and will get installed. Then, click on on Activate plugin to keen that plugin to make spend of in WordPress as viewed in the next conceal.
After clicking on Activate Plugin you are going to secure a message as Plugin activated and that that it is doubtless you’ll per chance also gain the installed plugin in the listing.
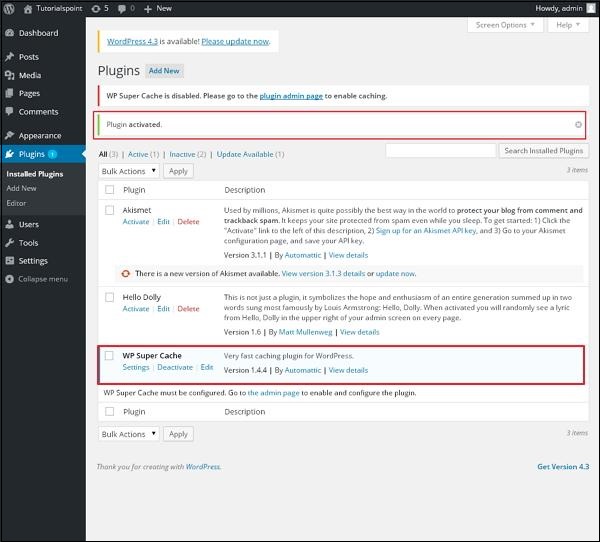
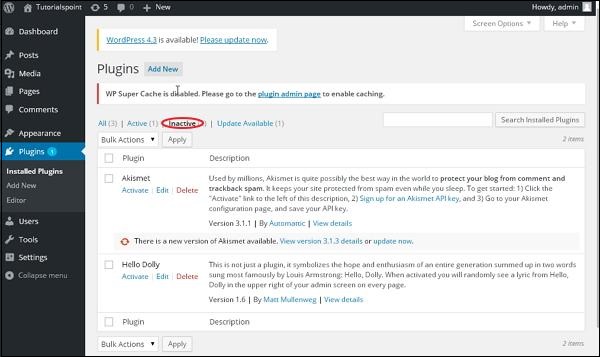
Below the plugin activated message, that that it is doubtless you’ll per chance watch few alternate options much like All, Packed with life, Sluggish and Change readily available.
While you click on on Packed with life the next internet page appears to be like. Right here that that it is doubtless you’ll per chance watch the total activated plugins.

When we click on on Sluggish, the plugins which could be readily available but have to now not activated will get displayed. You’re going to be in a region to spark off this plugin by clicking on Activate.
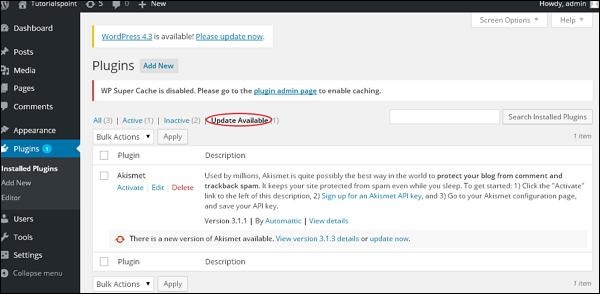
While you click on on Change readily available, you are going to secure a listing of plugins that should always be up to this level. Click on on Change and you secure a message as As much as this level.
Click on on Bulk Actions and steal out any of the alternate options. Click on on Follow button to change, delete, spark off or deactivate every of the plugins by checking the bins.

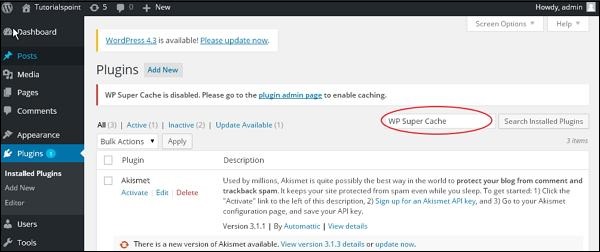
In Search Build in Plugins that that it is doubtless you’ll per chance correct kind your plugin title in the text box that’s already installed and click on on the Search Build in Plugins button.
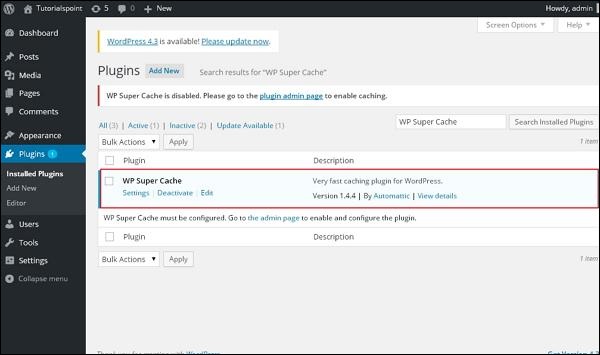
While you click on on the Search installed Plugin button you secure the next internet page along with your respective plugin.
Step (5) − Click on on Plugins → Editor from the facet bar.
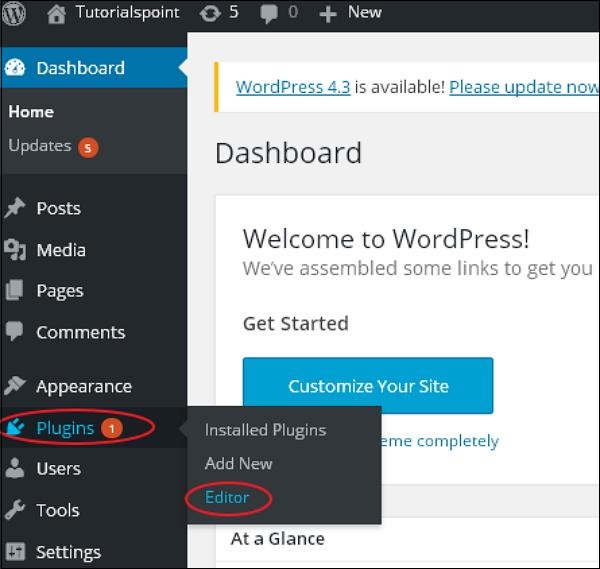
Step (6) − The following internet page will get displayed.
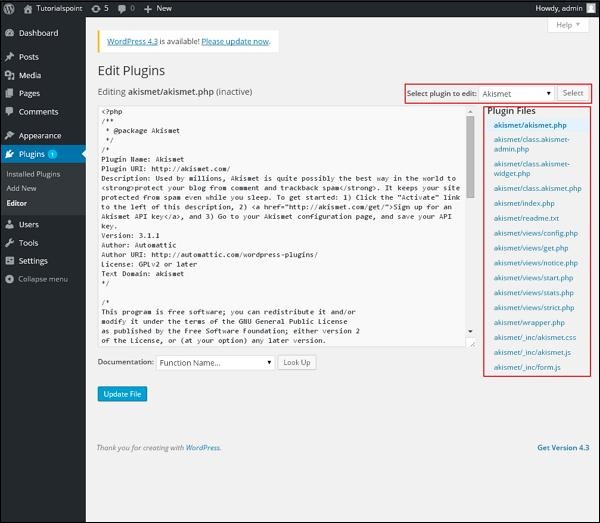
This internet page enables you to edit your plugins. About a alternate options are outlined.
- Eradicate plugin to edit − Enables you to make a preference a plugin from the dropdown and edit it.
- Documentation − Enables you to make a preference the instruments from the dropdown to edit the plugin.
- Plugin recordsdata − Enables you to make a preference recordsdata from the listing and edit accordingly.
At final, after editing the plugin recordsdata, click on on Change file.
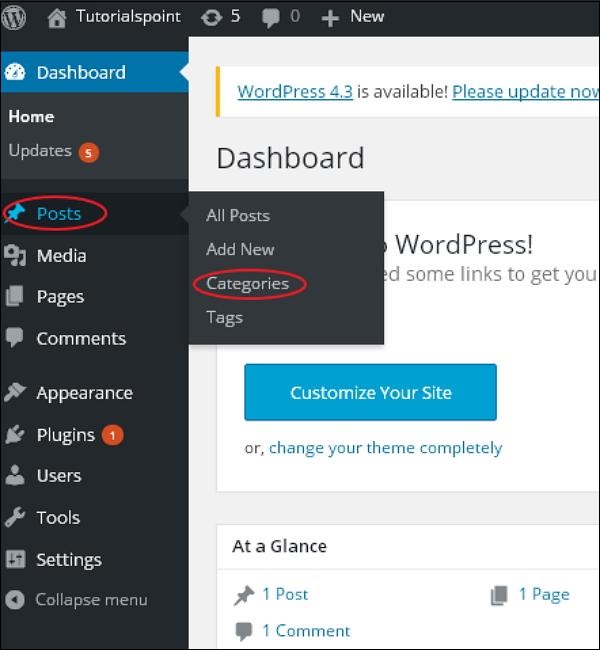
In this chapter, we are able to survey about the most intriguing technique to Add Categories in WordPress. Class is outdated to demonstrate sections of your attach and neighborhood connected posts. It forms the neighborhood command into diversified sections. It is a long way a extraordinarily convenient design to region up the posts.
To secure admission to the Class piece, follows the talked about steps −
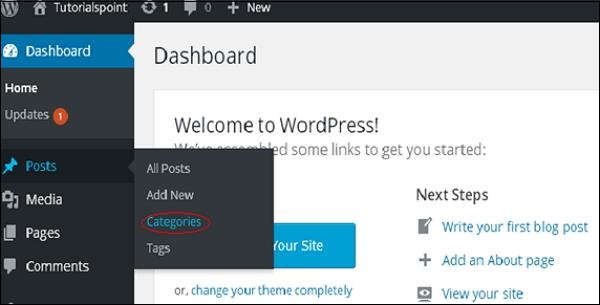
Step (1) − Click on on Posts → Categories option in WordPress.

Step (2) − The Categories internet page is displayed as confirmed in the next screenshot.
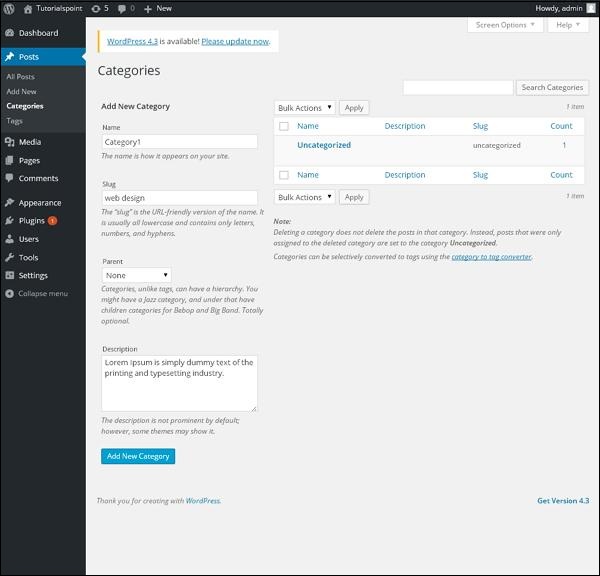
Following are the vital components of the fields on Categories.
- Name − Enter the outlandish title of categories.
- Slug − A discover chosen to checklist your post. It is a long way laid out in the tags URL.
- Guardian − By selecting the parent class from dropdown, that that it is doubtless you’ll per chance region the explicit class as sub-class or can rob it as None.
- Description − Add immediate description of your class. It is a long way non-mandatory.
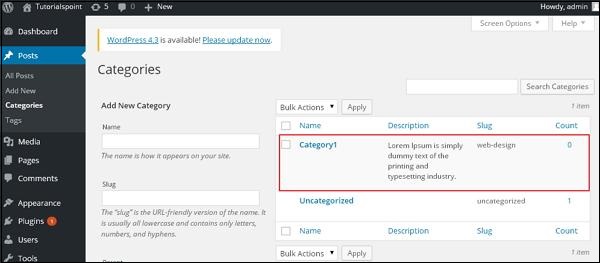
Step (3) − After filling the total files about Categories, click on on Add Sleek Class button.
Step (4) − After clicking on Add Sleek Class, the recent created class will secure displayed on the honorable facet of the get page as confirmed in the next conceal.
In this chapter, we are able to survey the easy steps to Edit Categories in WordPress.
Following are the easy steps to edit categories in WordPress.
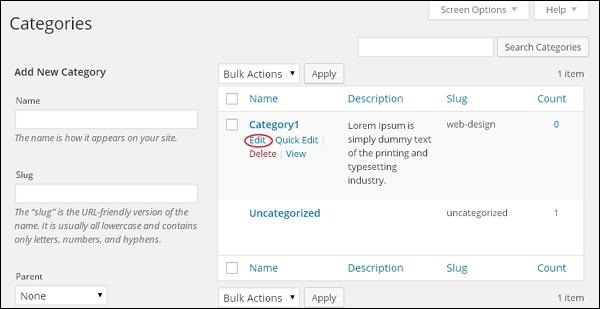
Step (1) − Click on on Posts → Categories in WordPress.
Step (2) − You’re going to be in a region to examine Category1 (Category1 used to be created in the chapter WordPress – Add Class). When the cursor hovers on the Categories, then about a alternate options secure displayed under the Class title. There are two suggestions to edit the categories i.e. Edit and Rapid Edit
Edit − Click on on Edit option in Categories piece as viewed in the next screenshot.
You’re going to be in a region to edit any of the vital self-discipline, and then click on Change button as confirmed in the next conceal.
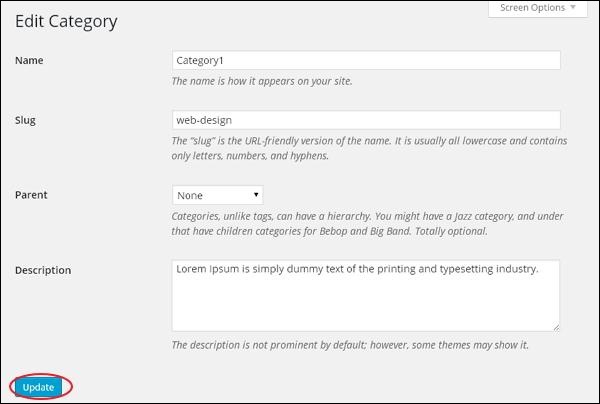
Class fields are same from the chapter WordPress – Add Class.
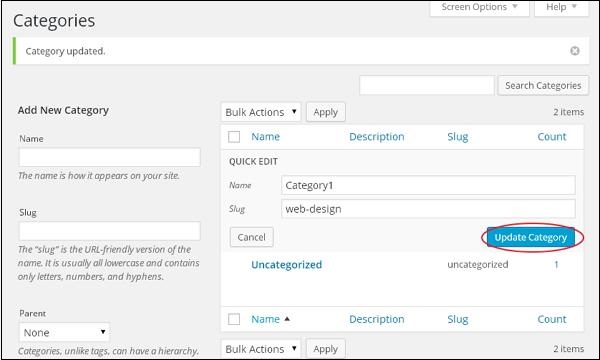
Rapid Edit − Click on on Rapid Edit option in Categories piece as confirmed in the next conceal.
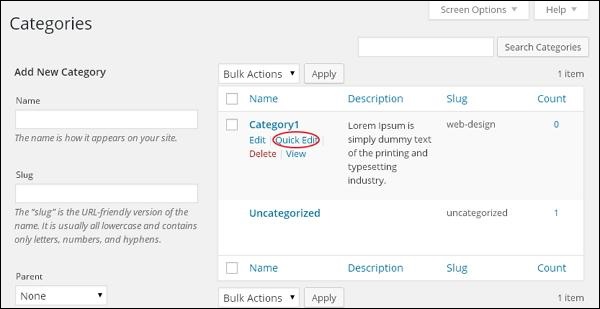
Right here, that that it is doubtless you’ll per chance simplest edit the Name and Slug of the class as viewed in the following conceal and then lastly click on on Change Class button.
In this chapter, we are able to survey about the most intriguing technique to Delete Categories in WordPress.
Following are the easy steps to delete categories in WordPress.
Step (1) − Click on on Posts → Categories in WordPress.
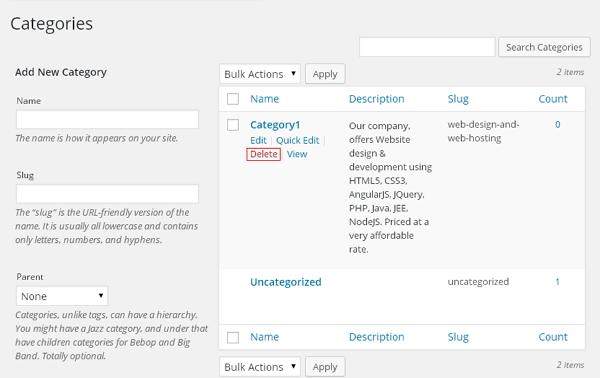
Step (2) − You’re going to be in a region to delete Category1 (Category1 used to be created in the chapter WordPress – Add Class). When the cursor hovers on the Categories, about a alternate options secure displayed under the Class title. Click on on Delete button as confirmed in the next conceal.
While you click on on delete, that it is doubtless you’ll secure a pop message inquiring for confirmation to delete the explicit class as confirmed in the next screenshot.
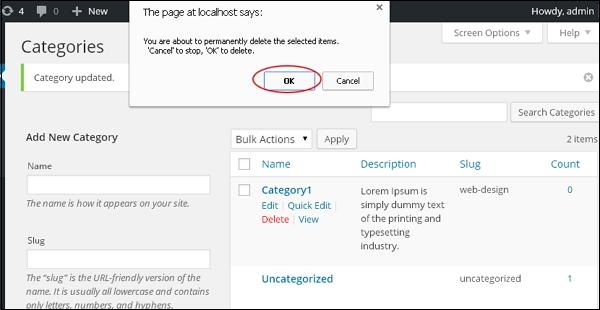
You’re going to be in a region to click on on OK button and delete the class completely.
In this chapter, we are able to survey about the most intriguing technique to Put collectively Categories in WordPress. You’re going to be in a region to’t region up categories straight in WordPress. Hence, you can have to set up Class Tell plugin to put collectively the created categories in a explicit design.
Step (1) − Click on on Posts → Class Tell in WordPress. The Class Tell menu displays after collectively with the Class Tell plugin. You’re going to be in a region to survey the most intriguing technique to set up plugins in the chapter Set up Plugins.
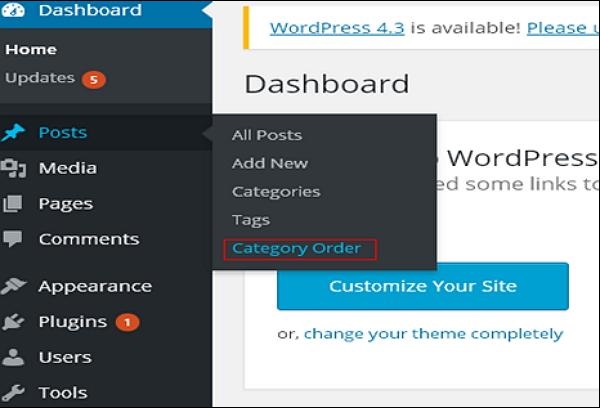
Step (2) − In the next conceal, that that it is doubtless you’ll per chance watch that the make categories piece have to now not in bellow.
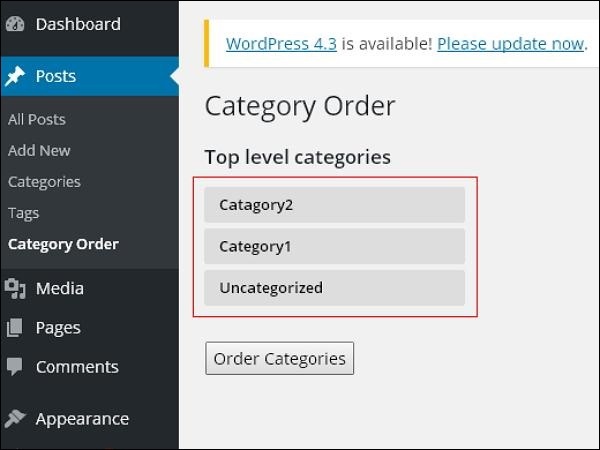
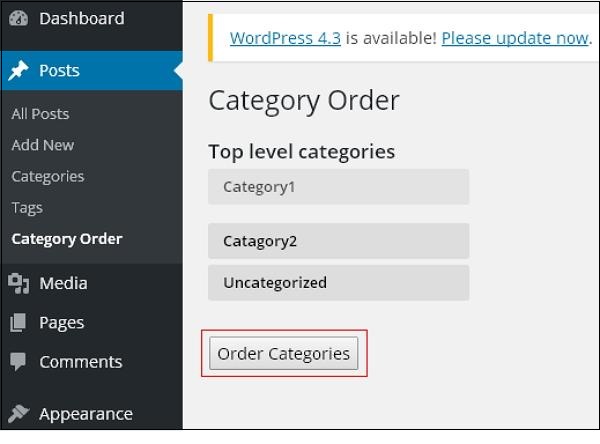
Step (3) − Now, that that it is doubtless you’ll per chance rearrange your categories by correct dragging the categories as per your preference. Click on on Tell categories button to set the ordered categories.
In this chapter, we are able to survey the most intriguing technique to Add Posts in WordPress. Posts are also is named articles and ceaselessly referred as blogs or weblog posts. These are outdated to popularize your blogs.
Following are the easy steps to Add Posts in WordPress.
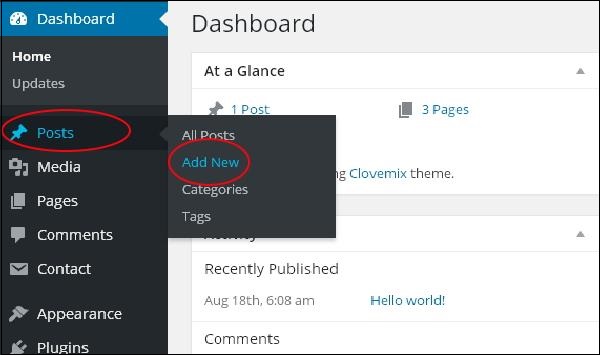
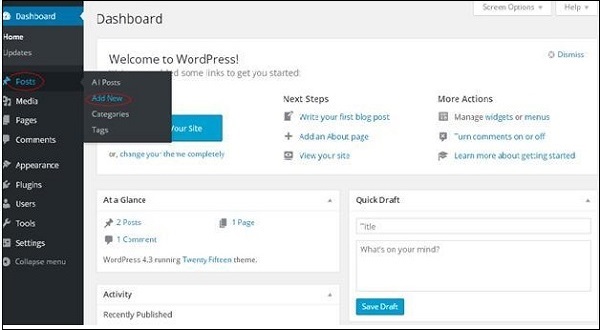
Step (1) − Click on on Posts → Add Sleek in WordPress.

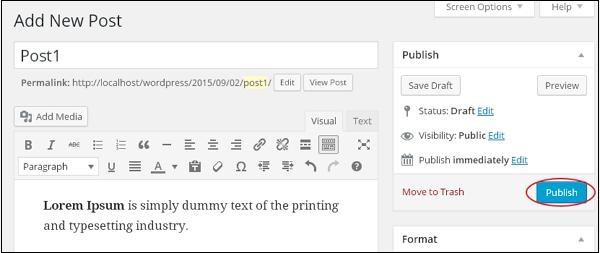
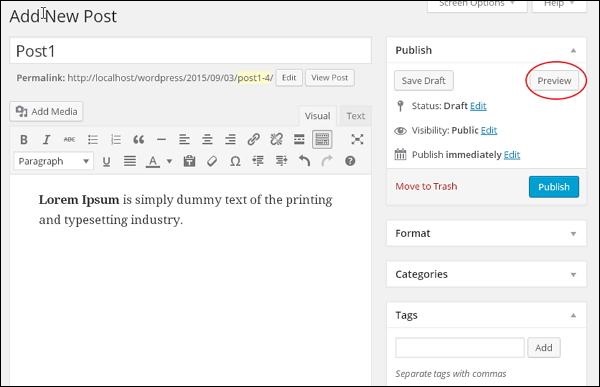
Step (2) − That you can secure the editor internet page of the Post as confirmed in the next conceal. You’re going to be in a region to spend the WordPress WYSIWYG editor to be able to add the trusty command of your post. We can survey intimately about WYSIWYG editor in the chapter WordPress – Add Pages.
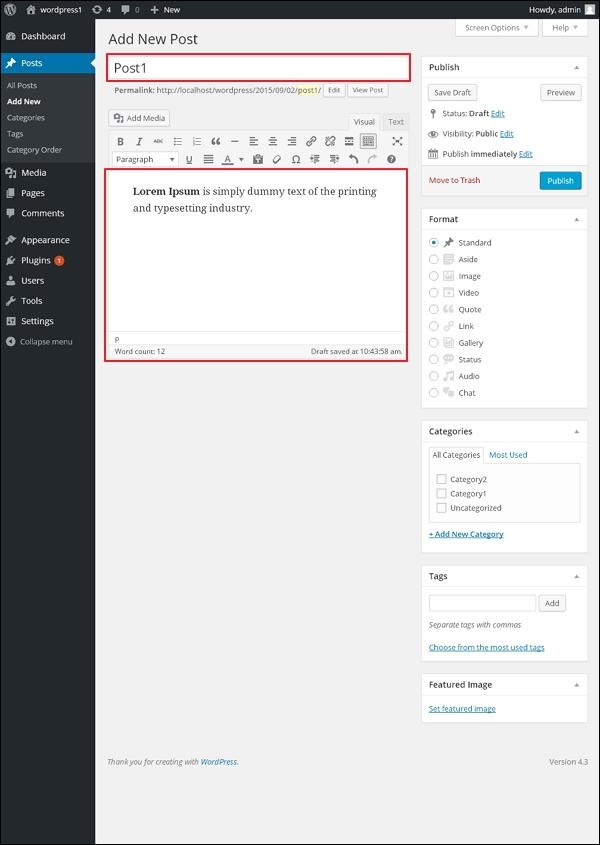
Following are the fields on the editor internet page of the Add Posts Page.
- Post Title − Enter the title of the post, i.e., Post1.
- Post State − Enter the command of your post.
Step (3) − Click on on Post button to put up your respective post.
Following are the few other alternate options latest in the Post piece.
- Put Draft − It saves the post as a draft.
- Preview − You’re going to be in a region to preview your post before publishing.
- Switch to Trash − Deletes the post.
- Station − Commerce the attach of your post to Printed, Pending, or Reviewer Draft.
- Visibility − Commerce the visibility of the post to Public, Private or Password salubrious.
- Printed − Commerce the publishded post date and time.
In this chapter, we are able to survey the most intriguing technique to Edit Posts on WordPress.
Following are the easy steps to Edit Posts in WordPress.
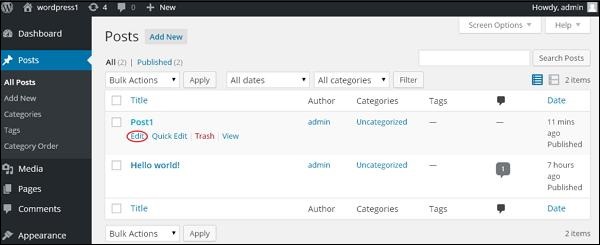
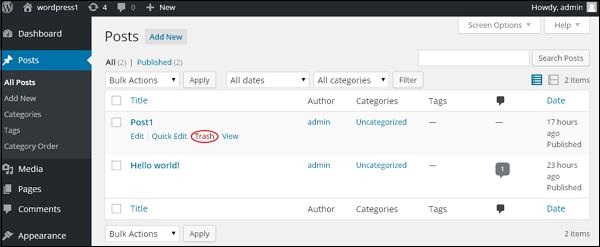
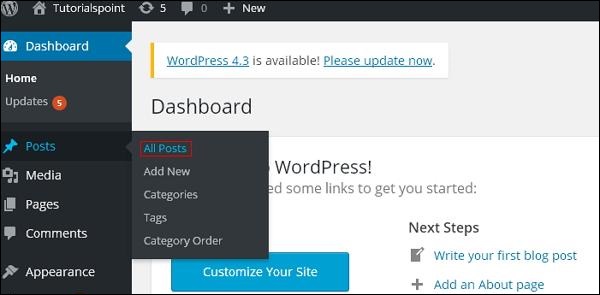
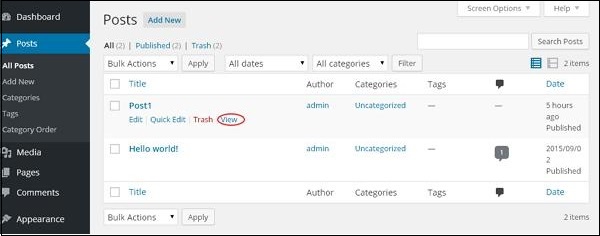
Step (1) − Click on on Posts → All Posts in WordPress.

Step (2) − You’re going to be in a region to examine Post1 (Post1 used to be created in the chapter WordPress – Add Posts). When the cursor hovers on the Post, few alternate options secure displayed under the Post title. There are two suggestions to edit the Post i.e. Edit and Rapid Edit.
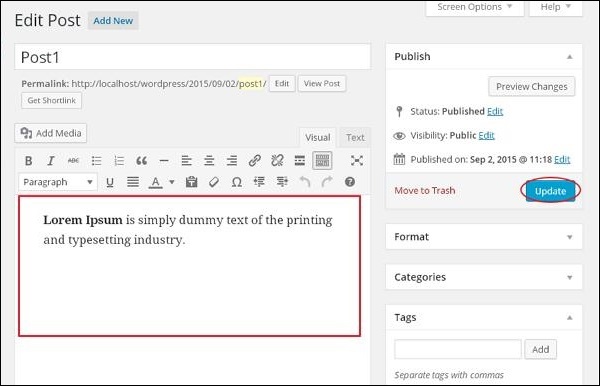
Edit − Click on on Edit option in Post1 as confirmed in the next conceal.
You’re going to be in a region to edit or alternate the command or title of the post as per your needs, and then click on on Change button as confirmed in the next conceal.
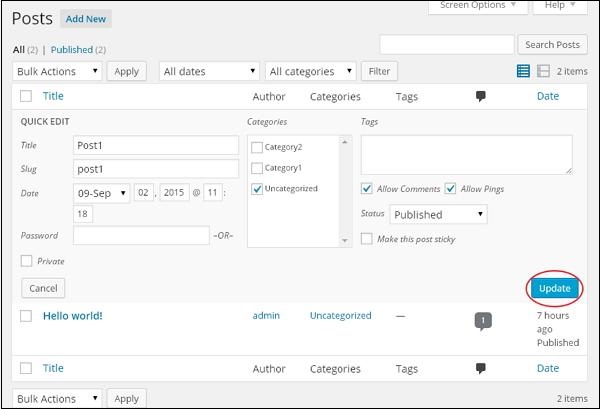
Rapid Edit − Click on on Rapid Edit option in Post1 as confirmed in the next screenshot.

Right here that that it is doubtless you’ll per chance edit the Title, Slug and date of the posts and would possibly steal out the categories on your post as confirmed in the next screenshot and then click on on Change button to verify post edits.
In this chapter, we are able to survey the most intriguing technique to Delete Posts in WordPress.
Following are the steps to Delete Posts in WordPress.
Step (1) − Click on on Posts → All Post in WordPress.
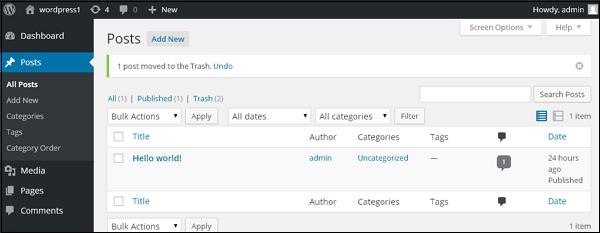
Step (2) − You’re going to be in a region to delete Post1 (Post1 used to be created in the chapter WordPress – Add Posts). When the cursor hovers on the Post, then about a alternate options secure displayed under Post1. Click on on Trash approach to delete the post.
Step (3) − You’re going to be in a region to examine your post lists to verify if the above post is deleted.
In this chapter, we are able to survey the most intriguing technique to Preview Posts in WordPress. Preview Post is to examine the post before it is printed to the person. It is a long way safer to preview your post and take a look at how your post appears to be like to be like on the web attach. You’re going to be in a region to edit or alternate the post as per your need after previewing.
Following are the easy steps to Preview Posts in WordPress.
Step (1) − Click on on Posts → All Posts in wordPress.
Step (2) − You’re going to be in a region to examine Post1 (Post1 used to be created in the chapter WordPress – Add Posts). When the cursor hovers on the Post, then about a alternate options secure displayed under the Post title. Click on on the Ogle option as confirmed in the next screenshot.
Or else that that it is doubtless you’ll per chance watch your post straight whereas editing or collectively with post by clicking on the Preview button as confirmed in the next conceal.
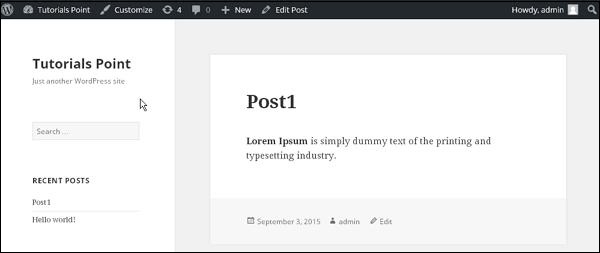
Step (3) − You’re going to be in a region to examine your post, whenever you click on on Ogle or Preview.
In this chapter, we are able to survey the most intriguing technique to Post Posts in WordPress. Post is outdated to kind the post readily available to the total users wherein every one can watch that particular person post. Publishing a recent post in WordPress is a easy job.
Following are the steps to Post Posts in WordPress.
Step (1) − Click on on Posts → Add Sleek in WordPress.
Step (2) − That you can secure the editor internet page of the Post as confirmed in the next screenshot. You’re going to be in a region to spend the WordPress WYSIWYG editor to be able to add the trusty command of your post.

Step (3) − Click on on Post button to put up your respective post.

After clicking on put up, your posts secure printed for the person to examine it.
In this chapter, we are able to study Media Library in WordPress. Media Library consists of the photos, audios, movies and recordsdata that that that it is doubtless you’ll per chance upload and add to the command when writing a Post or Page. Right here that that it is doubtless you’ll per chance watch, add, edit or delete any media connected objects if now not wanted.
Following are the steps to trace about Media Library.
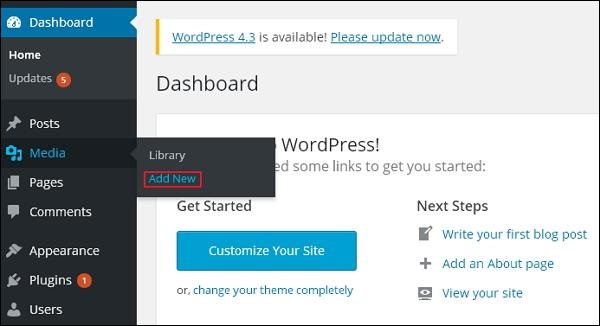
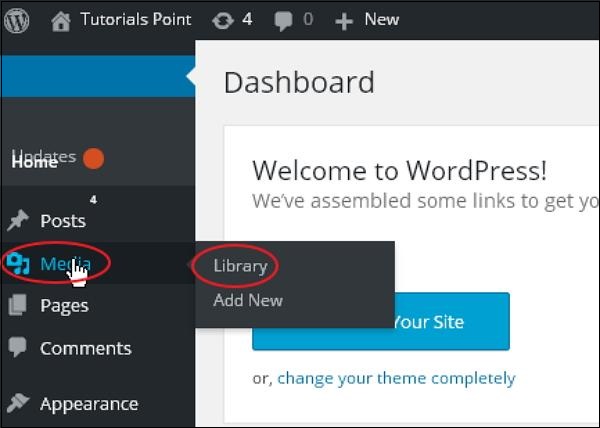
Step (1) − Click on on Media → Library in WordPress.
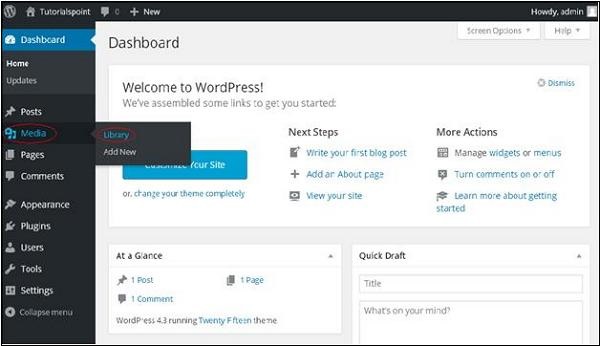
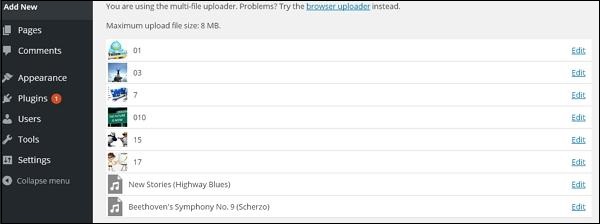
Step (2) − You’re going to be in a region to examine media recordsdata admire photos, audios, movies. Click on on Add Media button.
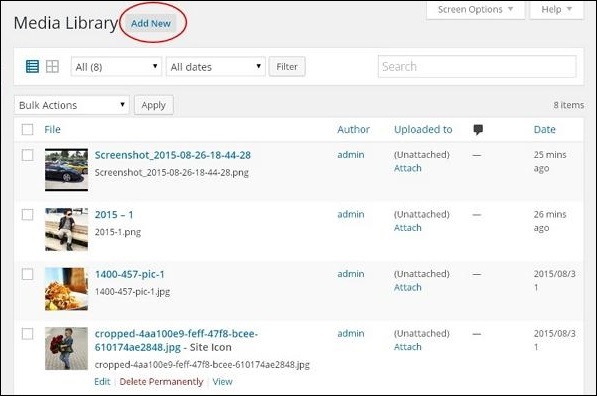
Step (3) − The Add Sleek Media internet page will get displayed. It is doubtless you’ll to find out the most intriguing technique to Add Media in the next chapter.
Step (4) − You’re going to be in a region to examine a bar as confirmed in the next screenshot.

The varied tabs that seem relish the next options −
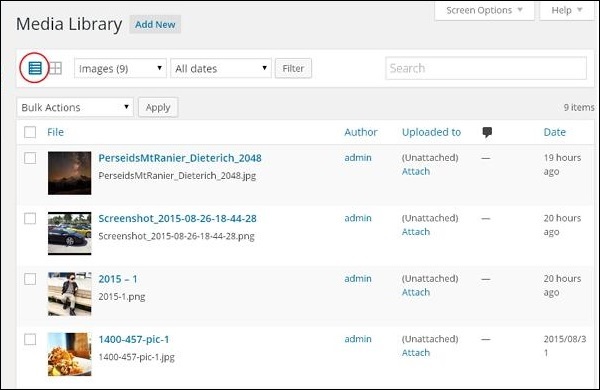
Listing Ogle − Shows the photos and movies in listing create.
Grid Ogle − Shows all photos in the grid format as confirmed in the next conceal.
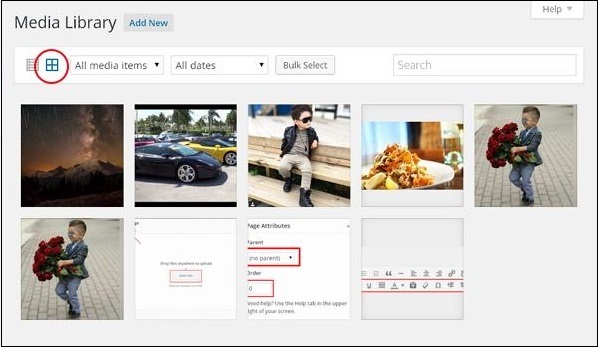
Filter the photos and movies − Filters the photos and movies.
Search Box − Helps to search a explicit image by inserting the title into the box.
In this chapter, we are able to survey the most intriguing technique to Add Media recordsdata in WordPress. WordPress enables you to be able to add, all roughly media recordsdata admire movies, audios and photos.
Following are the steps to Add Media.
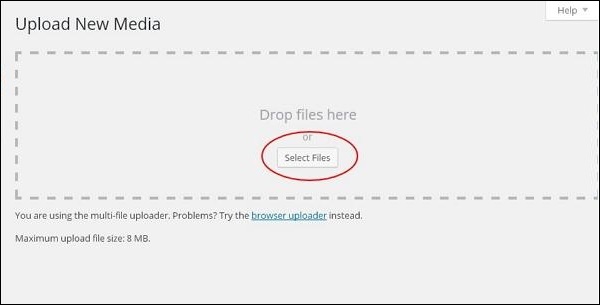
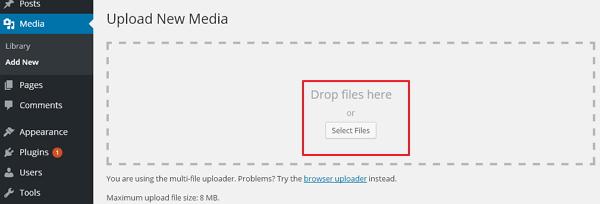
Step (1) − Click on on Media → Add Sleek in WordPress.
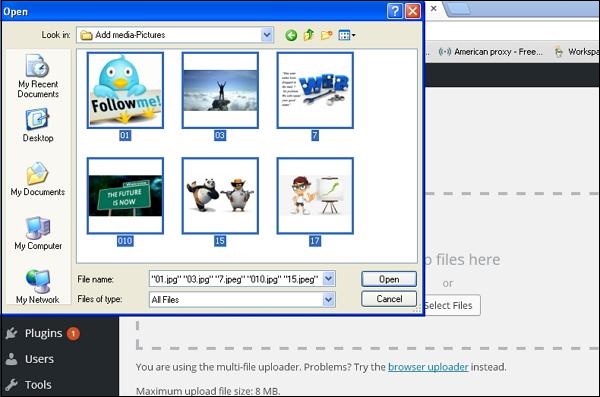
Step (2) − Then, click on on Eradicate Recordsdata approach to make a preference the recordsdata out of your local storage as confirmed in the next figure.
Step (3) − Add Media recordsdata much like photos and audios by selecting them and click on originate as confirmed in the next screenshot.
Step (4) − You’re going to be in a region to examine the listing of media recordsdata added as confirmed in the next screenshot.
In this chapter, we are able to survey the most intriguing technique to Insert Media in WordPress. Media recordsdata could be inserted to your Pages or Posts from libraries, from local storage or from URLs.
Following are the steps to Insert Media in WordPress.
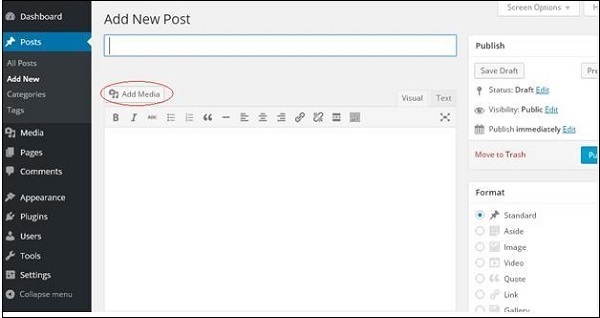
Step (1) − Click on on Posts → Add Sleek in WordPress.
Step (2) − Click on on Add Media.
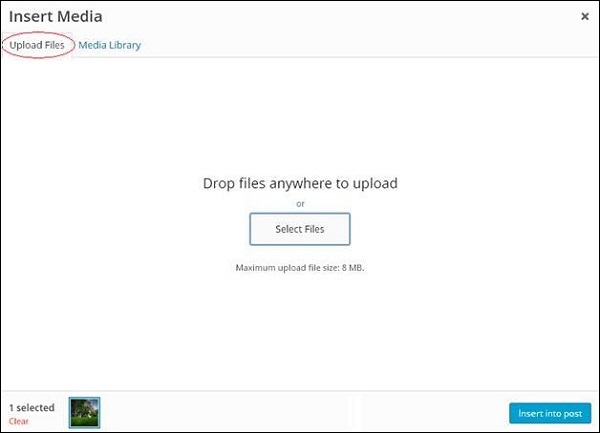
Step (3) − You’re going to be in a region to steal out the recordsdata from the Media Library tab as confirmed in the next screenshot.
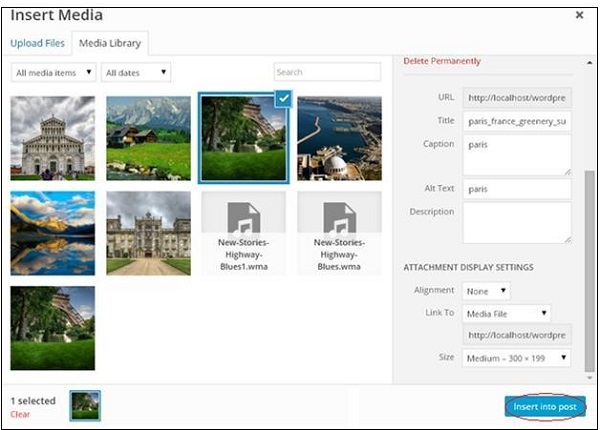
Facts about the chosen media file will be displayed on the honorable facet of the conceal under the Attachment Particulars. Click on on Insert Post button, the image will be inserted into the post. In Attachment Particulars piece, you will gain files about the photos much like URL, Title, Caption, Alt Text and Description
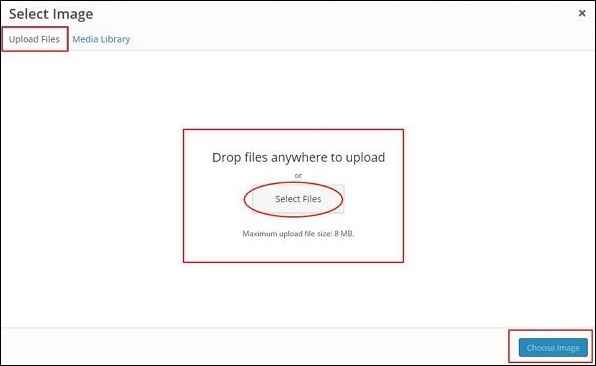
You’re going to be in a region to also insert a image straight out of your gadget by clicking on Add Recordsdata tab. Click on on Insert into Post button.
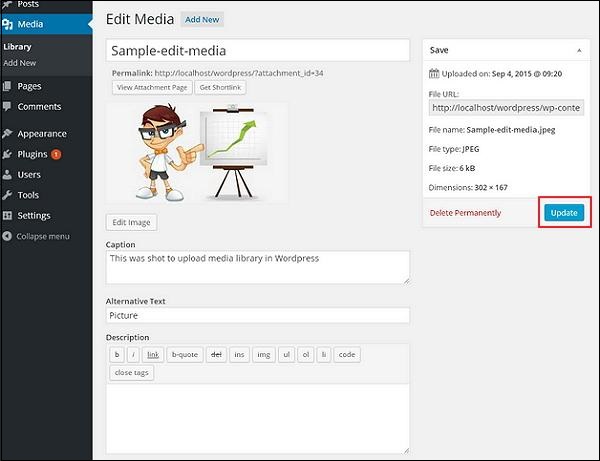
In this chapter, we are able to survey the most intriguing technique to Edit Media in wordPress. You’re going to be in a region to arrange the total files about your media that’s saved in the Media Library.
Following are the steps to Edit Media in WordPress.
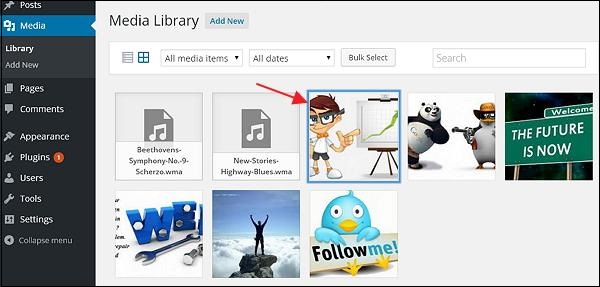
Step (1) − Click on on Media → Library and click on on the title of the media merchandise or the edit hyperlink.
Step (2) − It is doubtless you’ll watch a listing of media recordsdata. Eradicate any person image to edit.
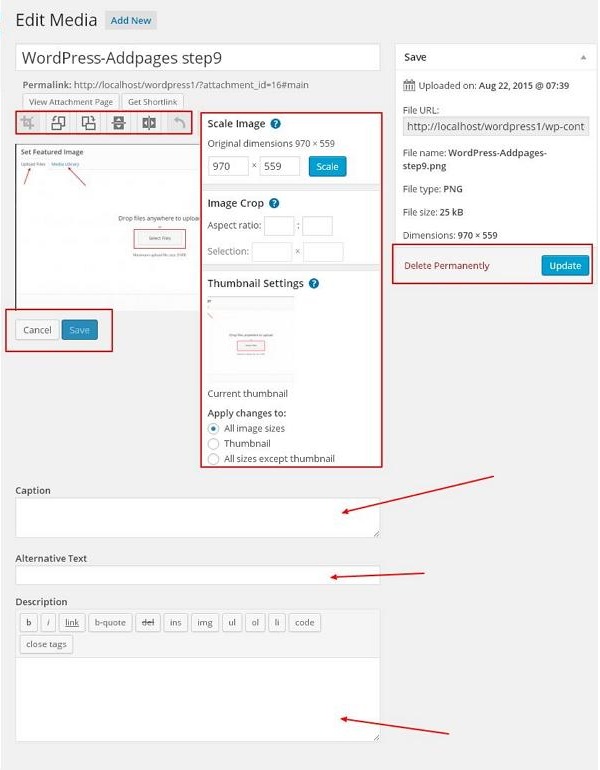
Step (3) − You’re going to be in a region to examine the edit media internet page with few alternate options on the honorable facet.
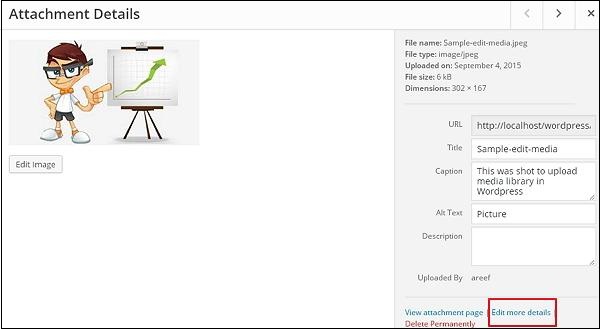
- URL − You’re going to be in a region to read simplest a hyperlink from media file.
- Title − This displays the title of the media. Title is continuously confirmed in galleries and attachment pages, if issues or plugins are designed to demonstrate it.
- Permalink − Permalink is the URL of the media attachment internet page. This is also a hyperlink to examine the attachment internet page.
- Edit image button − This allows you to edit the image space, much like rotate counter-clockwise, rotate clockwise, scale, prick, flip vertically, and flip horizontally.
- Caption − A immediate explanation of the media.
- Alternate Text − The alt text for the image, which is outdated to checklist media. Previous for availability.
- Description − An explanation of your media file.
- Delete Permanently − Delete your media file completely.
Step (4) − While you total editing the vital fields, click on on Change button to set the modifications made to a image.
In this chapter, we are able to survey the most intriguing technique to Add Pages into the WordPress. Adding pages is equivalent to collectively with posts in WordPress. Pages are static command and most continuously attain now not alternate its displayed files.
Following are the easy steps to be able to add pages in WordPress.
Step (1) − Click on on Pages → Add Sleek as confirmed in the next screenshot.
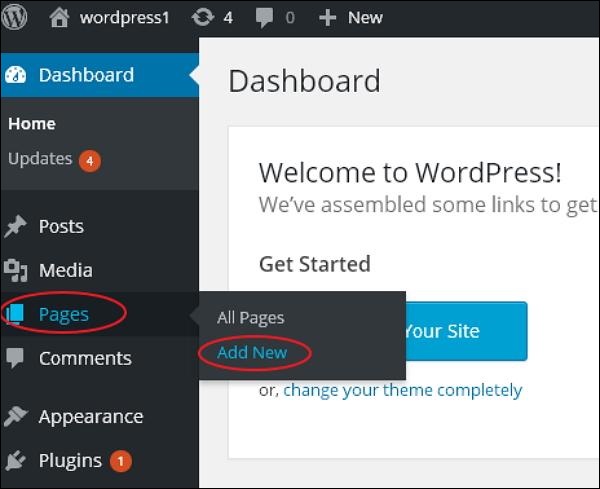
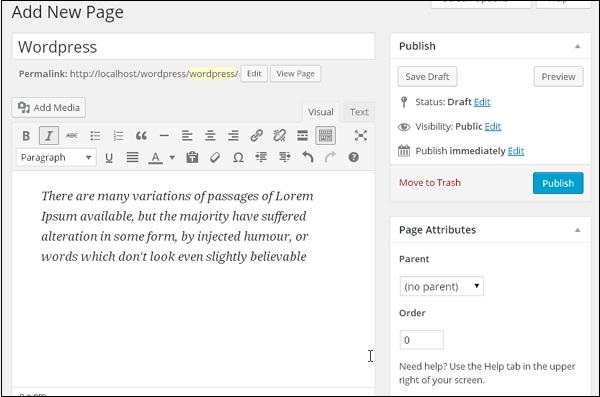
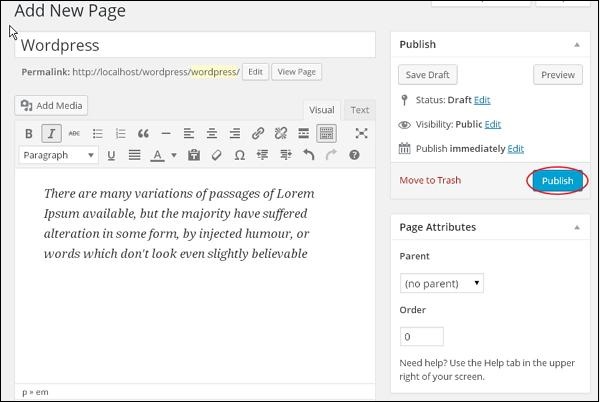
Step (2) − That you can secure the editor internet page as viewed in the next screenshot. The editor internet page has two tabs, Visible and Text. You’re going to be in a region to insert text in either of those. Right here, we’ll survey about inserting text into Visible format.

Following are the vital components of the fields on editor internet page of the Add Sleek Page.
Title
It is a long way outdated to jot down the title of the article, which is later displayed on the get page.
Permalink reveals the doubtless URL for the get page under the title. The URL generates as per the given title.

WYSIWYG Editor
It is a long way a WYSIWYG Editor, which is equivalent to a discover processor interface where that that it is doubtless you’ll per chance edit the contents of the article.

Following are the alternate options latest of WYSIWYG editor −
- Brave Button − Previous to intrepid your font.
- Italic − Previous to italicize the font.
- Note Strike − Strikes thru the command.
- Bullet Listing − Adds bullets to command.
- Quantity Listing − Adds numbers to the listing of the command.
- Blockquote − Quotes the text.
- Horizontal Line − Creates a horizontal line between sentences.
- Left Align − Sets the command on the left facet of the get page.
- Proper Align − Sets the command to the honorable facet of the get page.
- Interpret − Justifies the command of the get page.
- Add Link − Adds a hyperlink to your command. While you click on on this button, the next internet page will get displayed.
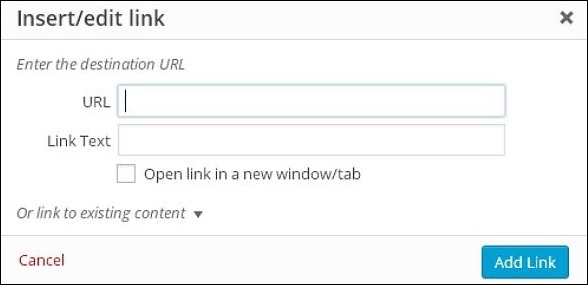
Following are the fields latest in the Insert/edit hyperlink.
- URL − Enter URL you want to hyperlink.
- Link text − Insert text you want to enter into the hyperlink.
- Originate hyperlink in a recent window/tab − Originate your hyperlink internet page into the recent tab or window. Verify the box as required.
- Or hyperlink to existing memoir − Hyperlinks to an existing command internet page by selecting the get page from the given listing. While you click on on existing internet page then you definately secure a hyperlink created in the URL piece as viewed in the next screenshot.
- Purchase away Link − Deletes the explicit hyperlink added for text or command.
- Read extra impress − Adds Read More impress to your internet page.
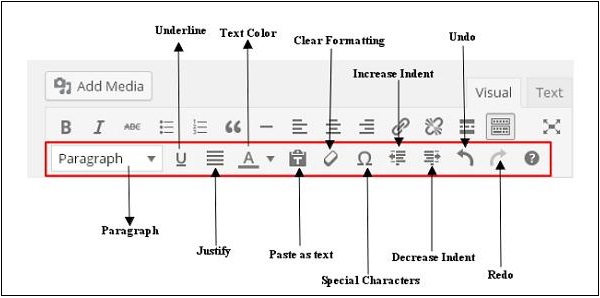
- Toolbar toggle − Clicking on this you secure any other listing of toolbar as confirmed in the next image.
-
- Paragraph − Selects the headings as required for the text from the dropdown.
- Underline − Underlines the sentences.
- Interpret − Justifies your command.
- Text Coloration − Sets shade for phrases or sentences.
- Paste as Text − Pastes your text.
- Definite Formatting − Deletes chosen command.
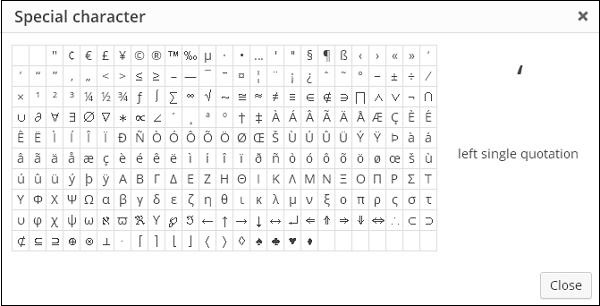
- Particular personality − Inserts special characters wanted to your command.
-
- Elevate Indent − Will enhance the indent of the get page.
- Decrease Indent − Decreases the indent of the get page.
- Undo − Reverses the most modern editing expose.
- Redo − Opposite of undo, restores the most modern editing expose.
Text Insertion
For writing the command of an editorial.
Post
To put up the get page to the person on the web attach.
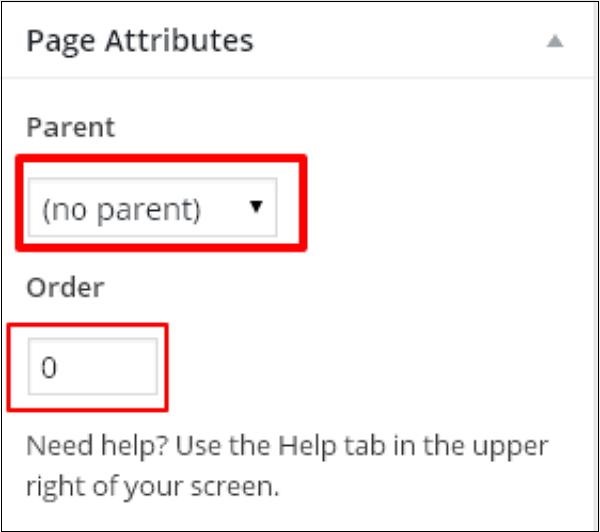
Page Attribute
Page attributes module enables you to make a preference the oldsters on your explicit internet page. You’re going to be in a region to also region bellow of the pages.
Featured Images
Contains the photos in the pages.
In this chapter, we are able to survey the most intriguing technique to Post Pages in WordPress. The expose, “Post” is outdated to kind the pages readily available to all users wherein every one can watch that particular person internet page. Publishing a recent internet page in WordPress is a easy job.
Following are the steps to Post Pages in WordPress.
Step (1) − Click on on Pages → Add Sleek in WordPress.

Step (2) − That you can secure the editor as confirmed in the next screenshot. You’re going to be in a region to spend the WordPress WYSIWYG editor to be able to add the trusty command of your internet page.
Step (3) − Click on on Post button as confirmed in the next conceal.
After clicking on put up, your posts secure printed for the person to examine it.
In this chapter, we are able to survey the most intriguing technique to Edit pages in WordPress.
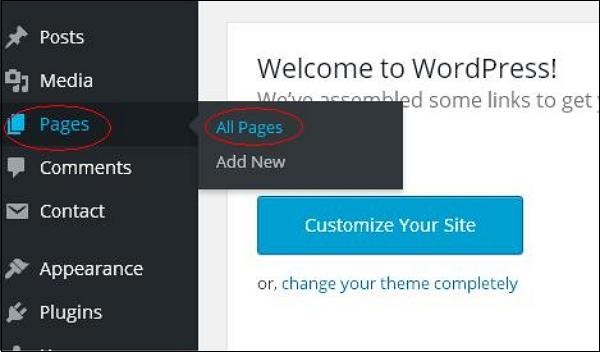
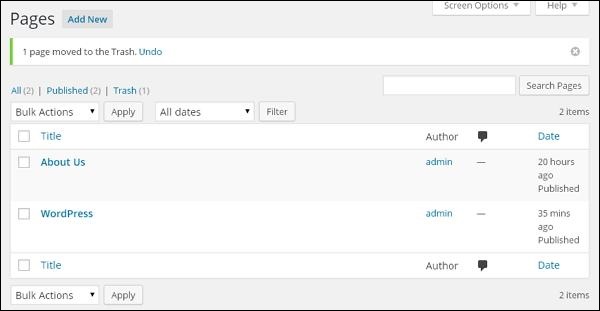
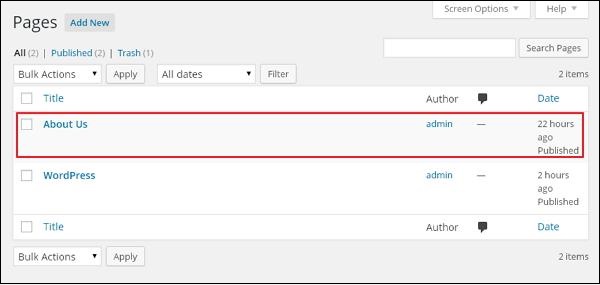
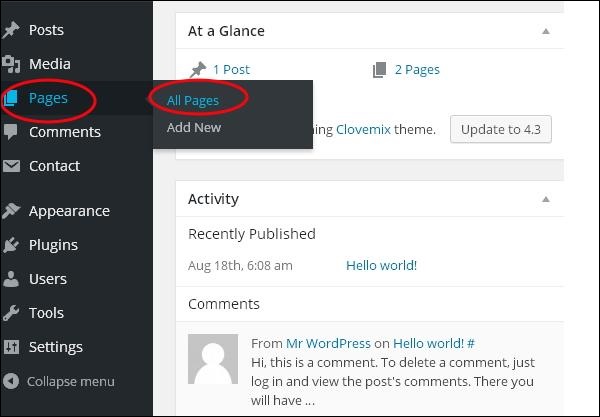
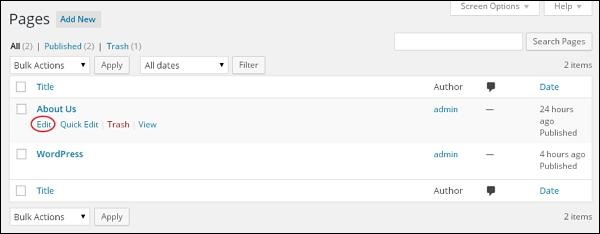
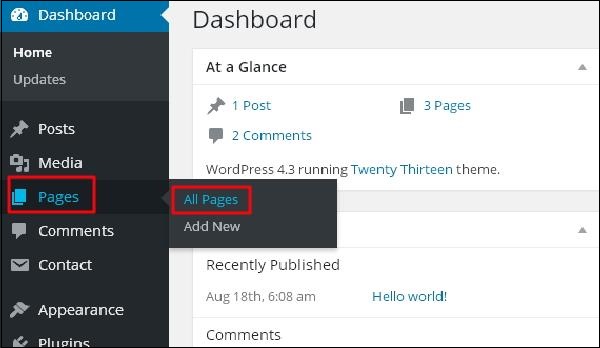
Step (1) − Click on on Pages → All Pages in WordPress as confirmed in the next conceal.
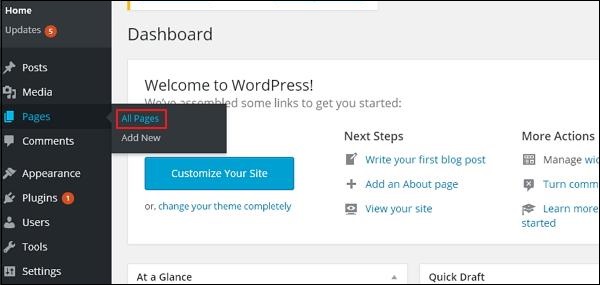
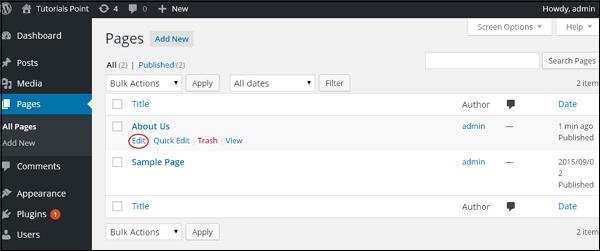
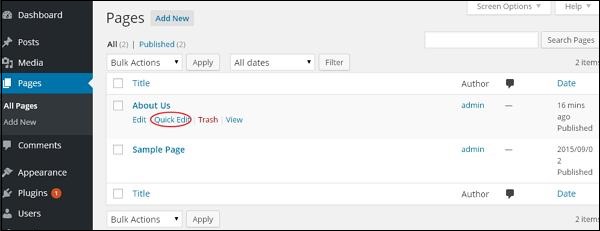
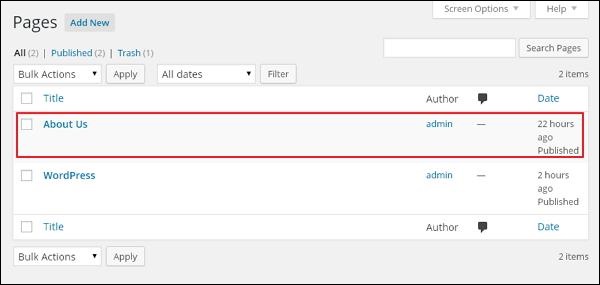
Step (2) − You’re going to be in a region to examine About Us (About Us used to be created in the chapter WordPress – Add Pages). When the cursor hovers on the pages, then few alternate options secure displayed under About Us. There are two suggestions to edit the Post, i.e., Edit and Rapid Edit.
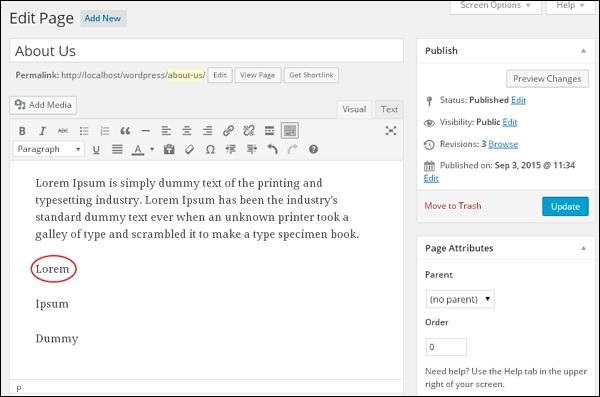
Edit − Click on on Edit option in About Us as confirmed in the next screenshot.
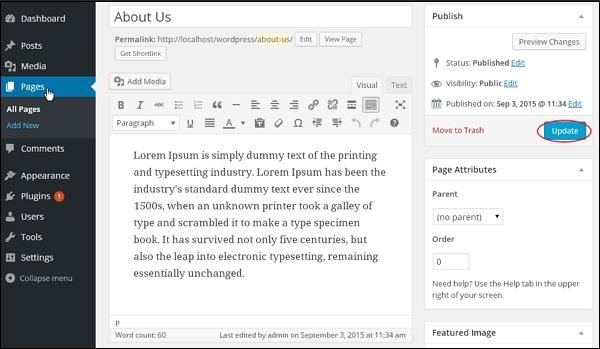
You’re going to be in a region to edit or alternate the command or title from the get page as per your need, and then click on on Change button as confirmed in the next conceal.
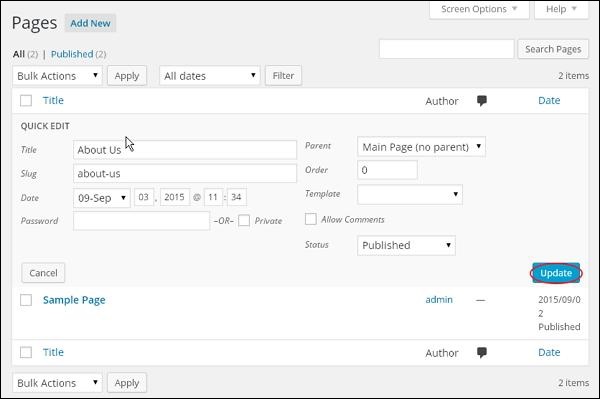
Rapid Edit − Click on on Rapid Edit option in About Us as confirmed in the next conceal.
You’re going to be in a region to edit the Title, Slug and date of the About Us internet page and would possibly steal out the parent on your internet page as confirmed in the next shot and then click on on Change button.
In this chapter, we are able to be taught to Delete Pages in WordPress.
Following are the steps to Delete pages in wordPress.
Step (1) − Click on on Pages → All Pages in WordPress.
Step (2) − You’re going to be in a region to delete Sample Page (Sample Page is created by default in WordPress). When the cursor hovers on the pages, then about a alternate options will get displayed under the Sample Page. Click on on Trash approach to delete the post.
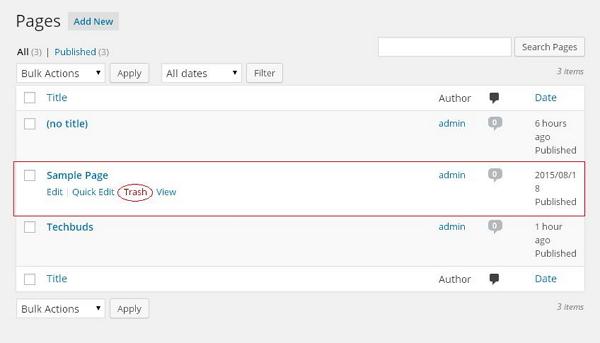
Or alternatively that that it is doubtless you’ll per chance also delete your internet page straight whereas editing or collectively with internet page by clicking on the Switch to Trash button as confirmed in the next conceal.

Step (3) − To substantiate that you simply have deleted the get page, watch your internet page listing.
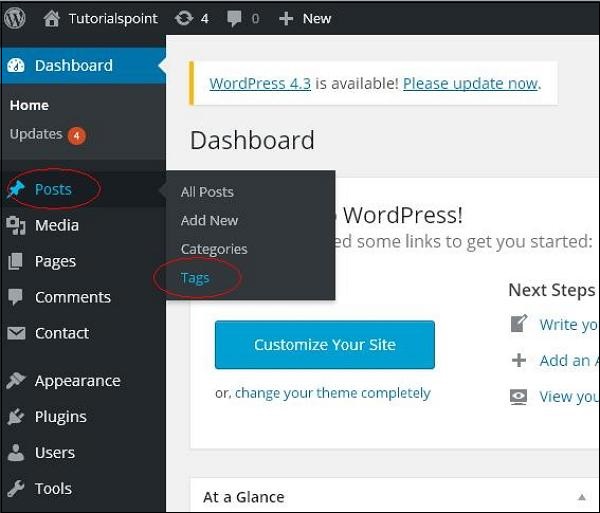
Mark is a minute files connected to the key command or post for the fair of identification. It tells the guests what truly the post is ready. If the impress is talked about successfully then it helps to gain the command very without grunt.
Following are the steps to Add Tags in WordPress.
Step (1) − Click on on Posts → Tags in WordPress.

Step (2) − The Tags internet page is displayed.
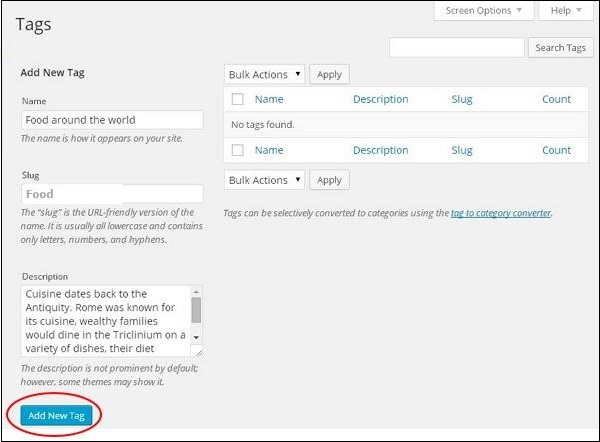
Following are the vital components of the fields on Tags.
- Name − Enter the title of tags.
- Slug − A discover chosen to checklist your post. It is a long way laid out in the tags URL.
- Description − Add immediate description of your impress. It will get displayed whenever you cruise on the impress.
After filling the total files about Tags, click on on Add Sleek Mark button.
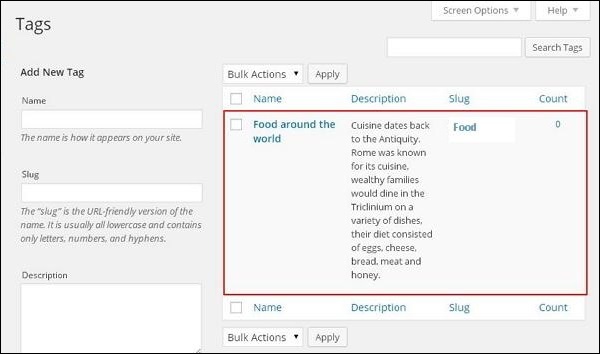
Step (3) − The recent created tags will secure displayed on the honorable facet of the get page as confirmed in the next screenshot.
In this chapter, we are able to survey to Edit Tags in WordPress. It is doubtless you’ll to find out the most intriguing technique to be able to add tags in the chapter WordPress – Add Tags.
Following are the easy steps to Edit Tags in WordPress.
Step (1) − Click on on Posts → Tags in WordPress.

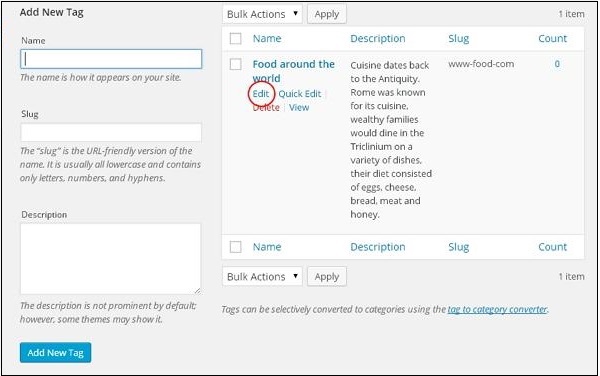
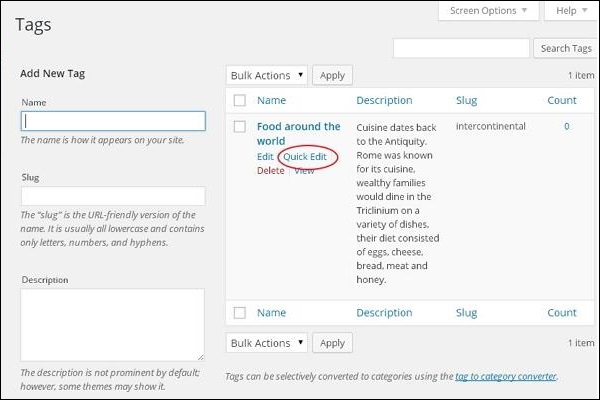
Step (2) − You’re going to be in a region to examine impress Food around the arena (Food around the arena used to be created in the chapter WordPress – Add Tags). When the cursor hovers on the Tags, then about a alternate options secure displayed under the Mark title. There are two suggestions to edit the tags i.e. Edit and Rapid Edit
Edit − Click on on Edit option in Tags piece as confirmed in the next conceal.
You’re going to be in a region to edit any of the vital self-discipline, and then click on on Change button as confirmed in the next conceal.
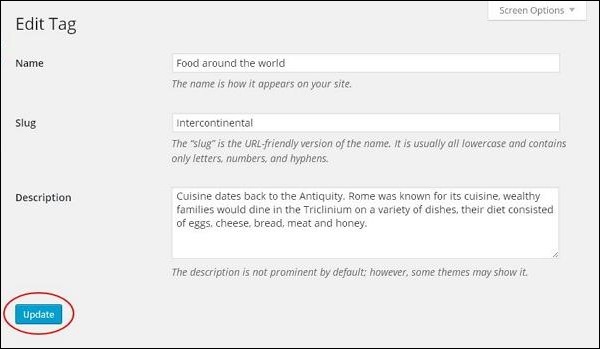
Right here impress fields are same from the chapter WordPress – Add Tags.
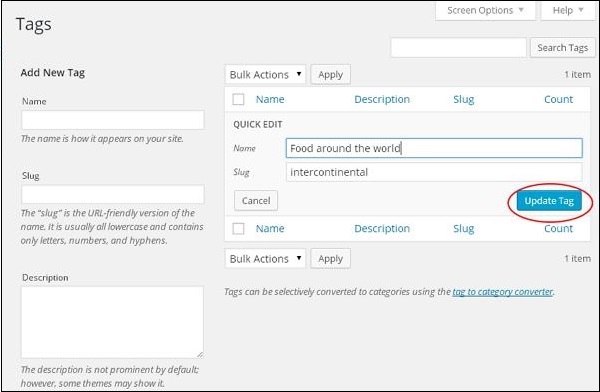
Rapid Edit − Click on on Rapid Edit option in Tags piece as confirmed in the next screenshot.
Right here that that it is doubtless you’ll per chance simplest edit the Name and Slug of the Tags as viewed in the next conceal and then click on on Change Mark button.
In this chapter, we are able to be taught to Delete tags in WordPress.
Following are the steps to delete tags in WordPress.
Step (1) − Click on on Posts → Tags in WordPress.

Step (2) − You’re going to be in a region to delete impress Food around the arena (Food around the arena used to be created in the chapter WordPress – Add Tags), when the cursor hovers on the Tags, then about a alternate options secure displayed under the Tags title. Click on on Delete in tags piece as confirmed in the next conceal.
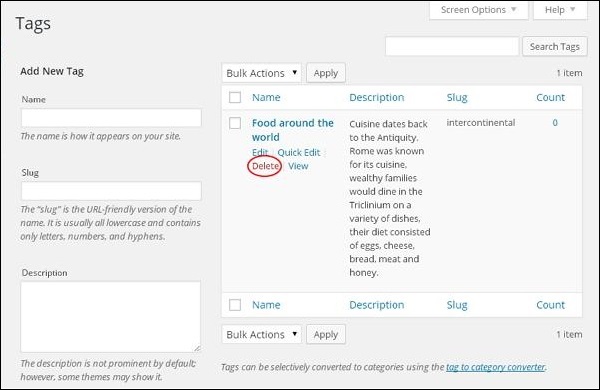
While you click on on delete, that it is doubtless you’ll secure a pop message inquiring for confirmation to delete.
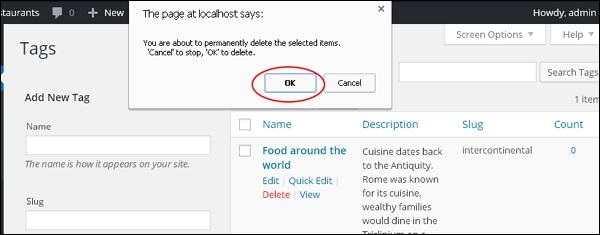
You’re going to be in a region to click on on OK button and delete the impress completely.
In this chapter, we are able to be taught to Add Hyperlinks in WordPress pages. Link is a connection from one helpful resource to any other. Adding hyperlinks to your pages or weblog posts allow you to join to other pages.
Following are the easy steps to Add hyperlinks in WordPress.
Step (1) − Click on on Pages → All Pages in WordPress.

Step (2) − Listing of pages created in WordPress will secure displayed as confirmed in the next conceal. Eradicate any of the pages to be able to add hyperlinks internal it. Right here, we’re going to be able to add hyperlinks in About Us internet page.
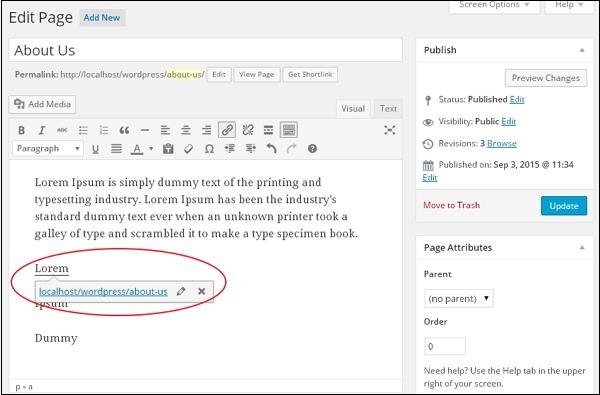
Step (3) − Eradicate any of the sentence or discover where you want to be able to add hyperlink. Right here, we are able to be able to add hyperlink to the discover Lorem.
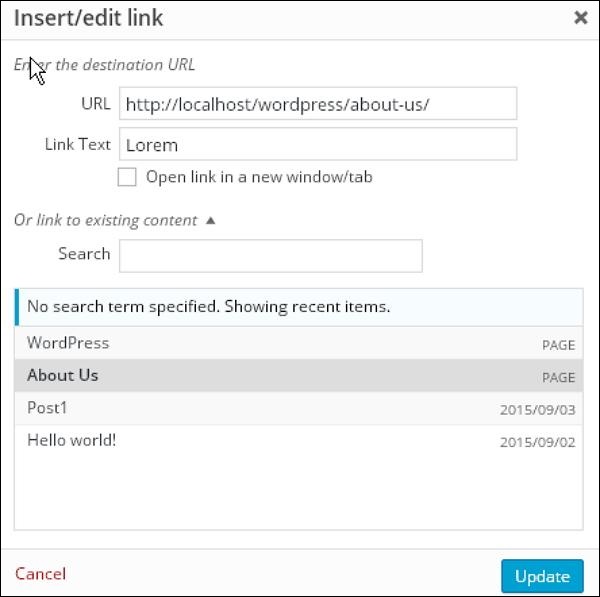
Step (4) − While you click on on the Insert/Edit hyperlink image then the next pop window will get displayed.
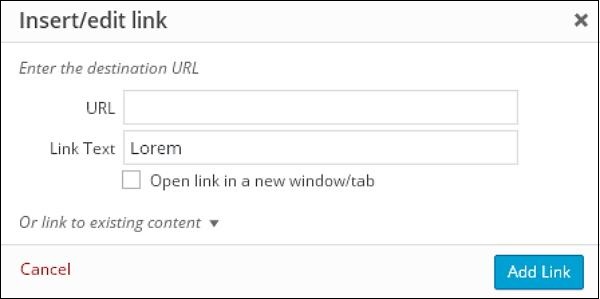
Following are the fields latest in the Insert/edit hyperlink.
- URL − Enter URL you want to hyperlink.
- Link text − Insert text you want to enter into the hyperlink.
- Originate hyperlink in a recent window/tab − Originate your hyperlink internet page into the recent tab or window. Verify the box as required.
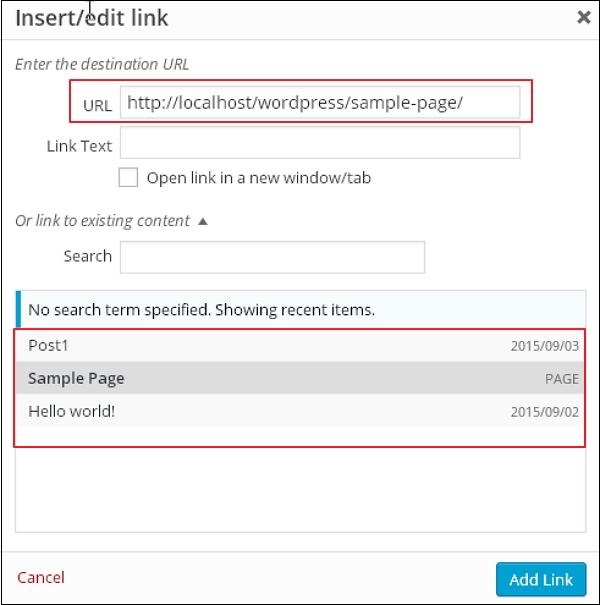
- Or hyperlink to existing memoir − Add hyperlinks to an existing command internet page by selecting the get page from the given listing. Click on on Or hyperlink to existing memoir and the listing of pages and posts will get displayed as confirmed in the next conceal.
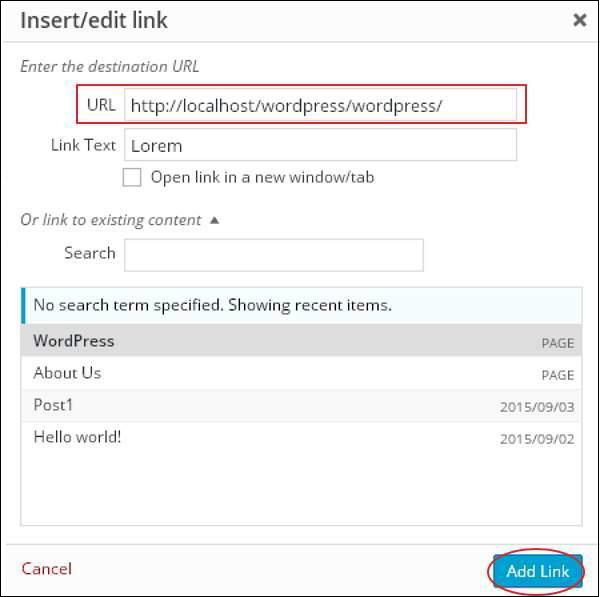
After selecting the explicit internet page or post from the listing, the hyperlinks secure created in the URL self-discipline as viewed in the preceding conceal. Click on on Add Link.
Step (5) − While you cruise on the discover Lorem then the hyperlink tooltip will get displayed as confirmed in the next conceal.
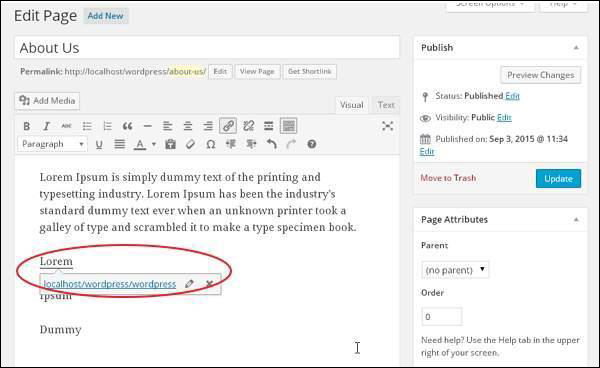
Click on on Change button to change the modifications to your internet page or post.
In this chapter, we are able to survey the most intriguing technique to edit hyperlink in WordPress.
Following are the easy steps to Edit Hyperlinks in WordPress
Step (1) − Click on on Pages → All Pages as confirmed in the next conceal.
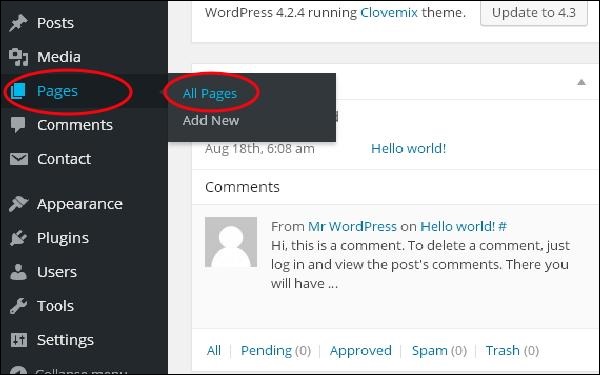
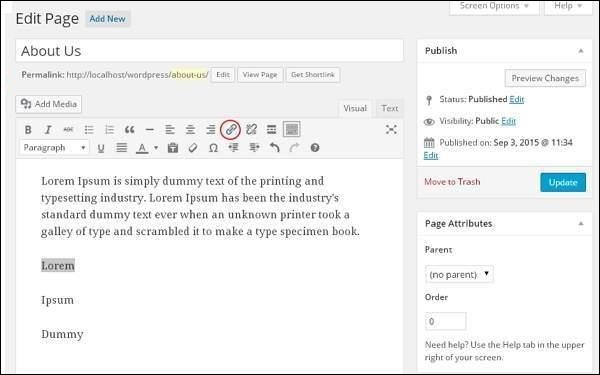
Step (2) − You’re going to be in a region to examine the listing of pages. When the cursor hovers on the About Us internet page, then about a alternate options secure displayed under About Us. Click on on Edit as confirmed.

Step (3) − Flee on the discover Lorem (Link for discover Lorem used to be created in the chapter WordPress – Add Hyperlinks), and click on on the pencil image to edit the hyperlink as confirmed in the next conceal.
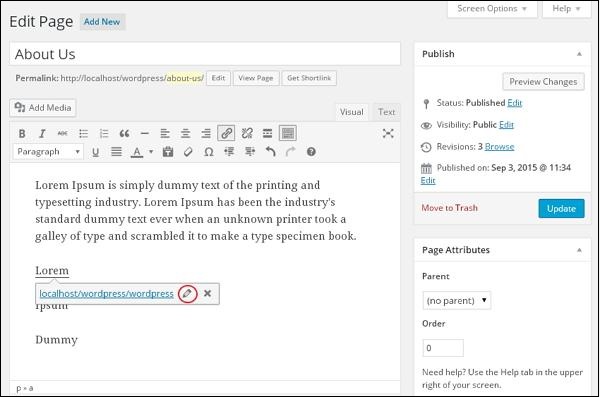
Step (4) − You’re going to be in a region to alternate or edit your hyperlink by selecting the get page from the present listing. In this case, we relish got chosen the About Us internet page.

After selecting the explicit internet page or post from the listing, then click on on Change button.
Step (5) − While you cruise on the discover Lorem then the hyperlink tooltip secure displayed as viewed in the next conceal.
Click on on Change button to change the modifications to your internet page or post.
In this chapter, we are able to be taught to Delete hyperlinks from WordPress. You’re going to be in a region to protect conclude away the undesirable hyperlinks which you don’t need on your internet attach or article.
Following are the steps to Delete Hyperlinks in WordPress
Step (1) − Click on on Pages → All Pages in WordPress.
Step (2) − You’re going to be in a region to examine the listing of pages. When the cursor hovers on the About Us internet page, then about a alternate options will get displayed. Click on on the Edit button as confirmed in the next conceal.
Step (3) − Eradicate the discover which you had already linked i.e. Lorem (Link for discover Lorem used to be created in the chapter WordPress – Add Hyperlinks), and click on on the Purchase away Link Symbol as viewed in the next conceal.

Step (4) − While you cruise on the discover Lorem, there will be no tooltip of the present URL. The following screenshot reveals that the hyperlink has been deleted.
In this chapter, we are able to be taught to Add Feedback in WordPress. Adding feedback enables your guests to relish a discussion with you. Feedback are authorized by the admin and then posted to be talked about additional.
Following are the steps to be able to add feedback to your weblog posts.
Step (1) − Click on on Pages → All Pages in WordPress.
Step (2) − The listing of pages created in WordPress will secure displayed as viewed in the next conceal. Eradicate any of the pages you want to be able to add feedback to. Right here, we’re going to be able to add comment in About Us internet page. Click on on About Us.
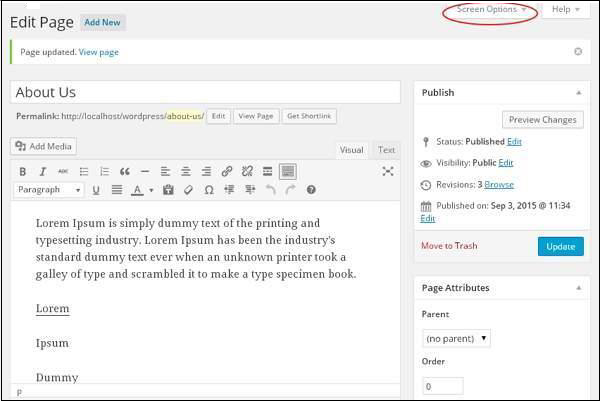
Step (3) − In an effort to add a touch upon this internet page, click on on Display conceal alternate options latest on the head correct hand corner.
Step (4) − The dropdown listing of Display conceal Probability will get displayed. Verify the Discussion and Feedback box as confirmed in the next conceal.
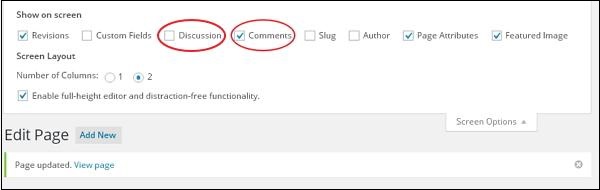
Step (5) − You’re going to be in a region to now watch the Discussion and Feedback box on the bottom of your internet page.
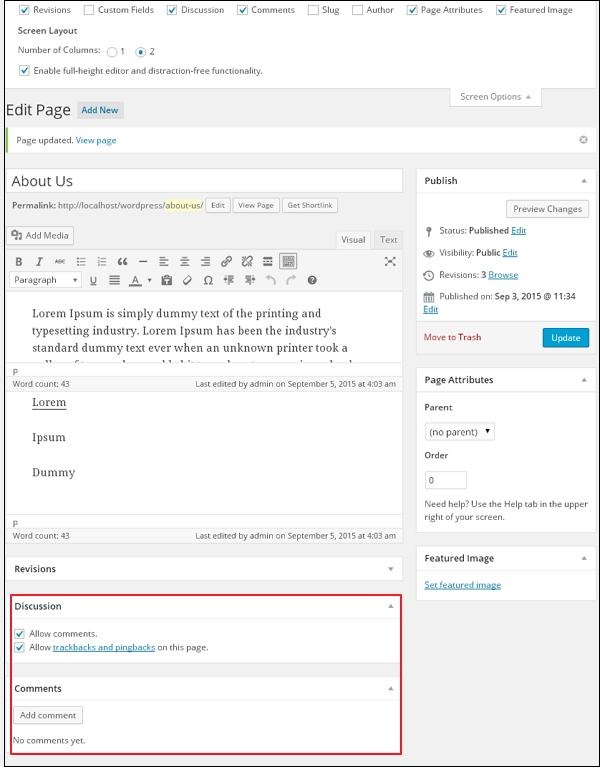
In the Discussion piece, there are two alternate options latest −
In the Reveal piece, that that it is doubtless you’ll per chance add feedback by clicking on Add Reveal button.
Step (6) − Click on on Change button after collectively with the comment box.
In this chapter, we are able to study the most intriguing technique to Edit feedback in WordPress. Modifying feedback could be done simplest by the admin.
Following are the steps to Edit Feedback in WordPress.
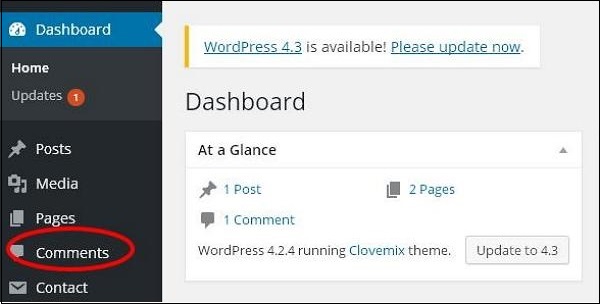
Step (1) − Click on on Feedback in WordPress.
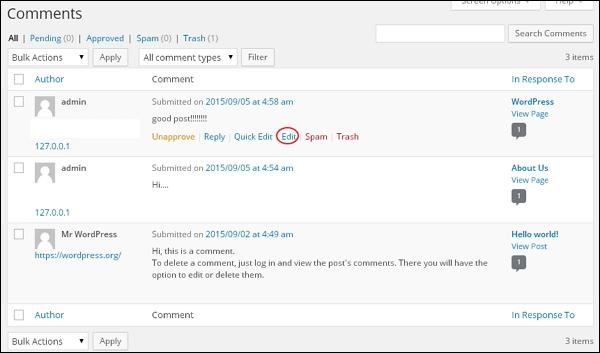
Step (2) − You’re going to be in a region to examine the feedback listing for the many pages. Eradicate any comment, you want to edit. Click on on edit.
Step (3) − The Edit comment internet page will get displayed. You’re going to be in a region to edit the comment and click on on Change Button.
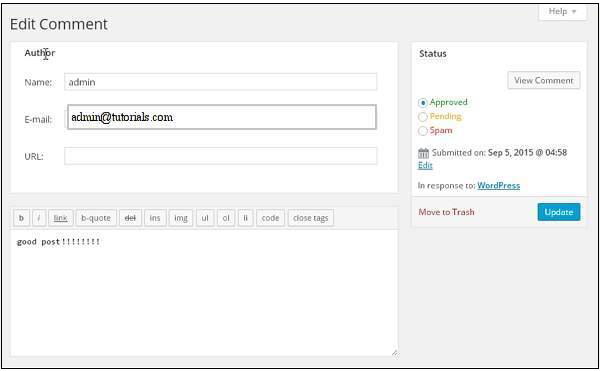
Right here that that it is doubtless you’ll per chance edit the title, email, URL or the comment from the comment box.
In this chapter, we are able to be taught to Lifelike Feedback in WordPress. Reveal moderation is a job where, when guests touch upon posts, the comment is now not printed straight till and unless it is authorized by the admin to be posted. It manages your feedback in inform that there would possibly be rarely the least bit times a comment spamming.
Step (1) − Click on on Settings → Discussion in WordPress.
Step (2) − The Discussion Surroundings internet page will get displayed.
In the Reveal Moderation self-discipline, enter those phrases or URLs you attain now not desire any visitor to be able to add feedback. Whenever a visitor affords any feedback it’d be moderated by the admin first and then printed.
Step (3) − Click on on Put Changes.
In this chapter, we are able to survey the most intriguing technique to Ogle Plugins in WordPress. It lets you allow and disable WordPress Plugins. This provides the outlandish options to an existing internet attach. Plugins lengthen and lengthen the performance of WordPress.
Following are the easy steps to Ogle Plugins in WordPress.
Step (1) − Click on on Plugins → Build in Plugins in WordPress administrator.
Step (2) − It is doubtless you’ll watch the listing of existing plugins to your attach as viewed in the next conceal.
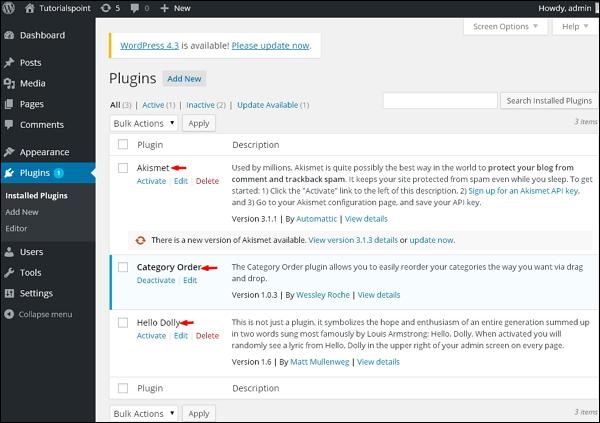
A table of Plugin and Description is displayed. Names of the plugins are outlined in Plugin column and a immediate description about the plugin is printed under Description column.
Toolbar
Following options seem as Plugin toolbar alternate options on the get page −
- Packed with life − Shows the keen plugins on the web attach.
- Sluggish − Shows the installed but idle plugins on the web attach.
- Change Readily available − Shows, if a recent version is readily available or asks to change now.
In this chapter, we are able to survey the most intriguing technique to set up plugins in WordPress. It is a long way truly easy to set up plugins. The total plugins are free to get; the most straight forward situation is that a plugin should always be in the WordPress listing.
Following are the easy steps to Set up Plugins in WordPress.
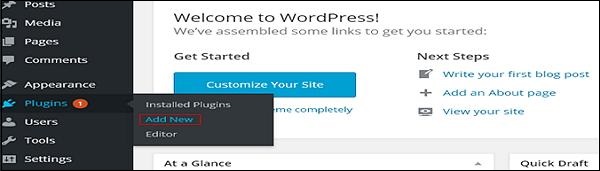
Step (1) − Click on on Plugins → Add Sleek in WordPress.

Step (2) − Enter your required plugin title in the search box as confirmed in the next conceal. Listing of plugins which could be relevant to the plugins title will secure displayed as viewed in the next conceal.
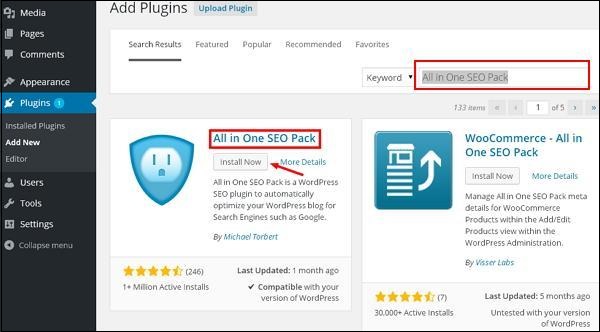
Eradicate the vital plugin you want to make spend of. Right here, we relish got searched All in a single SEO Pack plugin, which happens to be the key plugin as confirmed in the preceding conceal. Click on on set up now button to set up the plugin to your internet attach.
Step (3) − The plugins robotically originate downloading and inserting in.
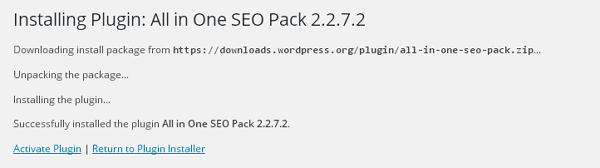
Click on on Activate Plugin to spark off the plugin to your internet attach, which makes your activity grand less complicated the usage of this plugin.
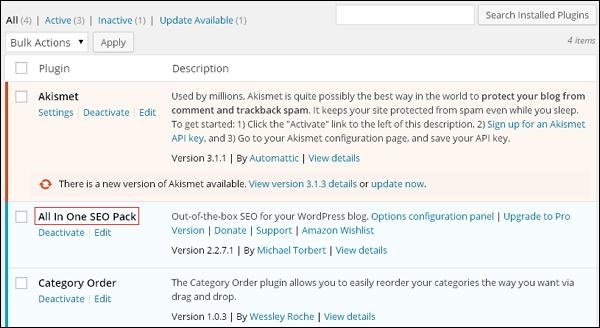
Step (4) − Once activated, you will watch the installed plugin in the listing of plugins as viewed in the next conceal.
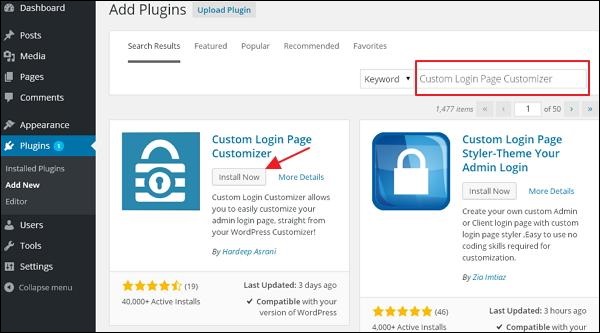
In this chapter, we are able to survey the most intriguing technique to Customise Plugins in WordPress without writing any HTML or CSS. It is most continuously a stunning addition for multi-person internet sites. This recent design enables you to customize your login internet page by the usage of the WordPress theme customizer (no coding skills required).
Following are the easy steps to Customise Plugins in WordPress.
Step (1) − Click on on Plugins → Add Sleek.
Step (2) − Set up and spark off the Personalized Login Page Customizer Plugin.
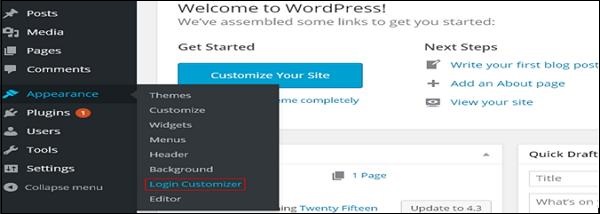
Step (3) − Click on on Look → Login Customise piece.
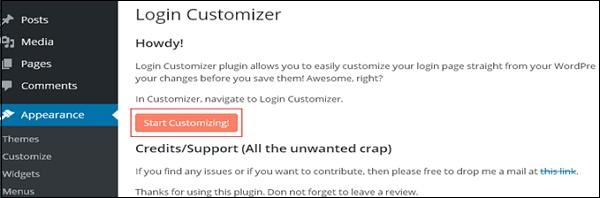
Step (4) − Click on on Originate Customizing button to proceed additional.
Step (5) − This will delivery the built-in WordPress theme customizer. You’re going to be in a region to customize the theme and kind it appreciate the design you should.
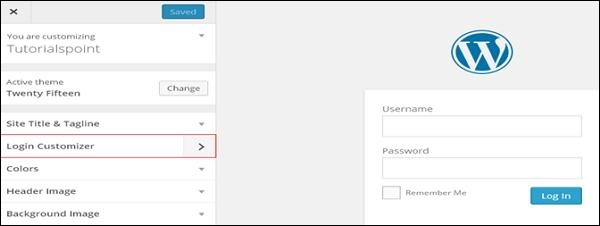
Click on on the recent Login Customizer tab in the facet panel. Login customizer internet page will secure displayed. On the login customizer internet page, that that it is doubtless you’ll per chance customize your login internet page in the same design as you customize your WordPress theme.
Step (6) − The customized login internet page will seem as confirmed in the next conceal.

- Logo − Add label of your approach to change the default WordPress label.
- Background − Add background image otherwise that that it is doubtless you’ll per chance capture a background shade of your preference.
- Make Background − Eradicate create background image or shade for login create container of your preference.
Most of the choices in the customizer panel are clear. You’re going to be in a region to take a look at the total choices in the customizer to alter the setting as per your requirement of your login internet page. Click on on Put and Post button.
In this chapter, we are able to study the roles of users in WordPress. Each and every one has their very hang role in WordPress. Roles are admire permissions given to a explicit person to secure admission to the WordPress attach. These roles could be distributed simplest by the Admin.
Listed right here are few pre-outlined roles readily available in WordPress −
- Administrator − The Administrator has the total rights. An Admin can attain one thing else and every part on the WordPress attach much like setting up extra admins, appealing extra users and also taking away them.
- Editor − The Editor has secure admission to to the total posts, pages, feedback, categories, tags, and hyperlinks. They would possibly make, put up, edit or delete any posts or pages.
- Author − The Author can simplest write posts, upload images, edit, and put up their very hang posts.
- Contributor − The Contributor can simplest write and edit their posts till printed. They would possibly make their very hang posts and pages but can now not put up them. They can’t upload photos or recordsdata but can watch your attach’s attach. After they have to put up any post, it’ll be first notified for my fragment to the administrator for analysis. When the post is authorized, the contributor can now not kind any modifications as soon as printed.
- Follower − The Follower can simplest read and touch upon the posts. Followers are those who relish signed in to your memoir to receive updates.
- Viewer − Viewers can simplest watch your posts; they’ll’t edit but can simplest touch upon the posts.
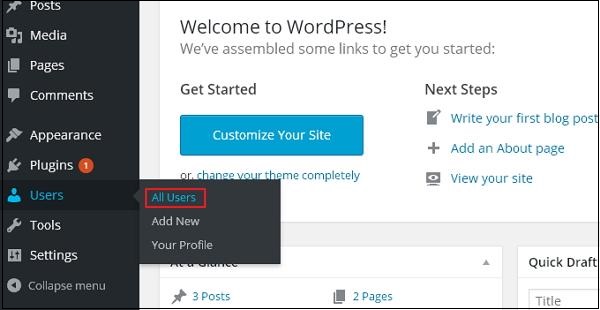
In this chapter, we are able to survey the most intriguing technique to Add users to your WordPress weblog or internet attach. When users register to your WordPress weblog or internet attach, you secure an email notification, so you repeatedly know when recent users register, and that that it is doubtless you’ll per chance then secure into your Dashboard and edit the users’ role.
Following are the easy steps to Add Users in WordPress.
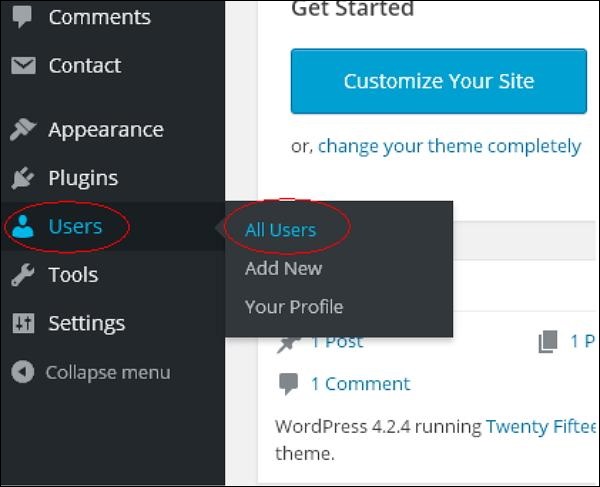
Step (1) − Click on on Users → Add Sleek in WordPress.
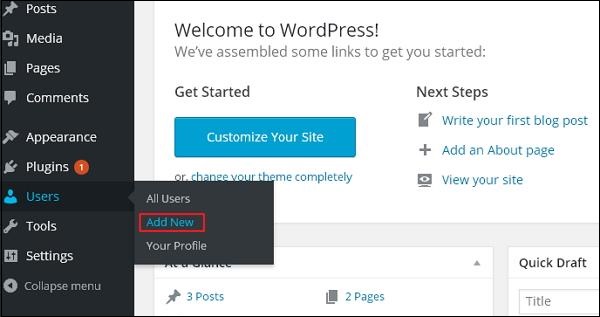
Step (2) − You’re going to be in a region to beget the person ingredient on the Add Sleek User internet page. Possess in the total required fields (as viewed in the next conceal) to proceed additional.
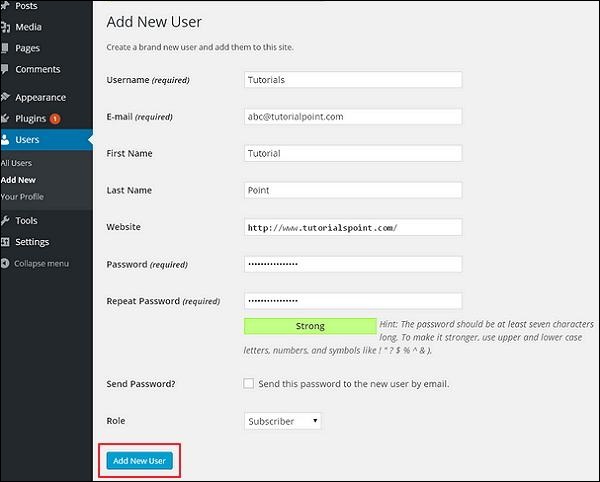
- Username (required) − Enter the outlandish username, which you want to demonstrate on internet attach.
- Electronic mail (required) − Enter the salubrious email address. The person receives notifications from the attach at this email address.
- First Name − Enter the person’s first title.
- Last Name − Enter the person’s final title.
- Web attach − Enter the URL for the person’s internet attach.
- Password (required) − Enter the password.
- Repeat Password (required) − Repeat the same password because the earlier password for authentication.
- Send Password − Send password to the Sleek User by email checkbox. The person will receive an email with the recent password.
- Position − Eradicate the explicit role from the dropdown, i.e., Subscriber, Contributor, Author, Editor, or Administrator.
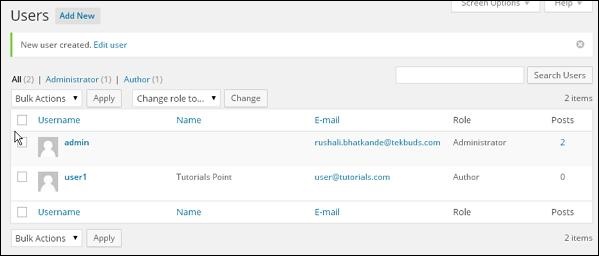
Click on on Add Sleek User button to be able to add person to your users listing.
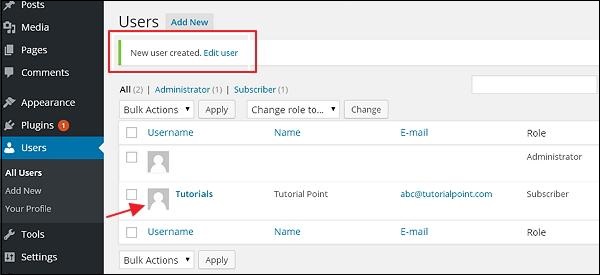
Step (3) − You’re going to be in a region to examine the person listing to appreciate whether the users had been added. A message will be displayed as Sleek User Created as viewed in the next conceal.
In this chapter, we are able to survey about User Photo in WordPress. In an effort to add person photo in WordPress, you want to set up plugin User Photo from WordPress plugins. It helps you add a photograph of your hang to your WordPress profile.
Following are the easy steps to be able to add a User photo.
Step (1) − Click on on Settings → User Photo.

Step (2) − The User Photo Solutions internet page will get displayed.
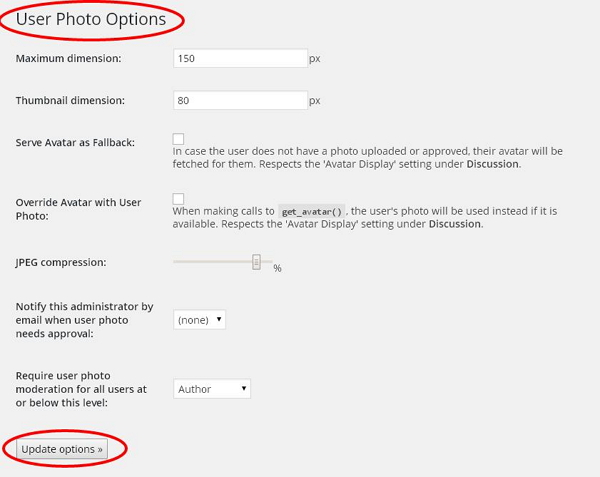
Jam the dimension on your thumbnails and kind the vital modifications and then click on on Change Solutions button.
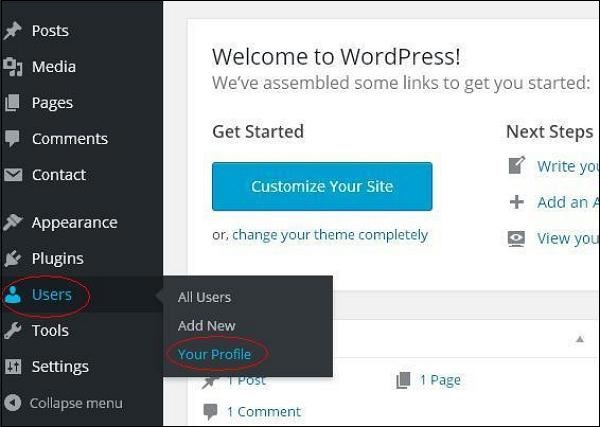
Step (3) − To look on the plugin User Photo is activated, whisk to Users → Your Profile. In your Profile internet page that that it is doubtless you’ll per chance watch Your Photo piece is added. Right here that that it is doubtless you’ll per chance upload your photo to demonstrate as profile image.
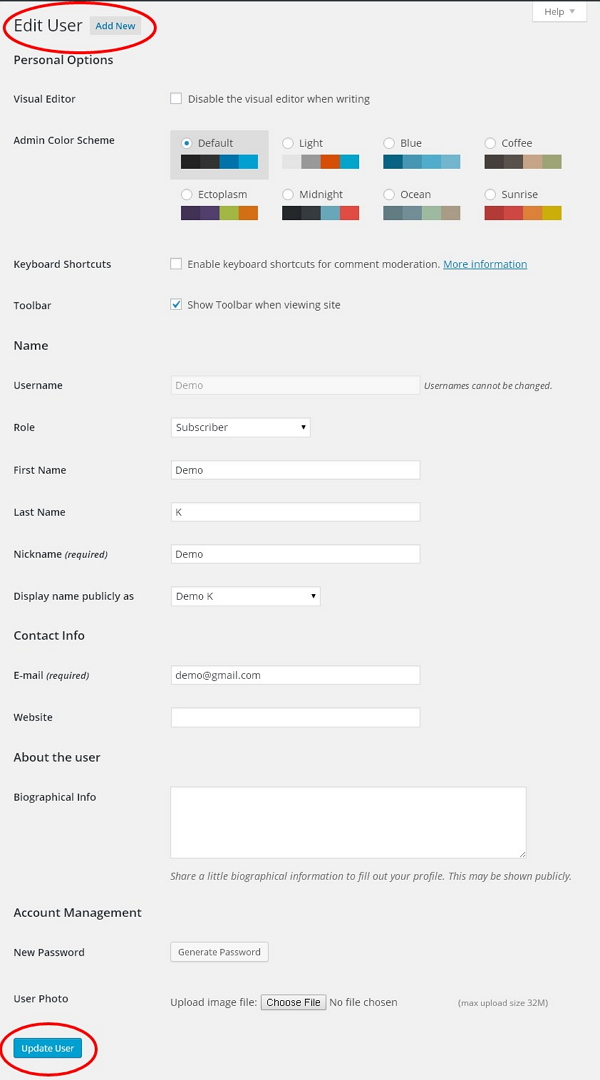
In this chapter, we are able to survey the most intriguing technique to Edit Users in WordPress.
Following are the easy steps to Edit Users in WordPress.
Step (1) − Click on on Users → All Users.
Step (2) − It is doubtless you’ll watch a listing of users.
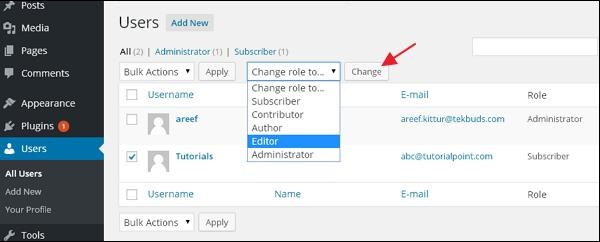
There are two extra tabs viewed on the toolbar −
When we click on on the Commerce role to box, a dropdown listing appears to be like as viewed in the preceding screenshot.
- Subscriber − An particular person that can simplest arrange his profile.
- Contributor − An particular person that can write and supervise hang posts, but can now not put up them.
- Author − An particular person that can put up and arrange his hang posts.
- Editor − An particular person that can put up and arrange posts, collectively with the posts of different users.
- Administrator − An particular person that has secure admission to to the total administration options within a single internet attach.
Click on on the take a look at box of the person title to alternate the role of the person. Then, click on on alternate button and the person’s role will be changed accordingly.
Step (3) − Click on on Edit option as confirmed in the next conceal to edit the person.
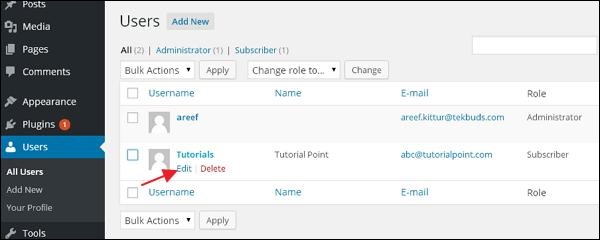
Step (4) − The Edit User internet page is displayed. Right here that that it is doubtless you’ll per chance edit or adjust the total fields as per your need and click on on Change User to set the modifications.
In this chapter, we are able to gain out the most intriguing technique to delete users in WordPress.
Following are the steps to Delete Users.
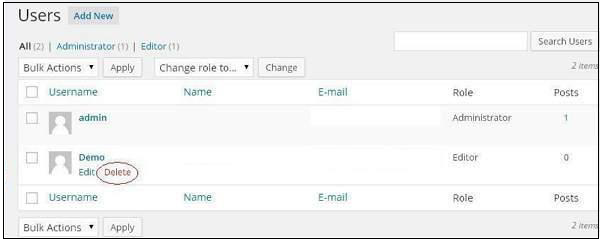
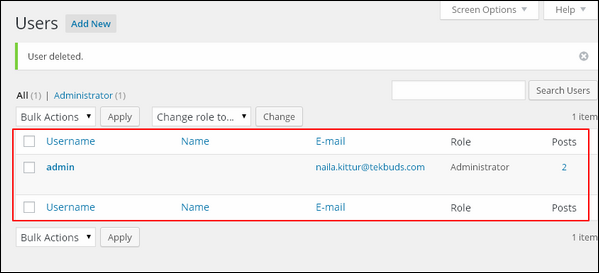
Step (1) − Click on on Users → All Users.
Step (2) − Listing of Users will get displayed as confirmed in the next conceal.
Step (3) − Eradicate the one you want to delete. And click on on Delete.
Step (4) − While you click on on Delete you secure the next internet page.
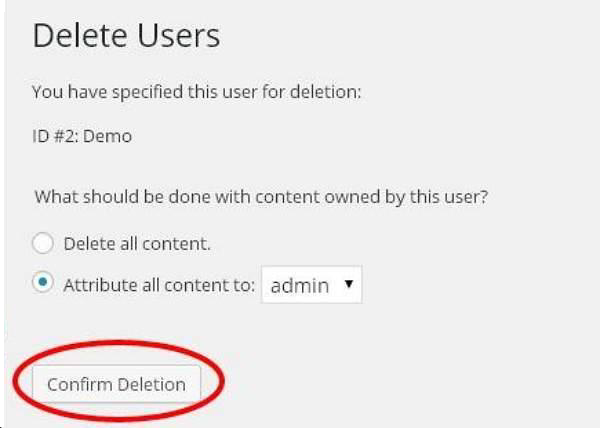
Step (5) − Eradicate alternate options as required and click on on Verify Deletion. Your person will be deleted.
Step (6) − We now relish any other design of deleting users. A conceal as confirmed in the next shot appears to be like.
Right here that that it is doubtless you’ll per chance steal out the users to delete, take a look at the bins and click on on Delete from the dropdown listing and click on on Follow.
Step (7) − While you click on on Follow, the users chosen will be deleted.
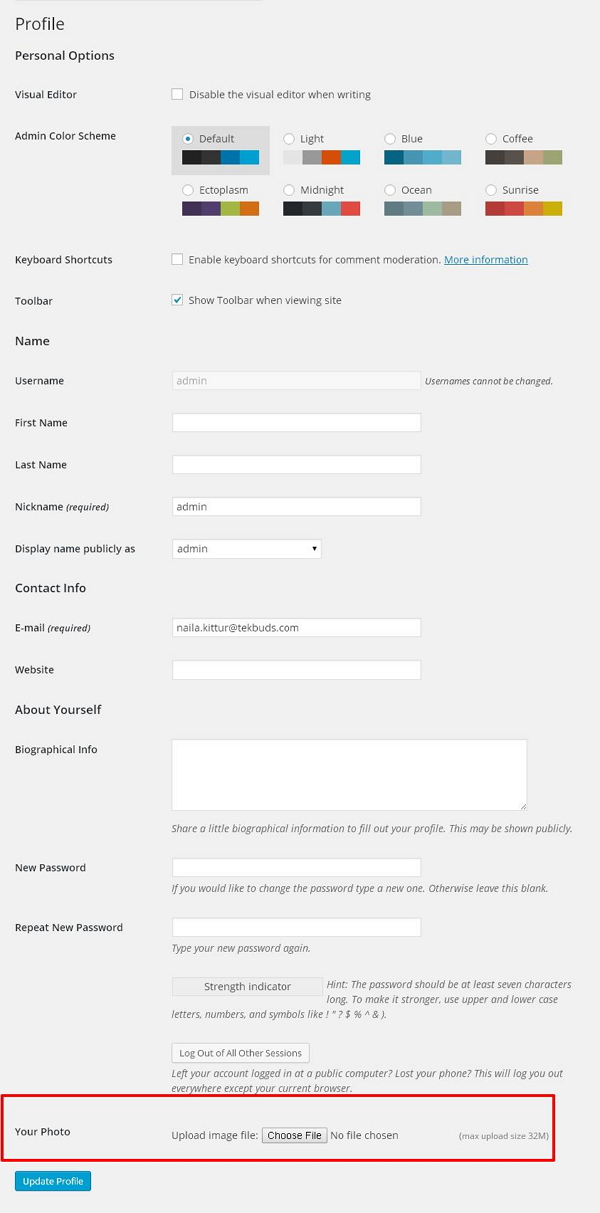
In this chapter, we are able to gain out the most intriguing technique to make a Private profile in WordPress.
Following are the steps to Private Profile.
Step(1) − Click on on Users → Your Profile from the left navigation bar.
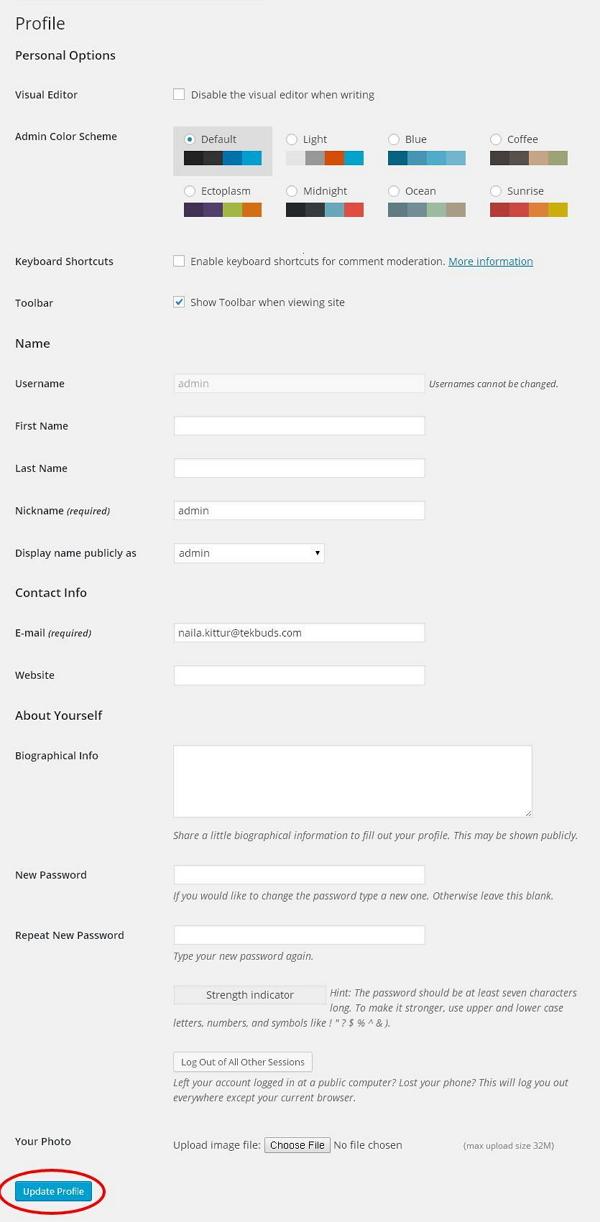
Step (2) − While you click on on ‘Your profile’ the next conceal will be displayed.

The following Private alternate options seem on the conceal −
- Visible editor − While you would be collectively with posts/pages to your attach that that it is doubtless you’ll per chance allow this setting whenever you rob to make, format, or edit your post. While you happen to disable this setting, you acquired’t be in a region to make spend of this selection.
- Admin shade blueprint − You’re going to be in a region to alternate the shade of your WordPress attach by selecting any of the next.
- Keyboard Shortcuts − While you happen to could be too like a flash at getting your work done and desire keyboard shortcuts then you definately per chance can take a look at this box.
- Toolbar − While you happen to take a look at this box, that that it is doubtless you’ll per chance watch the toolbar whereas the usage of WordPress.
Name
- Username − Enter your person title.
- First Name/ Last Name − Enter your first title and final title.
- Gash title − Enter sever names if any.
- Insist title publicly as − Verify the box whenever you can admire your title to be displayed publicly.
Contact Files
About yourself
- Biographical Files − Some vital components about you.
- Sleek password − Enter a password of your preference.
- Repeat password − Re-enter the password for authentication. Password have to beget 7 characters.
- Your photo − You’re going to be in a region to upload a image of your hang out of your computer. This will be your profile image.
Step (3) − After you’ve up to this level the total modifications, click on on Change Profile.
In this chapter, we are able to study Theme management. It involves image recordsdata, templates, CSS stylesheets, and so on. that can aid to kind your internet attach appreciate splendid. This chapter discusses the most intriguing technique to set up, add recent, or customize issues in WordPress.
Following are the steps for Theme Administration.
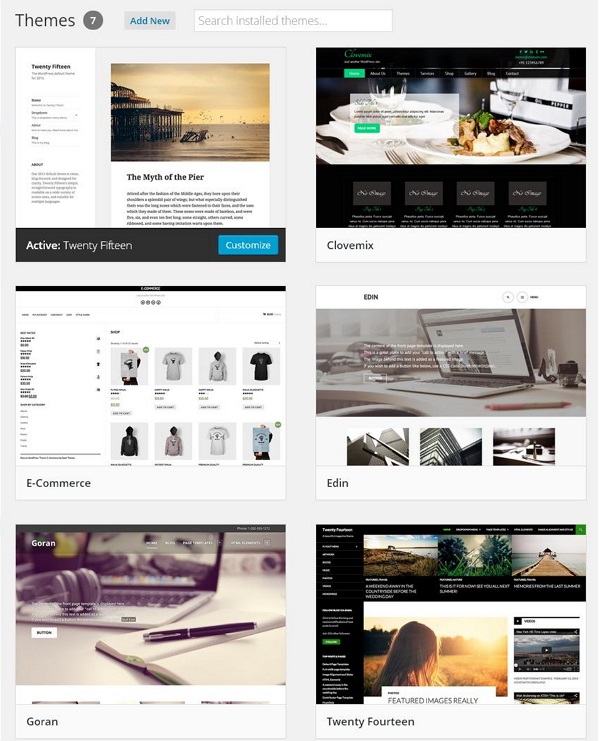
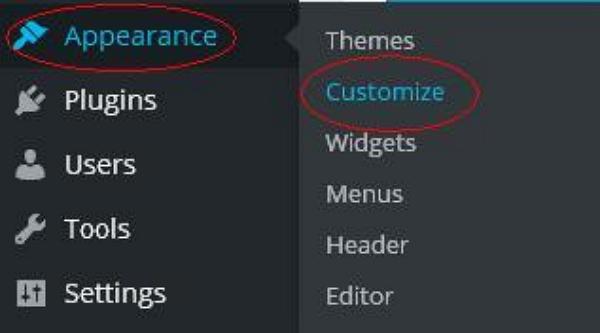
Step (1) − Eradicate Look → Topics from the dashboard.
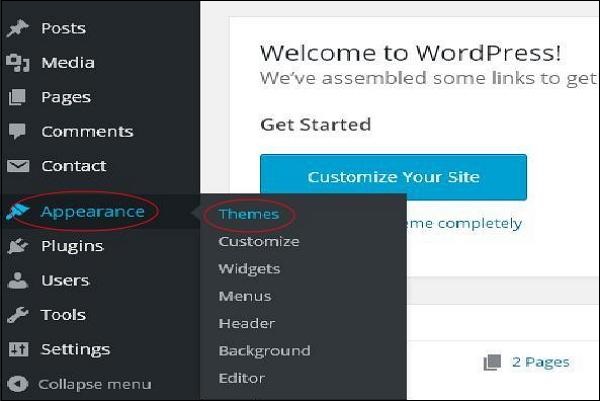
Step (2) − The following conceal will be displayed. Flee over any theme and click on on Theme Particulars.
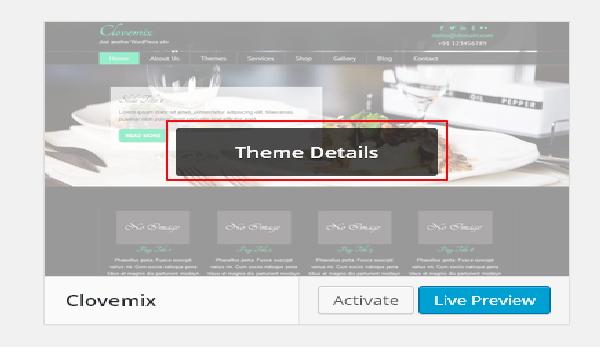
Step (3) − While you click on on Theme Component the next internet page appears to be like. It consists of vital components connected to the theme. Particulars admire version, description, tags and so on.
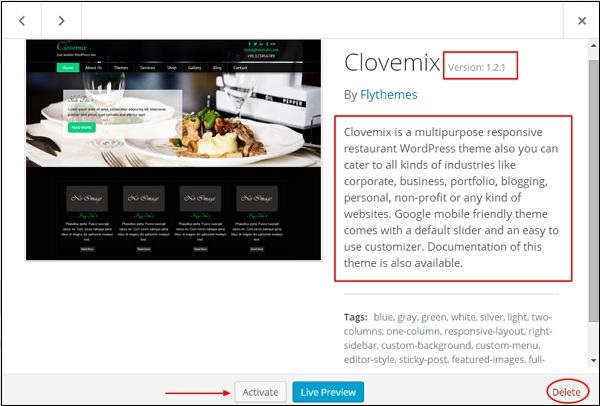
While you happen to’d rob to be able to add this theme to your internet page/internet attach then click on on Activate, and whenever you can rob to correct take a look at the theme, then click on on Reside preview.
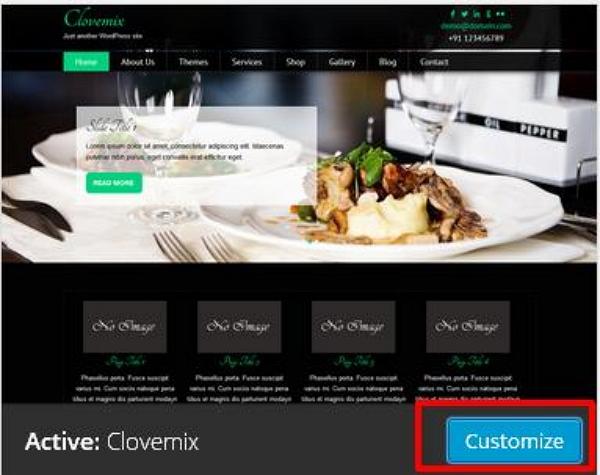
While you happen to click on on spark off then you definately secure a pop-up message as −

Step (4) − Click on on Customise.
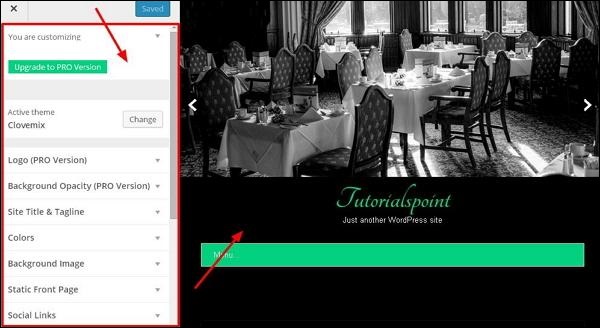
Step (5) − On the left facet of the get page, that that it is doubtless you’ll per chance customize your theme. Any modifications you kind or one thing else recent you add is displayed on the honorable facet of the get page.
We can study customizing the look of the issues in the next chapter i.e.; WordPress Customise Theme.
In this chapter, we are able to gain out the most intriguing technique to customize issues. Customizing issues allow you to give a recent appreciate to your internet attach. Right here that that it is doubtless you’ll per chance alternate background photos/colors, add titles, and accomplish grand extra.
Following are the steps of Customise theme.
Step (1) − Click on on Look → Customise.
Step (2) − The following conceal will be displayed.
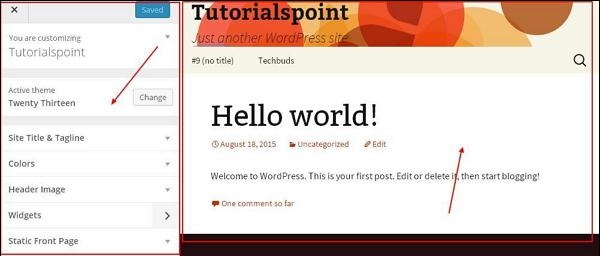
As could be viewed, on the left facet we relish got the customizing piece, and on the honorable facet we relish got the theme you’ve chosen. So any modifications you kind on the left facet will be displayed on the honorable facet of the get page. Listed right here are about a alternate options you want to know −
Packed with life theme − In this piece, that that it is doubtless you’ll per chance alternate the latest theme correct by clicking on ‘Commerce’.
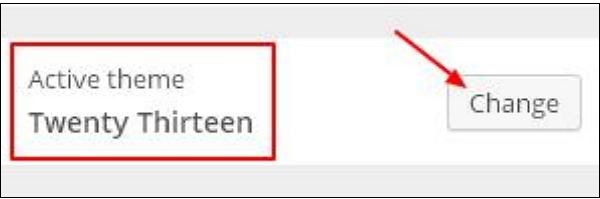
While you click on on ‘Commerce’ you secure a listing of issues, click on on any of the issues, and then click on ‘Put & Proceed’. Your theme will be saved.

Build of residing Title & Tagline − In this piece, that that it is doubtless you’ll per chance add the attach title and tagline you want to be able to add to your internet attach.
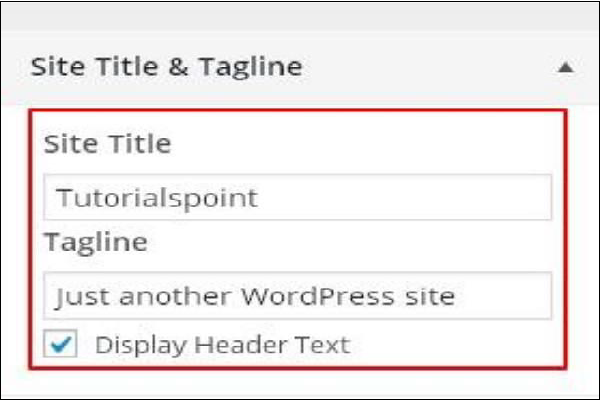
Add your title title in the ‘Build of residing Title’ piece. And your tagline in the ‘Tagline’ box.
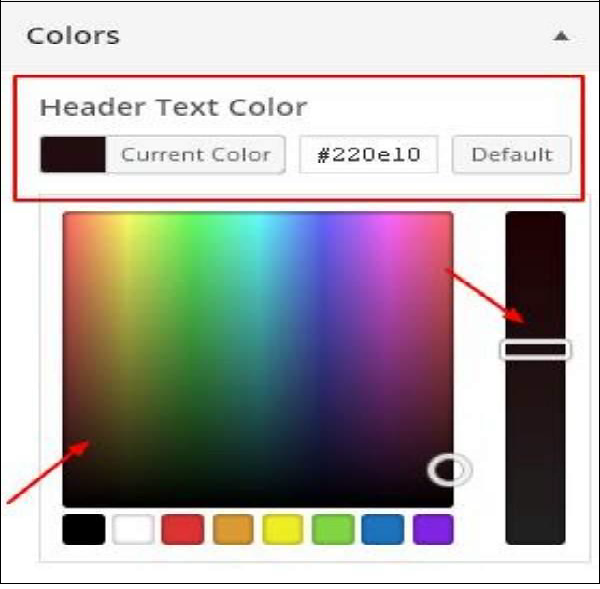
Colours − You’re going to be in a region to alternate your header text shade the usage of this piece. As you scroll thru the colors you observe modifications occurring on the honorable facet of your internet page. You’re going to be in a region to even add a shade of your hang into the box that’s located in between ‘Unique shade’ and ‘Default’.
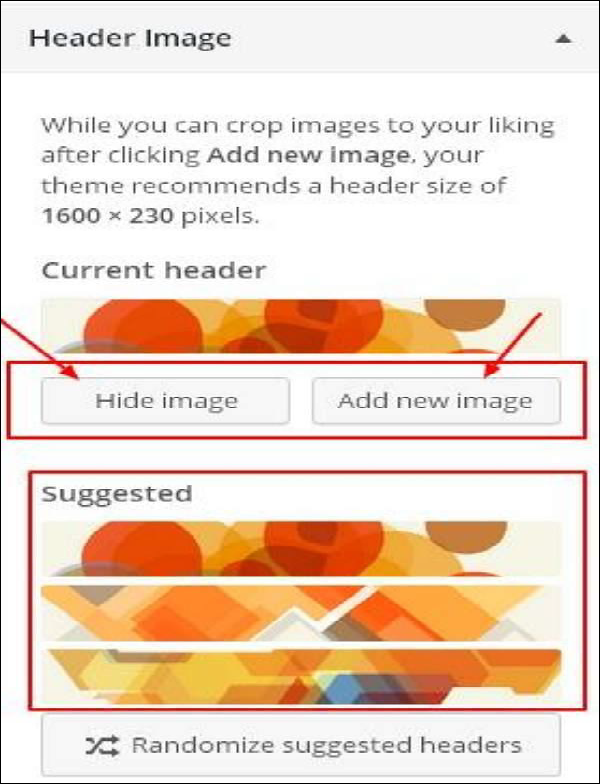
Header Image − Add a header image either by selecting from the solutions otherwise that that it is doubtless you’ll per chance add a image of your hang by clicking on ‘Add recent image’.
Widgets − Add widgets to your attach from right here.

While you click on on the arrow mark the next image appears to be like.
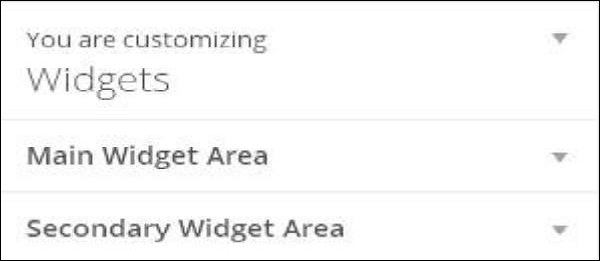
Right here, there are two alternate options −
First is the ‘Vital Widget Station’, whenever you click on on this you secure any other listing of widgets which could be to be displayed in the footer attach.
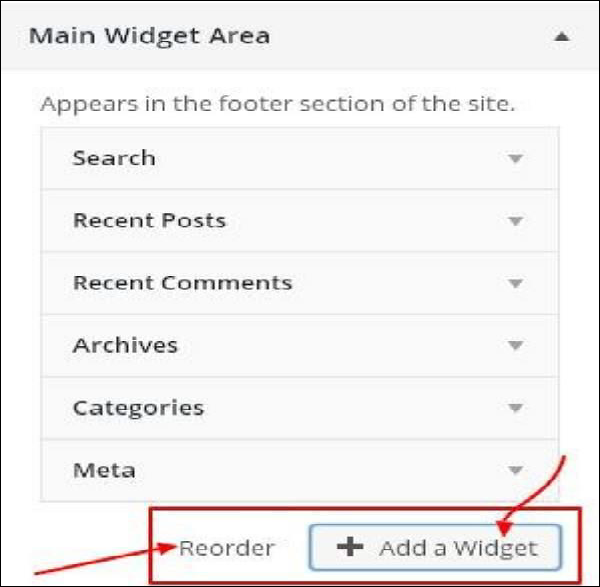
While you click on on any of the widgets a dropdown appears to be like where that that it is doubtless you’ll per chance edit extra or add extra. Shall we whine − While you happen to’d rob to be able to add categories then the next image appears to be like.
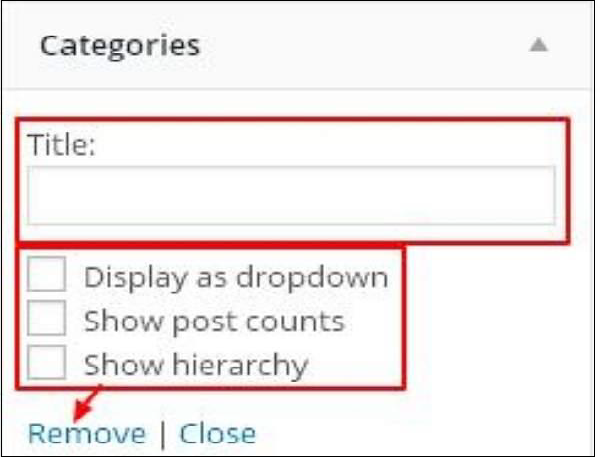
In this image, as that that it is doubtless you’ll per chance watch, that that it is doubtless you’ll per chance add your class in the ‘Title’ piece. Verify any of the vital bins. While you happen to attain now not need to be able to add any, then whine ‘Purchase away’. Same goes for other widgets too.
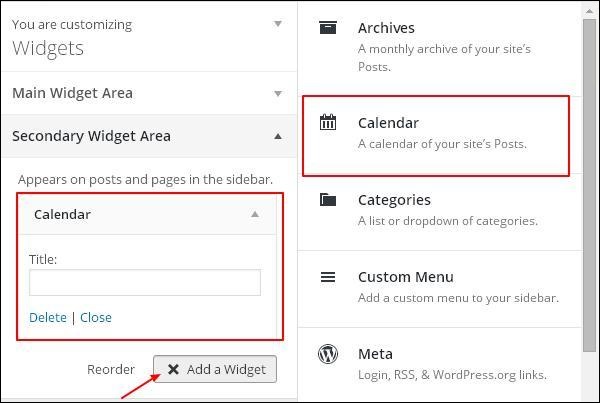
Secondary Widget − Right here you want to click on on ‘Add a widget’ and you secure a side bar with a listing of diversified widgets. Click on on any and it provides up to your widget listing.
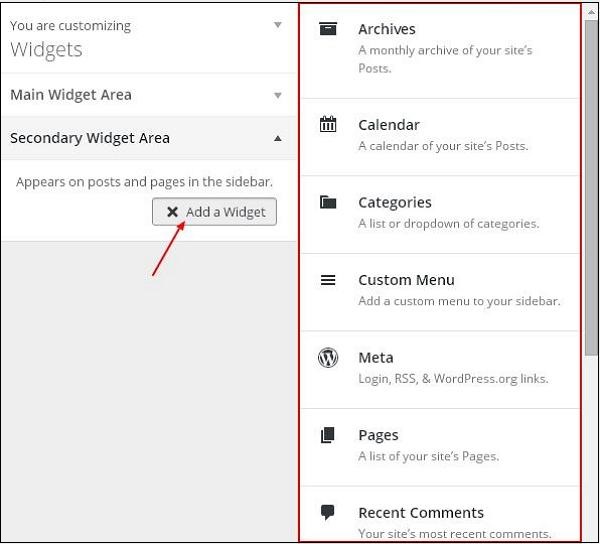
While you happen to’d rob to be able to add extra widgets then click on on ‘Add a widget’ again and that that it is doubtless you’ll per chance add as many widgets as you should.
Static Entrance − Eradicate either latest posts or static front internet page on your attach.
In this chapter, we are able to survey about Widget Administration. Widgets are minute blocks that kind particular options. These give attach and construction rob an eye on to the WordPress theme. Some particular options of a widget are −
- They enable you add command and options.
- They would possibly be without grunt dragged and dropped in widget attach.
- They differ from theme to theme. They’re now not same for every theme.
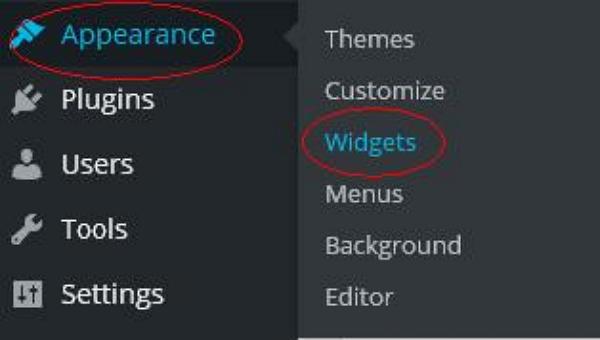
Step (1) − Click on on Look → Widgets.
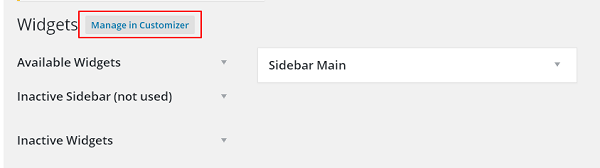
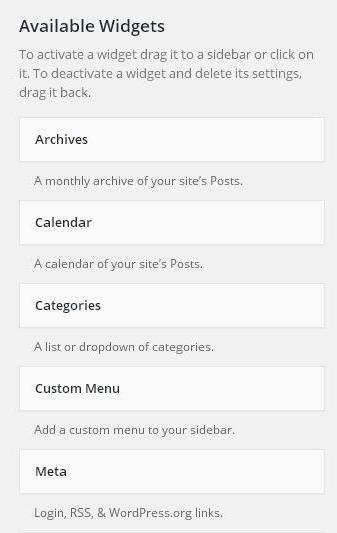
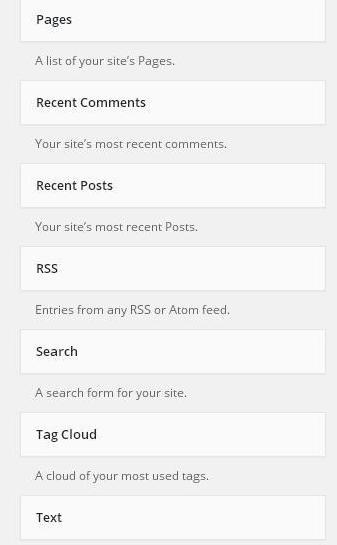
Step (2) − The following conceal showing readily available widgets seem.
The following options seem on the get page −
- Readily available Widgets − You’re going to be in a region to spend these to be able to add into your sidebar main.
- Sluggish Sidebar (now not outdated) − These have to now not outdated and should always be removed completely from the widget listing.
- Sluggish Widgets − Removes the widgets from sidebar but rob it in the settings.
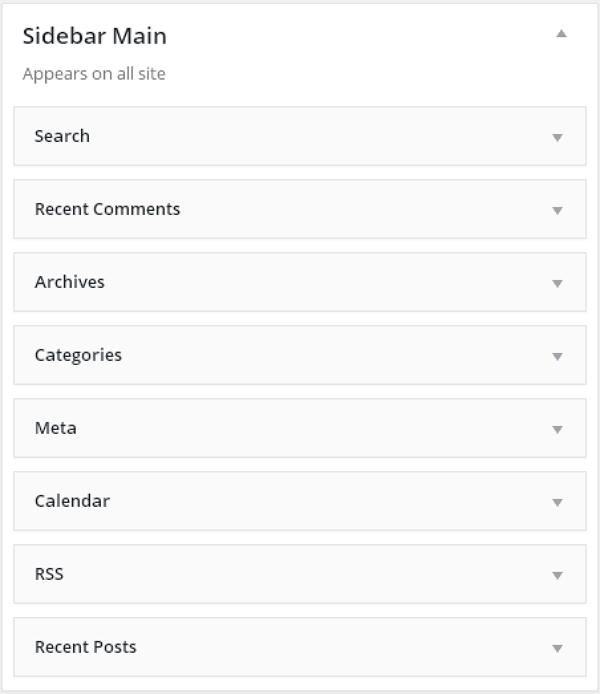
- Sidebar Vital − Any widget you add right here will seem to your attach.
- Jam up in Customizer − Takes you lend a hand to customization internet page.
Step (3) − Trek and fall in the Sidebar Vital. Any widget you add right here, reveals up to your attach.
In this chapter, we are able to survey about background photos, background colors and background opacity.
Step (1) − Click on on Look → Background.
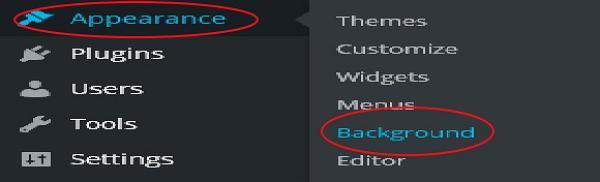
Step (2) − The following internet page appears to be like where the Background Image piece reveals up.

Step (3) − There’s no image chosen for background. While you happen to’d rob to attain so, then click on on Eradicate Image. You secure the next internet page.
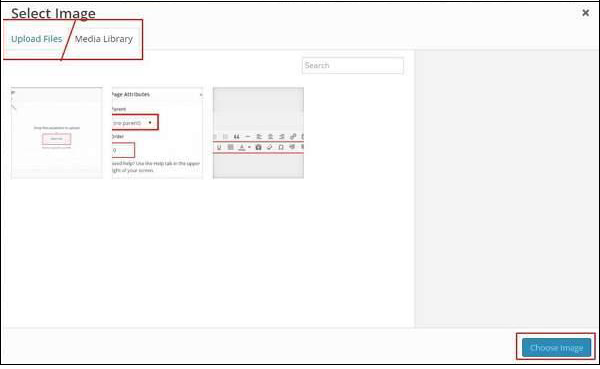
Right here that that it is doubtless you’ll per chance upload photos the usage of two alternate options.
- Add Recordsdata
- Media Library
Step (4) − Add Recordsdata − While you click on on Add recordsdata the next conceal is displayed. Eradicate recordsdata out of your desktop and then click on on Snatch Image if contented with the image.
Step (5) − Media Library − While you click on on Media Library the next internet page appears to be like. Eradicate recordsdata from the WordPress media library, which design, whenever you’ve already acquired photos up to this level then you definately per chance can steal out any of them straight.
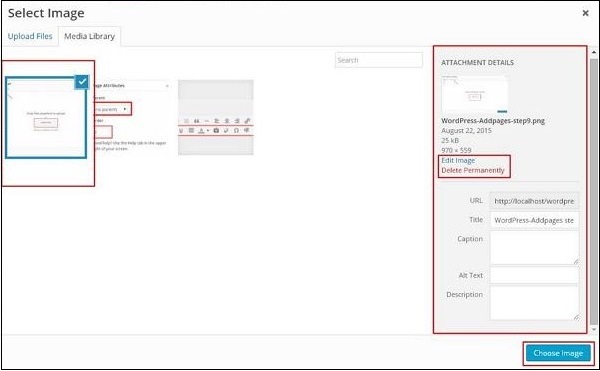
After selecting a image, on the honorable facet that it is doubtless you’ll secure about a alternate options −
- Edit Image − While you click on on this you would be taken to any other internet page where that that it is doubtless you’ll per chance edit the scale image, dimensions, prick image, and thumbnail settings, and so on. As confirmed in the next image, kind the vital modifications, click on on Put and then click on on Change.
- Delete Permanently − While you happen to’d admire your image off the library then click on on this button.
- URL − Enter your image URL into this box.
- Title − While you happen to’d rob to kind any modifications in the title of the image that that it is doubtless you’ll per chance attain it correct right here.
- Caption − You’re going to be in a region to level hasty about your image on this piece.
- Alt text − Give an quite loads of text to your image in inform that it is without grunt readily available for the users all over search.
- Description − A diminutive description about your image.
Step (6) − Click on on Colours → Background Coloration on the same internet page. Commerce your background shade accordingly. Background Opacity is now not outdated for all issues. Theme customization is now not same for every theme we spend. It modifications from theme to theme.
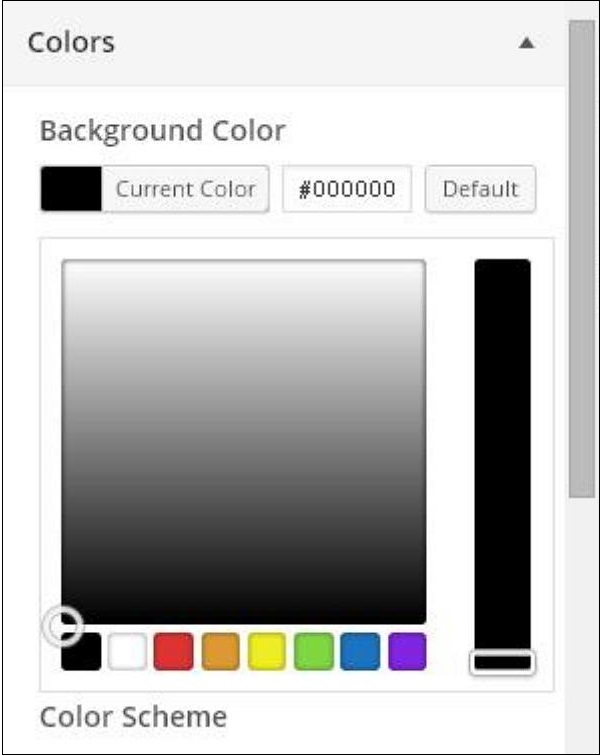
In this chapter, we are able to survey the most intriguing technique to transfer WordPress to a recent internet hosting platform.
Right here, we relish got outdated Hostinger internet attach internet hosting to transfer the WordPress attach to any other host.
Fair apply the easy steps given under to transfer your WordPress attach to any other host.
Step (1) − Place the backup of WordPress recordsdata and export the database. We can survey about this intimately in the chapter WordPress – Backup & Restore
Step (2) − Login to your cPanel and click on on MySQL Databases as confirmed in the next conceal.
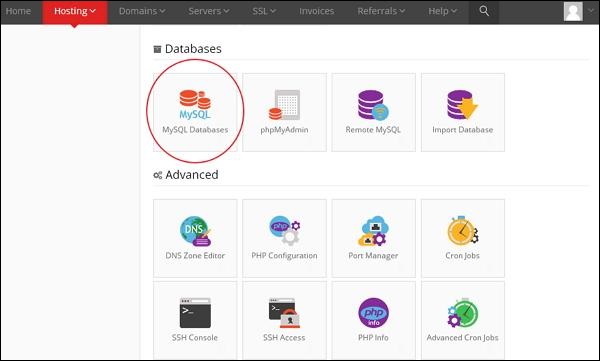
Step (3) − Kind a recent database and MySQL person as confirmed in the next conceal. The get page has the next fields −
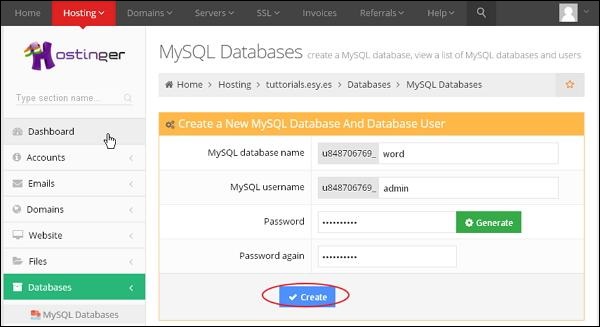
- MySQL Database Name − Enter your database title.
- MySQL Username − Enter your username.
- Password − Jam password on your database.
- Password again − Once extra region the same password as earlier for authentication.
After filling the total fields, Click on on Kind button.
Step (4) − You’re going to be in a region to examine your created MySQL database, User and Host as confirmed in the next conceal.

Step (5) − Click on on + image.
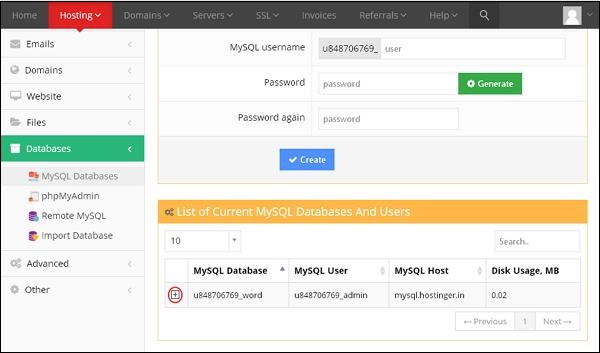
Step (6) − Click on on phpMyAdmin.
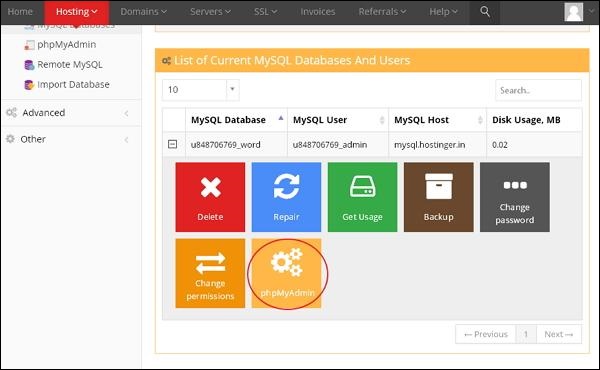
Step (7) − Click on on Import tab on the phpMyAdmin internet page.
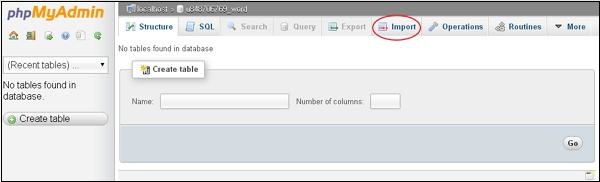
Step (8) − Click on on Snatch File button to make a preference the backup file out of your gadget and click on on Run button.
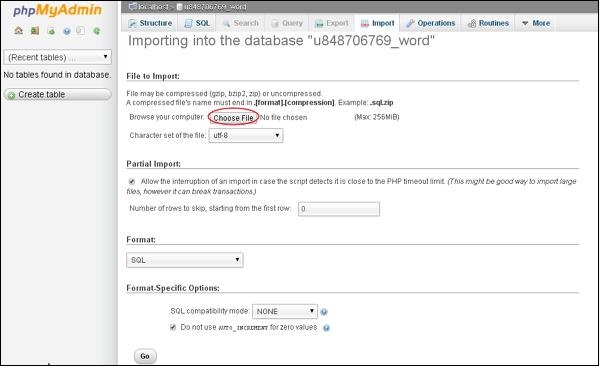
Step (9) − You’re going to be in a region to examine the tables of database uploaded as confirmed in the next conceal.
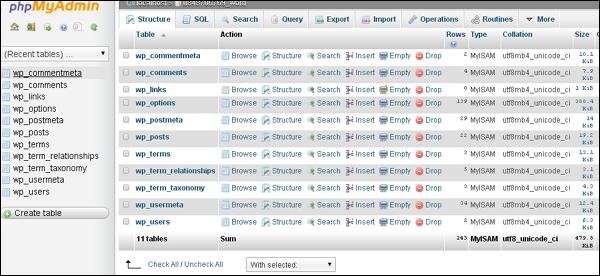
Step (10) − Add your WordPress recordsdata by the usage of file transfer protocol(FileZilla) as confirmed in the chapter WordPress – Backup & Restore in Restoring WordPress Recordsdata piece.
Step (11) − Edit wp-config.php file as talked about in the Restoring WordPress Recordsdata piece in chapter WordPress – Backup & Restore.
Step (12) − At some stage in the Web attach piece of hostinger, Click on on Auto Installer.
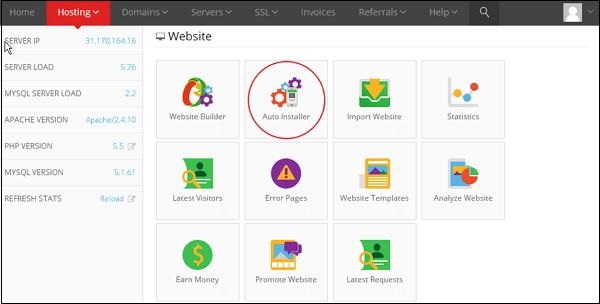
Step (13) − You’re going to be in a region to examine the uploaded file of the WordPress. Click on on the URL hyperlink as confirmed in the next conceal.
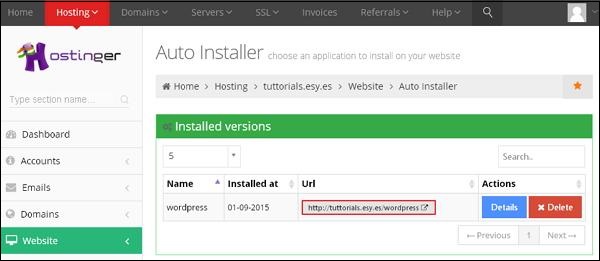
Step (14) − You’re going to be in a region to examine the login internet page of WordPress.
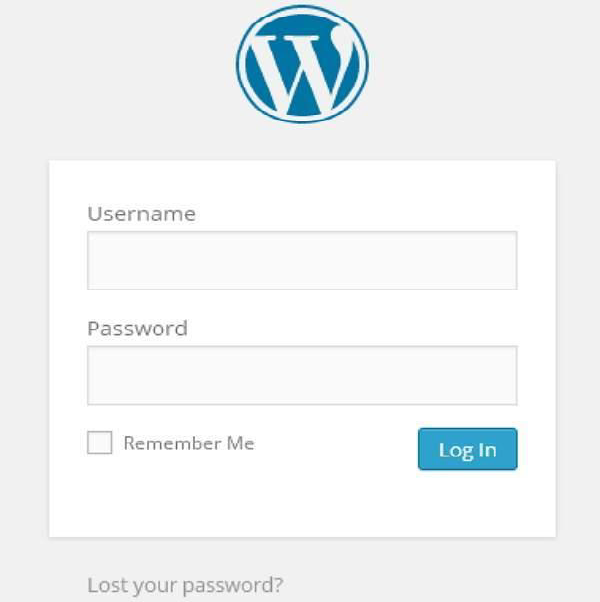
In this chapter, we are able to survey the most intriguing technique to change version in WordPress. Right here, we are able to upgrade WordPress to the latest version thru the admin panel.
Following are about a easy steps to change the version in WordPress.
Step (1) − Click on on Please Change Now as confirmed in the next conceal.
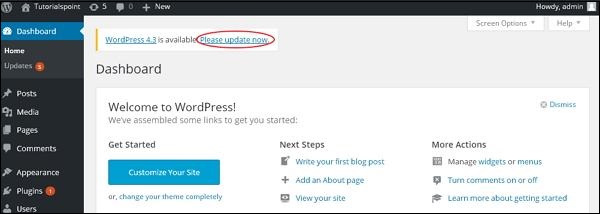
That you can secure notifications in WordPress admin panel when there would possibly be a extra recent version readily available for WordPress. Sooner than updating, it is educated to protect WordPress backup.
Step (2) − After clicking on the change hyperlink, the next internet page will get displayed. Click on on Change Now button.
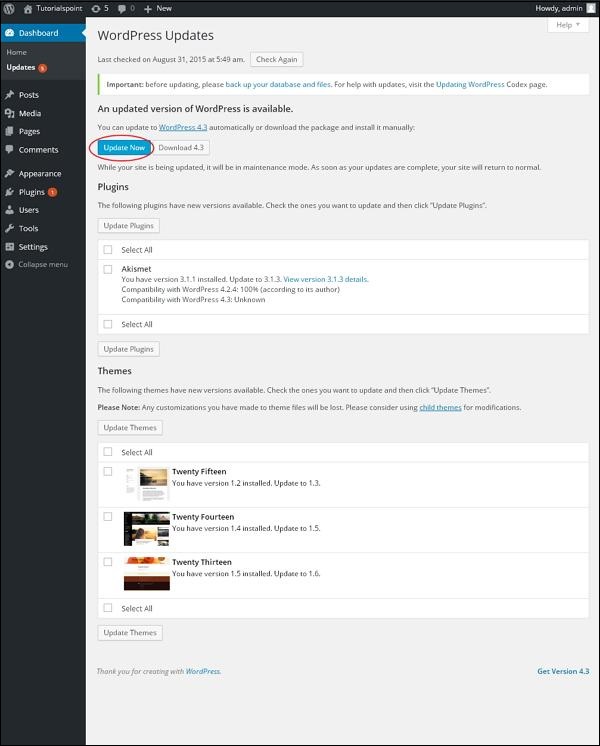
Step (3) − The following message will get displayed in all places in the upgradation of WordPress.
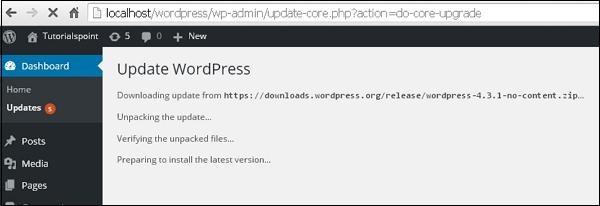
Level to − While updating the version, whenever you secure an error as
Deadly error: Most execution time of 30 seconds exceeded in C:your wordpress folderwp-involvesclass-http.php on line 1597
then you definately want to protect conclude the next actions −
Now your WordPress is successfully upgraded.
In this chapter, we are able to gain out the most intriguing technique to supply protection to your WordPress weblog or internet attach from spam. Kind fantastic that that that your WordPress script is up to this level to the latest receive version. WordPress comes with a preinstalled antispam resolution – Akismet.
You’re going to be in a region to spark off Akismet, for which it is top to relish a WordPress API key. That you have to always register on the legit WordPress internet attach. The major will be sent to your mail box.
Following are the steps to apply to permit Akismet Assert mail Protection plugin on your internet attach or weblog.
Step (1) − Run to your WordPress admin attach → Plugins → Build in. The following conceal will be displayed.
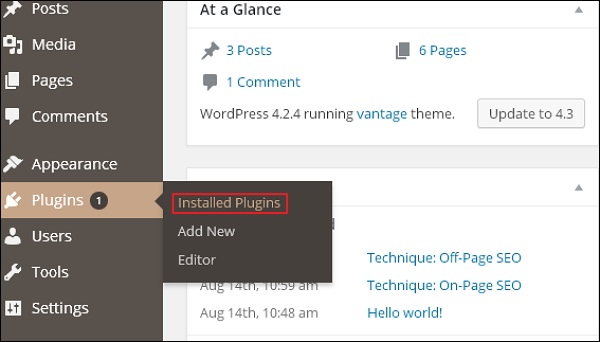
Step (2) − Click on on Activate button as confirmed in the next conceal.
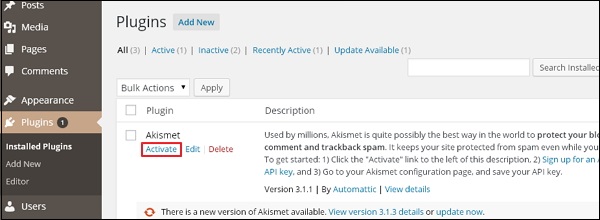
Step (3) − The Akismet plugin will be activated and then Click on on Activate your Akismet memoir button as confirmed in the next conceal.
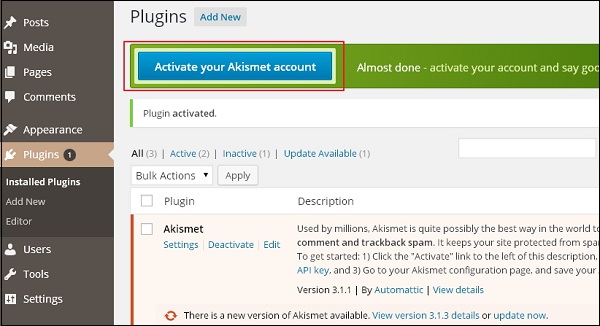
Step (4) − Click on on Secure your API key as viewed in the next conceal to secure a recent key or enter manually, whenever you’ve already acquired API key.
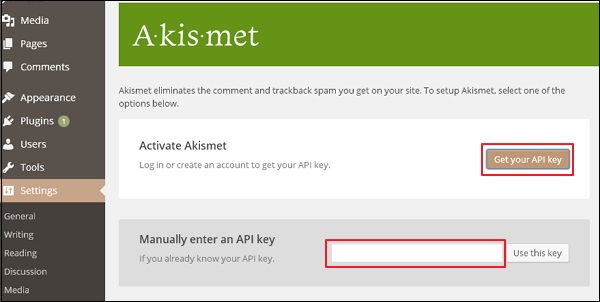
Step (5) − While you happen to connect now not need API key then, click on on GET AN AKISMET API KEY tab to inch additional.
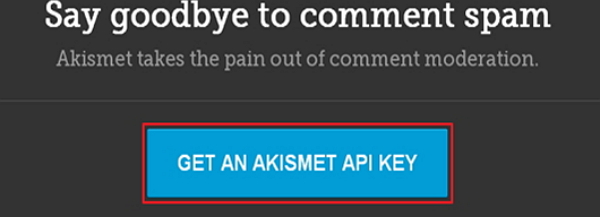
Step (6) − Possess up the vital fields and click on on Signal in button as confirmed in the next conceal.
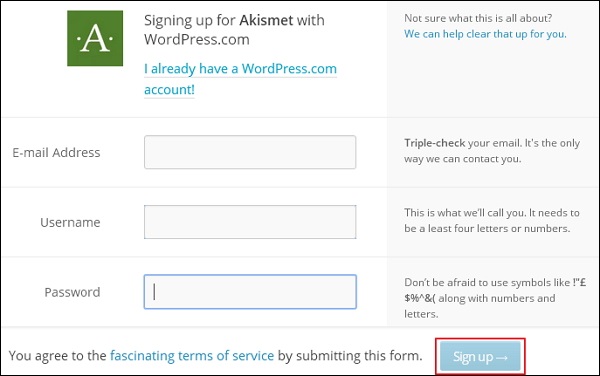
Step (7) − While you total with signup job. That you can secure an API key to your registered email identification. Enter API key manually and click on on Employ this key button as viewed in the next conceal.
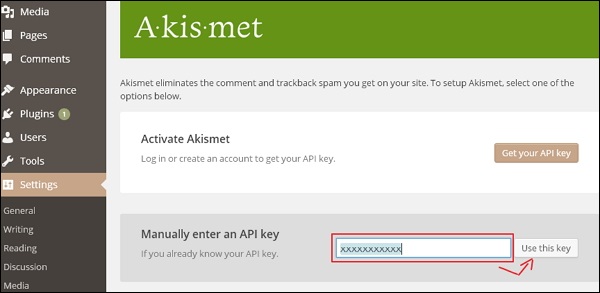
Step (8) − While you happen to’ve entered a truly most intriguing API key, it’d be verified and that it is doubtless you’ll secure a confirmation message as mirrored in the next conceal.
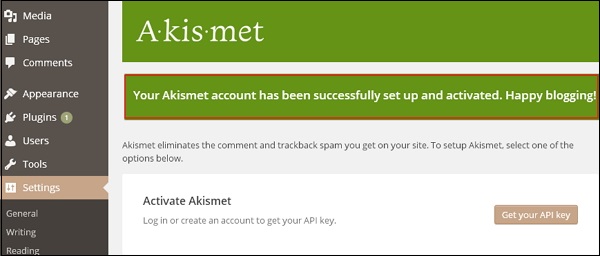
Step (9) − Now your weblog will be salubrious from spam by Akismet. It is a long way doable for you to to take a look at the feedback to your weblog for spam, as successfully as manually mark feedback as spam from the weblog admin attach → Feedback.
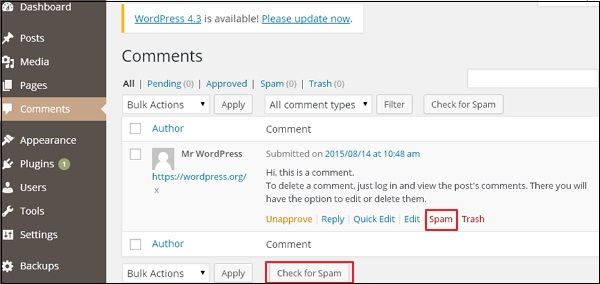
You’re going to be in a region to rob a display screen of what number of spam posts had been stopped by Akismet and that that it is doubtless you’ll per chance receive your posts, blogs, feedback, and so on. Moreover, that that it is doubtless you’ll per chance close your internet attach from spammers, who can damage your attach.
In this chapter, we are able to survey the most intriguing technique to Backup & Restore recordsdata and database in WordPress. In WordPress there are two design of backing up much like −
- WordPress Recordsdata Backup
- WordPress Database Backup
- WordPress Recordsdata Restore
- WordPress Database Restore
WordPress Recordsdata Backup
To secure the backup recordsdata of WordPress, you want to set up FileZilla Client to your gadget.
Following are the easy steps outdated for recordsdata backup operation in WordPress −
Step (1) − Originate the FileZilla Client as confirmed in the next screenshot.
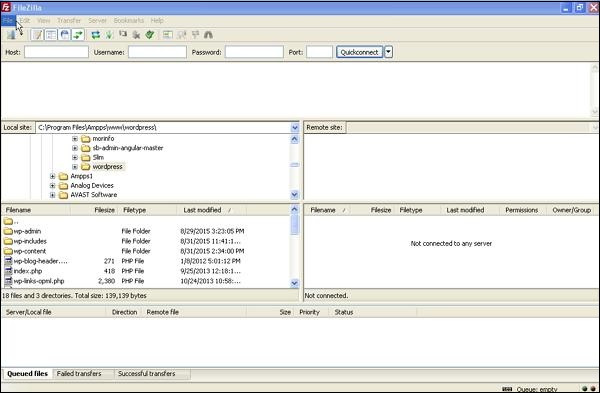
Step (2) − Enter the Host, Username, Password and Port much like you’ve outdated to log-in to your cPanel.
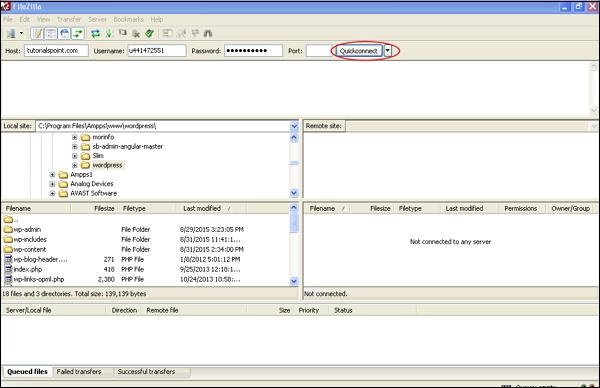
After filling the total fields, click on on Quickconnect button.
Step (3) − That you can secure all recordsdata and folders of your WordPress attach on the honorable facet as viewed in the next conceal.
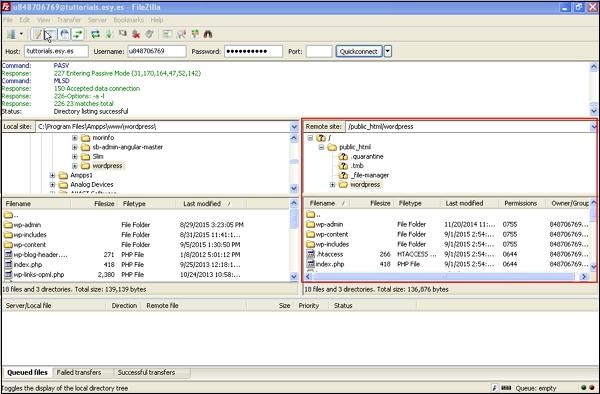
Step (4) − Eradicate the total recordsdata and folders and correct click on on the mouse and click on on Receive.
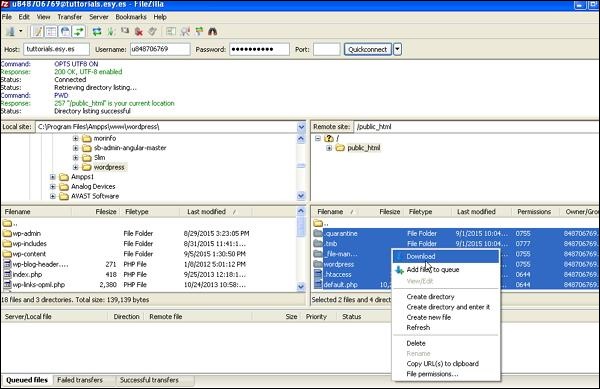
After downloading the WordPress recordsdata from cPanel, it’d be saved to your gadget.
WordPress Database Backup
Following are the easy steps for database backup in WordPress −
Step (1) − Kind the path http://localhost/phpmyadmin to your browser. That you can secure the next conceal.
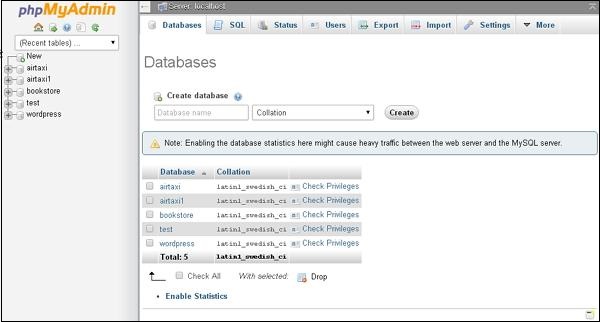
Step (2) − Click on on the database title ‘wordpress’ which you’ve created for WordPress.
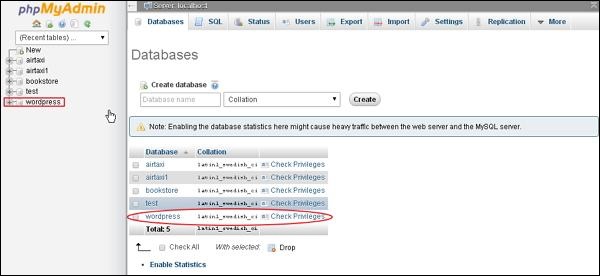
Step (3) − After clicking on database wordpress, it would originate the next internet page. Click on on Export tab.
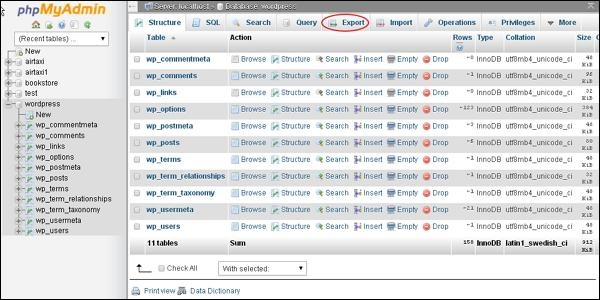
Step (4) − That you can secure two be taught how to export the database i.e. Rapid and Personalized. Eradicate any person of the suggestions and click on on Run button.
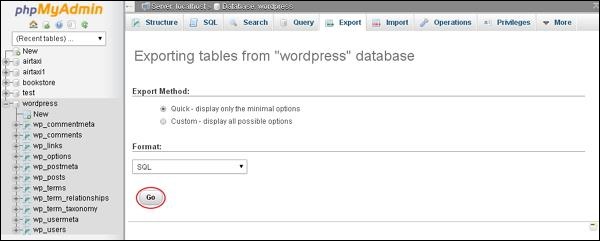
After exporting the database file, it would secure saved to your gadget.
Restoring WordPress Recordsdata
Following are the easy steps outdated to restore the recordsdata in WordPress the usage of ftp −
Step (1) − Originate the FileZilla Client and login to your attach the usage of ftp as confirmed in the next conceal.
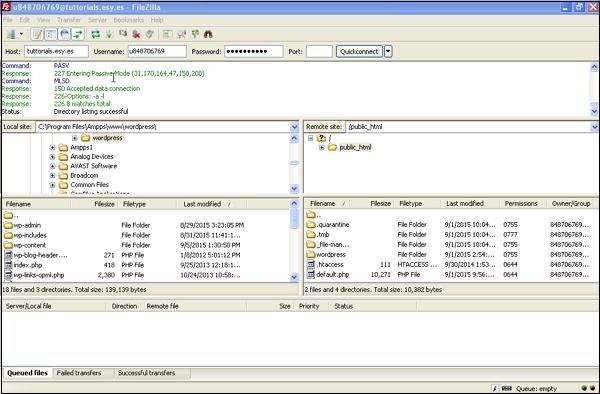
Step (2) − Originate the local listing in ftp and upload all WordPress recordsdata to your internet attach as confirmed in the next conceal.
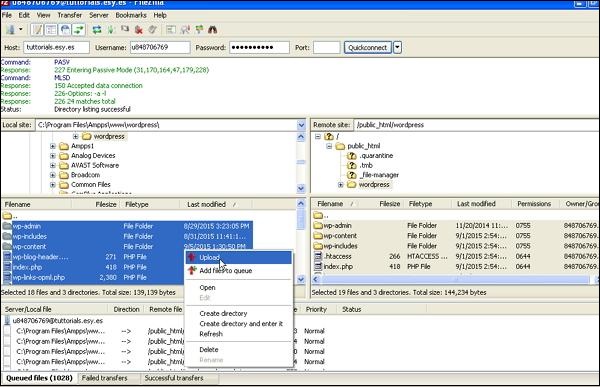
Step (3) − Then, whisk to your wordpress folder → wp-config.php file. Reproduction and rename wp-config.php file before editing, in case of some mistake that that it is doubtless you’ll per chance restore this file lend a hand.
Originate the wp-config.php file and to find the next code.
interpret('DB_NAME', 'db_name');
Change the db_name along with your database title which you’ve created.
interpret('DB_USER', 'db_user');
Change the db_user along with your username of MySql.
interpret('DB_PASSWORD', 'db_password');
Change the db_password along with your password of MySql.
Put your wp-config file after editing and upload it to your WordPress attach thru ftp.
Restoring WordPress Database
Following are the steps outdated to restore the database in WordPress −
Step (1) − Kind the path http://localhost/phpmyadmin in the browser. The following conceal will pop up.
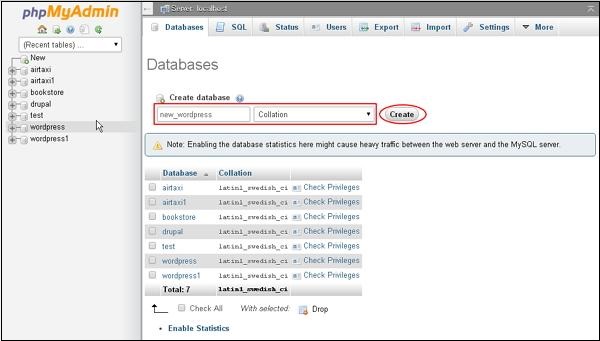
You’re going to be in a region to make a recent database or import your backup in the present database.
Right here we’ll make a recent database title, i.e., new_wordpress and click on on Kind button.
Step (2) − You’re going to be in a region to examine your created database as confirmed in the next conceal. Click on on the database title new_wordpress.

Step (3) − Click on on Import.
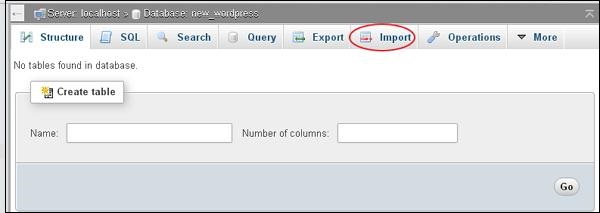
Step (4) − Click on on Snatch File button to make a preference the backup file out of your gadget. After uploading the sql file, steal out format as SQL as confirmed in the next conceal.
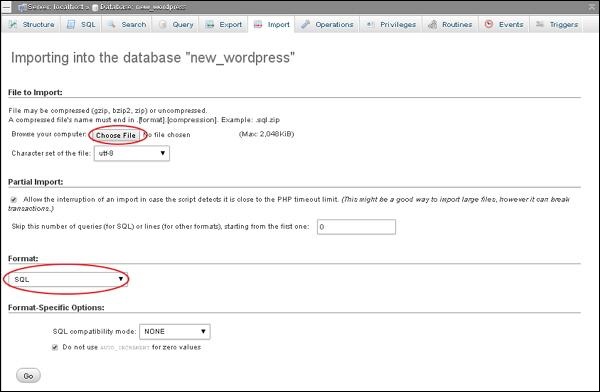
Click on on Run button.
Step (5) − While you click on on Run, that it is doubtless you’ll secure a message after the sql file is uploaded successfully.

In this chapter, we are able to survey the most intriguing technique to Optimize WordPress attach.
Listed right here are about a easy pointers to optimize your WordPress attach.
- Kind fantastic that excessive tremendous and meaningful command.
- Comprise the honorable names for photos.
- Employ short permalinks that beget keywords.
- Comprise optimized issues.
- Sitemap should always be in XML format.
- Connect posts to social networks.
- Beware of murky hat ways.
- Delete your trash box.
- Place Checking Your Build of residing Statistics
- Place checking your plugins.
- Employ CSS and JavaScript successfully.
Kind fantastic that Excessive Fantastic and Meaningful State
Any internet page you make, the most intriguing ingredient that matters is the command. It is a long way a have to-have to relish correct command with keywords that would possibly be priceless for users, now not for the quest engines. State should always be comprehensible and now not hard or hard to read.
Comprise the honorable names for photos
The names you to come to a decision on your photos should always be outlandish; relish in suggestions selecting photos keeping the person in suggestions. Employ keywords that would possibly be priceless for the users. Comprise some particular names on your photos and don’t put out of your mind to be able to add your alt tags and title tags to your photos.
Shall we whine − If your image is ready Chocolate sundae Ice-cream then attain now not mention the title as DSC12346, as a replacement set aside it as ‘Chocolate-sundae-Excessive-boulevard-restaurant-recent-york.jpg’. This could be grand less complicated to search.
Employ short permalinks that beget keywords
The permalinks you spend should always be comprehensible. Shall we whine − http://www.mywebsite.com/tutorialspoint/telangana/ as a replacement of http://www.mywebsite.com/internet page-identification?5631456325
Comprise optimized issues
Employ those issues which could be like a flash and are optimized for WordPress in inform that when utilized to a internet attach, it have to now not relish low poke.
Sitemap should always be in XML format
Google has many instruments that would possibly be priceless. Instruments admire Web attach Optimizer, Webmaster Central, and Google XML sitemaps are very easy to make spend of.
Connect posts to social media
Social media is an foremost facet nowadays. So relish them connected to your weblog posts, pages, and so on., to relish correct ranks and recognition. Serve promote others posts and pages too and so that they’ll attain the same in return.
Beware of murky hat ways
Don’t trick Google as it finds you very hasty. Don’t set aside yourself in hassle and make issues on your attach by the usage of murky hat ways. Kind fantastic to make spend of suited SEO ways.
Delete your trash box
Repeatedly relish in suggestions clearing your trash for added poke and to relish a correct float along with your internet attach.
Place checking your attach statistics
Size of internet page matters plenty. The extra photos, flash, movies or media connected posts to your internet page, the extra it’d be slower to load. Yslowi> module plugin is ceaselessly recommended to permit you secure a faster internet page browsing.
Verify plugins
Having many plugins in WordPress could be the fair on your internet page to tiring load. So rob a take a look at to your plugins which you’re engaged on. Have in suggestions checking your plugins before you add them.
Employ CSS and JavaScript successfully
Repeatedly rob your CSS on the upper facet of the get page and JavaScript on the bottom. Let CSS load first and then JavaScript. Right here is a plugin that can allow you secure your JavaScript’s on the bottom of the get page. It is a long way Footer javaScript.
In this chapter, we are able to gain out the most intriguing technique to reset your passwords in WordPress. We now relish two suggestions of resetting passwords in WordPress −
Let’s appreciate the most intriguing technique to region password thru the User piece.
Step (1) − Login to your wordPress admin panel and click on on Users → All Users from the dashboard.
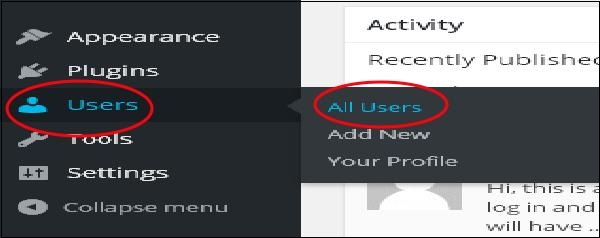
Step (2) − While you click on on All Users you secure a internet page with a listing of users. From this steal out the one you want to reset password of and click on on edit.
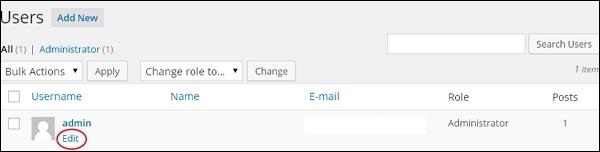
While you click on on edit, the next internet page will get displayed.

Now let’s appreciate into resetting your password the usage of Misplaced your password piece.
Step (3) − In this internet page that that it is doubtless you’ll per chance kind to your recent password that have to beget 7 characters. While you would be done with setting your recent password click on on Change Profile.
Step (3.1) − While you attempt logging into your WordPress admin panel, you put out of your mind your password and have to reset it, you secure the next message on the get page.
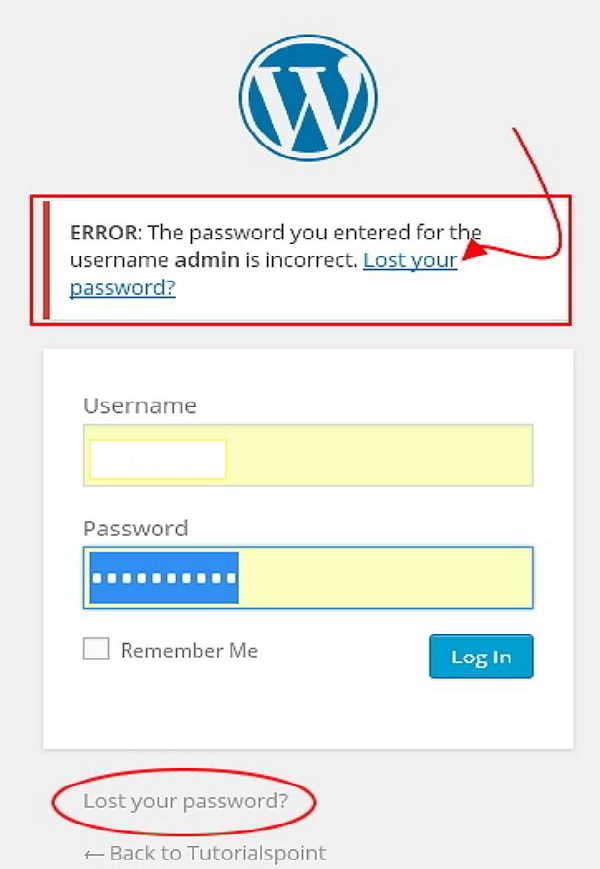
Step (3.2) − Click on on Misplaced your password? The following internet page appears to be like. Change your email and whine Secure Sleek Password.
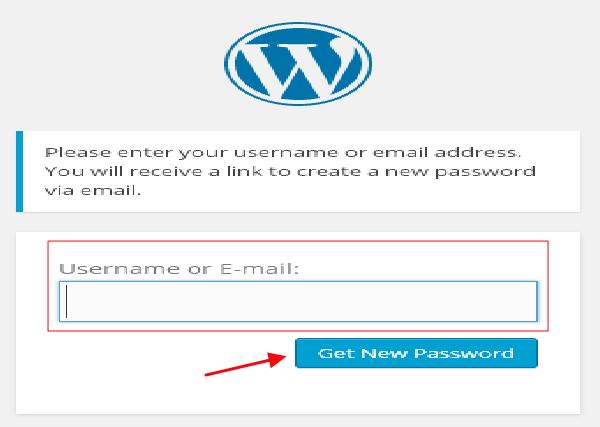
Step (3.3) − After you click on, you secure a message pronouncing a Link has been sent to the email address you supplied.
Step (3.4) − Run to your email and originate the (WordPress Build of residing) Password Reset mail and click on on the hyperlink that’s supplied.
Step (3.5) − Kind your recent password, verify again if required and then click on on Reset Password.